Tabs

Sunday, December 19, 2021

Merry Christmas To All!


I just put this on the stove. It's simmering right now. I'm taking a preemptive step. I'm trying to balance the holiday menus coming this week. I've made this soup so many times. Personally, I love vegetable soup that's full of potatoes and corn and beans. With a big piece of cornbread on the side. But this one is also good and has barely any starchy vegetables, thus it's lower in calories. And I'll have a couple of saltine crackers with it instead of cornbread. This time I did use two cups of low-sodium chicken broth as part of the liquid for a bit more flavor.

According to the original source, this soup keeps in the fridge for five days. So I have lunch ready from now until Christmas Eve. It's so much easier to make a healthy meal choice when it's ready and waiting in the refrigerator. 

Not-Quite-Free Soup (photo from months ago)

You might rather hang on to this recipe for after the holiday when you are ready for a reset after maybe too much food. I'll probably make it again then.


NOT-QUITE-"FREE" SOUP

1 16- oz bag frozen vegetables for soup
1/2 head cabbage, finely chopped
1 onion, diced (I only had a 1/2 onion)
1 15-oz can cut green beans 
1 28-oz can crushed tomatoes
1 pkg dry Ranch Dressing mix
5-6 cups water
freshly ground black pepper, to taste 

Put all ingredients into a pot. Bring to a boil. Lower heat and simmer for 45 minutes or longer, until vegetables are as tender as you like them.

~~~~~~~~~~~~~~~~~~~~~~~~~~

And here is another favorite recipe when you want to eat lighter. All of this "free" and "zero point" stuff refers to WW (formerly Weight Watchers.) They have changed their system again so I have no idea how you count this anymore. 

I'm pretty sure this recipe would work well in the slow cooker if you don't use an Instant Pot.

ZERO POINT CHICKEN TACO SOUP (Instant Pot) 
        ...recipe from SlapDashMom.com (check her site for other good recipes)

1 small onion, chopped
1 (15-oz) can black beans, drained
1 (15-oz) can light red kidney beans, drained
1 (8-oz) can tomato sauce
10-oz bag frozen corn
2 (10-oz) cans Rotel tomatoes (I used Mild)
1 packet taco seasoning (I used mild, low-sodium)
1 teaspoon cumin
1 teaspoon chili powder
2 boneless, skinless chicken breasts (fresh or frozen)
1/2 cup water

Place all ingredients into pot. Put lid on, close and set vent to "seal." Use manual button and set to 8 minutes. Let it "natural release" for at least 10 minutes. (Longer is fine.) Then release remaining pressure, if there is any. Remove chicken and shred with two forks. Add shredded chicken back into soup. Serve. 


This is more like a chili than a true soup, but it's yummy. It's gluten-free. And it freezes beautifully. You can certainly cook this in something besides an Instant Pot. I used my IP last night and carried it to the dinner in the pot because the lid fastens securely and I could plug it in when I got there to keep it warm.


And I'm closing the lid on my computer now. I'll see you here after the holidays. Take care of yourself in these coming busy days. 


Sunday, December 5, 2021

Correction: Check The Skillet Apple Pie Recipe

If you read the previous post right after I hit "publish" and you plan to make this pie, you need to make sure you see that I've corrected the recipe. It calls for FOUR pounds of apples. Not two like I wrote. Good thing I had more coffee this morning and saw my mistake.

Here is the entire recipe again. With the proper amount of apples. It has also been corrected on the previous post. You probably would have figured out when you made it that it needed more apples. They should be piled high in the pan.

EASY SKILLET APPLE PIE 

4 lbs apples, half Granny Smith & half Braeburn or Macintosh
good squeeze of lemon juice
1 teaspoon cinnamon
3/4 cup sugar
pinch of salt
1/2 cup butter (1 stick)
1 cup firmly packed brown sugar
1 box refrigerated pie crust (2 crusts per box)
1 egg white
2 tablespoons sugar

Preheat oven to 350º. Peel and slice apples into 1/2 inch slices. Squeeze lemon juice over apples and toss.  Then toss apples with cinnamon and 3/4 cup sugar.
Melt butter in 10-inch cast iron skillet over medium heat. Stir in brown sugar and cook, stirring constantly, for 1 to 2 minutes until sugar is melted. Remove from heat and place one pie crust on top of butter mixture. Spoon apples over pie crust. Top with remaining pie crust. (I didn't try to crimp the edges because the pan is hot. Just tuck in anything that hangs over.) 
Whisk egg white until foamy and brush over crust. Sprinkle with sugar. Cut slits in the top crust so the steam can escape. 
Bake for 1 hour to 1 hour 10 minutes, until golden brown and bubbly. If the crust is browning too quickly, shield with foil for the last 10 minutes.
Cool for 30 minutes before serving. And y'all...it begged for a scoop of vanilla ice cream on top!


Sorry, y'all. I'll try to do better. 


Saturday, December 4, 2021

Looking Back At Thanksgiving

Skillet Apple Pie

This look at our Thanksgiving nearly got lost when I interrupted my blogging to add the paper angel how-to a few days ago. But this recipe is too good and too easy not to share. You'll find the recipe at the end.


We had a revolving door kind of family gathering. But we did get to see everyone but J-Daddy who had to stay home while some home repairs were in progress. Our little girls are becoming big girls.


As soon as they headed home the other set of family arrived. I really think they waved at each other as they were coming and going up and down I-85. This smallest granddaughter is learning all about life at the farm. She is an independent little thing who has learned about opening and closing pasture gates already. And she had a go at driving the tractor with Daddy-O. That's a rite of passage here.


And on our last night of family time we enjoyed a backyard bonfire. We never got to the marshmallow part of this evening, so we will likely have Christmas s'mores in a few weeks. (FYI...this was our first fire in our Solo fire pit. It does indeed work as advertised.)


I promise. I'm getting to the pie recipe. But I wanted to talk about pillowcases for just a minute. The Santa Claus pillow case here was made by my mother many many years ago. Our children, and now our grandchildren look forward to sleeping on them Christmas Eve. I have four of these. It's a family tradition that I'm sure my mother never anticipated would last this long. She really was not a maker in general. Except for these pillow cases that I've had for decades now. 

I've found that the best traditions are the ones that just happen. I've never had much luck with intentional plans to create a tradition. But I treasure these that create themselves.


In that spirit, daughter Jessica wanted a set for her house. I think the plan—in the beginning—was that she was going to make some herself. But along came a baby and a house move and she sent up the mom-style bat signal. And even then I let that fabric sit on my sewing machine for a long time. 

But this Christmas they are in their new old (as in historic) house and it was time. I whipped myself into action just days before they came for Thanksgiving and sent her home with two sets. Two pillow cases for a queen bed and three for the king size bed.


I had let this fabric sit on my sewing machine for a long time. And then I LOVED working with this fabric. It felt so good in my hands. I can imagine how good they will feel at bedtime. Jessica found this cotton Tana Lawn by Liberty online and ordered both colors because she loved the whimsical Christmas print.


Because the fabric was so special I made these pillow cases with French seams that will wear well.  Hopefully Jessica will be tucking in her grandchildren on Christmas Eve years from now and tell about Mimi who made the pillow cases.


And now to the pie recipe. Finally. It was the easiest thing to make. And it makes a great presentation in the skillet. I'm sending a big thank you to my friend Missy who texted me the recipe and said, "also made this...a huge hit!" Missy is one of those friends who never steers me wrong in the kitchen. (Notice she said "also." I'll get to her other recipe soon.)

When I started this, I envisioned a sticky, hard-to-clean mess in the bottom of the skillet. But as it baked it turned into a thinner caramel type syrup. Cleaning was no problem. Hang on to this recipe. It's easy enough for a family supper and good enough for a company meal. 


4 lbs apples, half Granny Smith & half Braeburn or Macintosh
good squeeze of lemon juice
1 teaspoon cinnamon
3/4 cup sugar
pinch of salt
1/2 cup butter (1 stick)
1 cup firmly packed brown sugar
1 box refrigerated pie crust (2 crusts per box)
1 egg white
2 tablespoons sugar

Preheat oven to 350º. Peel and slice apples into 1/2 inch slices. Squeeze a little lemon juice over apples and toss. Then toss apples with cinnamon and 3/4 cup sugar and a pinch of salt.
Melt butter in 10-inch cast iron skillet over medium heat. Stir in brown sugar and cook, stirring constantly, for 1 to 2 minutes until sugar is melted. Remove from heat and place one pie crust on top of butter mixture. Spoon apples over pie crust. Top with remaining pie crust. (I didn't try to crimp the edges because the pan is hot. Just tuck in anything that hangs over.) 
Whisk egg white until foamy and brush over crust. Sprinkle with sugar. Cut slits in the top crust so the steam can escape. 
Bake for 1 hour to 1 hour 10 minutes, until golden brown and bubbly. If the crust is browning too quickly, shield with foil for the last 10 minutes.
Cool for 30 minutes before serving. And y'all...it begged for a scoop of vanilla ice cream on top!


I set my skillet on a cookie sheet just in case anything dripped while baking. It did not. But it turned out the pan made it easier to get the skillet into and out of the oven. 


Tuesday, November 30, 2021

Paper Angels


Years ago I attended a community Christmas dinner at Mommy's church and I remember walking into their gym and seeing the many tables beautifully decorated with angels. So many angels. When I looked closer, I saw that each angel was simply cut from a single sheet of heavy white paper, like card stock or cover stock.

I did not take one of the angels from the table when the meal was over. My mother taught me not to take without asking. But later thanks to heroic efforts by Mommy and one of the associate ministers at that church, they tracked down a paper angel for me. And they shared a website that showed how to fold these adorable angels. The directions were in some slavic language, but the pictures were useful.

Jessica and I made stacks of these angels for a cattlemen's dinner the following year. And yay for me, I saved the angels and added them to my accumulation of Christmas table decorations. (I decorated for the cattlemen's association for years.) So when a friend asked this week if I remembered how to make the angels, I told her we could use one of mine to trace some for her. I thought it would be good for Joanne to see the original link but I cannot find that original site. I thought it might be wise to make a new set of instructions right here. In English.

These are so easy to make. And they are extremely economical. It just takes time. The tracing was the hardest part. This morning I realized that as I was making a new, more permanent pattern, I could print the cutting lines and eliminate the tracing.


This is what the printed pattern looks like.
Fold it in half to cut.


If you trace by hand, you would fold the paper first and place your template on the fold.
YOU CUT THIS OUT FOLDED!


When I first saw the pattern I thought that cutting out the interior around the head was going to be impossible without tiny sharp scissors. But then realized that if you cut the line above the head (see blue arrow) first, you just keep cutting around the arms and head. Then it was pretty simple.


I cut this one with my not-so-sharp scissors I use for gift wrap.


It's possible that you might need to smooth out the printed/traced lines as you cut. And when I printed the pattern, the lines didn't quite reach the edge of the paper. You crafty people can extend it to the edge. Try to cut so that the pencil/printer line is cut off. My goal was to have a pure white angel. I didn't always achieve my goal.


Open the paper enough to make the angel stand, arms straight up.


Fold the arms and trumpet forward, giving a little pinch at the shoulders.


And then fold the arms down, pinching the "hands" at the trumpet.


You can download the PDF for the angel pattern here: Paper Angel Template   I hope. I've never attached a PDF to the blog. If you are the artsy type, you could freehand the pattern onto folded paper and make a template.


Friend Joanne is going to put an angel on a charger plate with greenery and votive candles. I honestly don't remember exactly how I used them on the tables years ago. I do remember that the air from the heat vents would blow them over. They are only paper. So I taped them to the table on the back side.


Wednesday, November 17, 2021

Countdown To Thanksgiving

Macaroni Pie  

One week until Thanksgiving! Made a trip to the grocery store this morning to pick up a few things I knew we needed. And like some of you, I found empty shelves. No cans of cranberry sauce. But I did buy fresh cranberries. I can make my own cranberry sauce. I like both kinds. Cranberry sauce in the shape of the can sometimes sits side by side with the fresh kind. Everybody is happy.

Yesterday my Zoom knitting group spent our hour talking about Thanksgiving instead of knitting. Our group has knitters from NYC, Tennessee, Maryland, Texas, Georgia, Washington state, and South Carolina. It was interesting to hear what is "always" on the table in different parts of the country.

Here in our house possibly the most important dish—besides the turkey—is macaroni and cheese. We called  it "macaroni pie" all of my life. At least until I was grown. And somehow that morphed into a more standard name. But macaroni pie is probably more accurate. This recipe has been handed down in our family for several generations.

You might make it with a cheese sauce. But here in our little corner of the state, it's the "pie" version that reigns supreme. Some of the knitters were surprised that mac and cheese was considered a Thanksgiving item. 

They didn't understand. ALL meals here include macaroni and cheese. It's a standard for Sunday dinners and church covered dish dinners. It's comfort food at funeral meals. It sits beside the picnic food on the 4th of July. And it's a side dish in BBQ restaurants. I've even seen macaroni cheese bites as a appetizer.

People wonder about our "no cheese sauce" mac and cheese. But it's the only one I know. I was surprised and delighted when we watched the Netflix documentary High On The Hog and heard about George Washington's chef making his specialty—macaroni pie—at Mount Vernon. The historian told how it was made. And it was really close to our recipe. Even here, there are variations of the basics. I've seen as many as nine oblong dishes of macaroni and cheese lined up on a table in the church fellowship hall. I doubt anyone makes it exactly the same. But the end result is nearly identical.

Here is our recipe. I often put it together the night before and get a head start on my prep. Layer the macaroni and cheese, cover, then refrigerate until the next day. When it's time to bake it, mix the milk and eggs and pour over. 

MACARONI PIE

16-oz. box elbow macaroni (we like the small elbows)
16-oz. sharp Cheddar cheese (NY sharp when I can find it)
4 cups milk (any kind from fat-free to whole)
4 eggs
1 teaspoon salt
a sprinkle of black pepper

Preheat oven to 350 degrees.

Cook macaroni according to directions on the box. Drain. While macaroni cooks, grate the cheese. Spray a 9x13-inch baking dish with PAM. Put half the macaroni in the baking dish, layer half the cheese over it, add the rest of macaroni and then the remaining cheese.

Mix the milk, eggs, salt and pepper. Pour over the macaroni and cheese. Use just enough to cover the macaroni.  (Sometimes I don’t use quite all of the milk/egg mixture. And I have been known to add a little bit more milk if the 4-cups didn't cover it.)

Bake, uncovered, for 35-45 minutes, until lightly browned on top.  Let rest for about 15 minutes before serving so that it "sets."

Y'ALL!!!! I'm sitting here writing this, with a Hallmark Christmas movie playing to keep me company. The grandma and mother just decided "it's time to share the family mac and cheese recipe" with the daughter They put it together while singing Christmas music. It looked like they make it t like I do. The movie was A Holiday In Harlem.

~~~~~~~~~~~~~~~

And should your store also be sold out of cranberry sauce, have no fear. If you can find fresh cranberries, make this. It's easy. It's delicious. Thanks to Mommy who made this it first. Hang on the this recipe just in case.


CRANBERRY SAUCE

1 lb. fresh cranberries, washed
2 cups sugar
1/3 cup water
1 cinnamon stick
1/2 teaspoon ground allspice
1/4 teaspoon ground nutmeg
1 orange, zested and juiced

Combine berries, sugar and water in a medium saucepan and stir together. Bring mixture to a boil over medium heat. Reduce to a simmer and stir in cinnamon stick and ground spices. Simmer for another 5 to 7 minutes. Some of the berries will burst. Some will remain whole. Add orange juice and zest and stir. Cool before serving.


Sunday, November 14, 2021

Another Year In The Rearview Mirror


It was my birthday weekend. Another trip around the sun. And felt like I went around quicker than the year before. Not telling my age—although it's not a secret. But my email inbox is now full of mail shouting things like "Tinnitus!" "Silver Singles." (Yes. I am silver. No. I am not single.) "Need hearing aids?" "Silver Sneakers." Those come along with more emails for burial insurance and recommendations for home care aides, and invitations to tour various retirement communities. Somebody out there evidently thinks I need this information.


But I don't feel quite as old as the calendar indicates. All of my joints still work pretty well. And I don't need hearing aids or a cane. I plan to keep up with this sweet thing who isn't quite two. And she has a brother due in January. I want to sit in the floor and play with them, run around in the yard and maybe even teach them to ride a bike in a few years. We will revisit this "old age" topic down the road. Waaaay down the road, if I have my way!


Little Lady is wearing her brand new hat. Sadly, the Hiberatum pattern is no longer available. But the Lambs Pride Worsted from Brown Sheep Wool Company is. You can find it at the regular online yarn websites and even on Amazon. And you might find it at your local yarn shop. It really is a great yarn for warm hats. I've used it many times. I used a size 7 needle for the hat.


Saturday, November 6, 2021

October Turns Into November

We have been waiting on a new refrigerator and freezer for a few weeks now. We are caught in the supply chain mess that complicates shopping now. Every Monday I think "this is the week." But we are still waiting. So my grocery shopping has been limited because I want to keep them as empty as possible to make installing the new ones easier. That means no recipes to share. Sorry.


But there has been knitting. New purple socks for Baby Girl.


How could I NOT make her a pair after finding this note she left me 
stuck above an old pair of socks. 
I put a caption there because pencil on dark paper is hard to read. 


Somewhere along the way I started a hat for the new baby (a BOY!)
due in January. A winter baby needs hats.


And finished it while I was at their house helping with the move.


Good thing I had tucked another skein of yarn in my bag.
Before I left, I found time to make one more hat to keep this baby warm.

And you know I couldn't make Baby Girl a pair without making another pair for her sister.


But when she tried them on I realized I had not seen her in a long time. 
Oh, how she's grown. This pair barely went on.
 Maybe she can wear them a couple of times, then save them for her sister.


So I've started another pair for her. And now I'm worried they will be too big!
I'm envious of grandparents who live close to their grandchildren.

And at the same time counting my blessings that a drive to visit only takes a half a day.
They are no longer a half a continent away like they were for years.
And they are not a half a globe away like some of my friends' grandchildren.


Sunday, October 17, 2021

Fall Comes To The Lake


The first noticeable display of fall color.


A little pre-Halloween creation from a friendly spider.


We had an unexpected weekend with family. 
(So what if it involved some significant car trouble.)
It was glorious. (Except for the car problem.)


We drove down to the lake for lunch and ended up staying for dinner and breakfast the next morning. And then we came home with leftovers. It's a long, long story. But all you need to know is that should you find yourself with a couple of pieces of leftover grilled salmon, you can make a delicious, quick supper for 2 or 3 folks.

This is basic "fridge foraging." But this worked really well. Warmed over salmon didn't sound particularly appetizing. But when I combined the leftover salmon with a very few ingredients I had on hand, it was surprisingly good supper. I expected good. But this was GOOD!

Here is all I did. Use this as a starting point for your own creation.

SALMON LINGUINE w/SPINACH

2 pieces of leftover grilled salmon
1/2 box whole wheat linguine
1 jar Rao's Alfredo sauce
baby spinach

Cook pasta according to package directions. While pasta is cooking, remove skin from salmon and break it apart into chunks. In a skillet, warm Alfredo sauce over low heat. A few minutes before pasta is done, stir in salmon and baby spinach. 

When pasta is done, use spaghetti lifter and move linguine from the pot directly into the skillet. Stir to combine. Continue to heat gently for a minute or two, until spinach is wilted.


That's it. It almost took longer to write the directions than it did to make the dish.  We will do this again, On purpose.


Tuesday, October 12, 2021

Making An Old House Into A New Home


Every muscle aches. Every bone is weary.


But some of my moving "chores" were restful.


There were little sewing projects.


And there were bigger sewing projects.


A couple of old windows were freshened with simple new curtains.


And betwixt and between the unpacking there was time to knit.


Two new hats for baby brother who is due in January.


"May this home be a place of happiness, of good health,
of contentment, of generosity and hope.
A home of destiny and kindness.
May those who visit and those who live here
know only blessings and peace." *

~~~~~~~~~~~~~~~
]
This quick and simple baby hat makes the best gift. I've made over 50 so far. Include care instructions if you're giving one away.

ROLLED BRIM BABY HAT

DK or sport weight yarn, suitable for a baby
size 5 or 6 needles (16-inch circular and DPNs)

Cast on 72 stitches for newborn size. Join, being careful not to twist stitches and place marker at beginning of round.

Knit to 5 inches. (I add 2 or 3 extra rounds; extra length lets baby wear it a little longer.)

Begin decreases — K2tog, K6 around to marker.
                                K2tog, K5 around marker.

Switch to DPNs and change to locking marker fastened between stitches at beginning of round. Place 3 decrease sections on each needle.

Continue decreases. 
                                K2tog, K4 around...
                                K2tog, K3, around...

Continue decreasing in this manner until a total of 5 stitches remain. 
Work 6 rows in I-cord.
Then K2tog twice. 3 stitches remain. 
Cut yarn and run yarn tail through 3 remaining stitches and then down through "stem" of hat.
Weave in yarn end. And weave in cast-on tail.


*New home blessing borrowed from eunamae's Instagram page.


Friday, October 1, 2021

This Grandmother Will Return Shortly


I’ll be back after a short break. Helping daughter Jessica move. 


Thursday, September 16, 2021

Homegrown Tomatoes


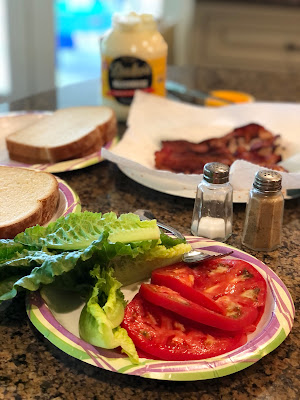
The calendar says it's almost fall. The first day of autumn is next week. But our garden thinks it's still summer. That suits us just fine. Here in the South, people celebrate the very first tomato sandwich of the year. But well into tomato season, we are just as excited to have another good BLT. 

I know not everyone is lucky enough to walk out the back door and pick tomatoes for lunch. Maybe you can find local tomatoes at a farmers market. But if you've only had them from the grocery store, you are missing a treat. Sometimes you will get a flavorful tomato at the store, but they are never as juicy. A really good tomato sandwich should have juice that dribbles down your chin.

Several years ago we had a neighbor plant several acres in tomatoes. Specifically a variety of tomatoes that were ideal for shipping. When they had finished picking and packing and shipping them for the season, the neighbors were welcome to come pick whatever was left. Well, those tomatoes were not like our garden tomatoes. They were much harder. And that makes sense. Our super juicy tomatoes would not survive being packed on top of each other. They would be a squished mess.

So we thank our lucky stars for living where we can grow our own. Just so you know...the best tomato sandwiches are made with Duke's mayonnaise. You'll never convince me otherwise.

And a good tomato sandwich always me think of this classic Guy Clark song. It might replay in your head all day. Or, you might find you're humming the tune for a week.  You're welcome.


Tuesday, September 7, 2021

Improv — In The Kitchen, At The Piano

Chicken Divan

For all the weeks I've said my kitchen was closed, (really, it was more like it was in low gear) I made up for it this weekend. We had Jessica, Todd and Little Lady here for a long weekend. We had not seen them in a couple of months, so I wanted to make sure they enjoyed some of their favorite foods while they were home.


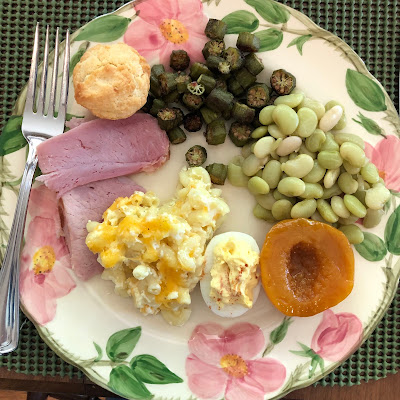
The biggest meal was a traditional southern Sunday dinner. I haven't cooked like this in ages. I baked the ham and used the brown sugar-mustard glaze we like. I also made macaroni and cheese, roasted okra (the okra was from our garden) and sour cream muffins. Baby limas, deviled eggs and pickled peaches completed the plate. 


Saturday was an easy meal. A slow cooker supper I could get ready in the morning and then have the day to play with the baby. She is one busy little girl. This roast is a favorite we've made many times. You can make it a true one dish meal if you add some fresh baby spinach on top of the hot grits. Then spoon the roast over that. All that heat will wilt the spinach. And you can feel righteous because you've served a green vegetable.

SWISS-STYLE ROAST with CHEESE GRITS

1 beef chuck roast (or any other roast--brisket works great)
salt, pepper, & garlic powder 
1 jar marinara sauce with Cabernet, red wine or portabella mushrooms
1 onion, sliced thin 
1 can sliced mushrooms, drained

Place beef, rubbed with salt, pepper and garlic powder, into crockpot. Cover with sliced onion. Pour spaghetti sauce over. Cook on HIGH for 6-8 hours. When fork tender, slice meat and place back into sauce while preparing grits.

Cheese Grits:
quick-cooking grits (the 5-minute kind—not instant)
1 teaspoon garlic powder 
1 cup shredded Cheddar cheese (or cheese of your choice)

Cook grits for 4 servings, according to package. Stir in garlic powder and shredded cheese. Stir until cheese melts. You can adjust the garlic powder and cheese amount to suit you.


Why I'm telling you this all backwards, I don't know. But I'm too far in to change all of this now.


Friday night supper was a delicious new-to-the-blog recipe. For years, I've heard my cousin Audrey talk about her chicken divan. Everyone in her family loves it and requests it for special meals. I made chicken divan years ago from directions that my secretary gave me. No actual recipe. I remember that it called for toast triangles on the bottom instead of bread crumbs on the top. I asked Audrey to send me her recipe and in a few minutes, she texted this photo. Remember community cookbooks? I had so many of these cookbooks from civic clubs, churches and professional organizations. They were a guaranteed money maker back in the day. I got rid of many of my collection. But I still have one shelf devoted to the favorites I kept. I don't know what group put this particular cookbook together.


And here is where we get to the kitchen improv. This recipe has been tweaked again and again. Changing it up while maintaining the essence of the dish. That's exactly how jazz improv works. Change the lines around, tinker with the rhythms, but the essence of the tune is still there. My current hobby is learning jazz piano. I've played piano for decades, but the jazz is new. It's been so much fun.

I changed this recipe to suit me. We like fresh broccoli better. I always use sharp cheddar. And EIGHT slices of bread??? That would make a half-gallon of bread crumbs with the bread slices I had. I used Pepperidge Farm sour dough. Those are large slices. I tore each slice up into smaller pieces and processed them, one at the time in my mini food processor. Each slice makes about 1 cup of crumbs. I also cut way back on the butter. I probably used less than half a stick, just enough to moist the crumbs. Oleo? Nope. I only use butter nowadays. And I'm sure I used more than two cups of chicken. I just covered the broccoli.

Jessica said it was the crunchy crumbs that made the dish! She's right. I did like this better than the toast on the bottom. And Audrey's recipe is better seasoned that the old version I used to make. Mine was plain, plain, plain. No curry. No lemon juice. 


And my last kitchen improv was to use one can of cream of chicken soup and one can of cream of mushroom. That is because when I read the recipe, I only got as far as "cream of..." That so often means cream of mushroom, that is what I bought. But I did have one can of cream of chicken in the pantry, so I used one can of each. A trip back to the store for me is a 15 mile round trip. I've learned to improvise.

CHICKEN DIVAN


2 large broccoli crowns, cut into bite-size pieces & steamed until tender 

3-4 chicken breasts, cooked and cut up

2 cans cream of chicken soup, undiluted (I used one chicken & one mushroom)

1 cup mayonnaise

1/2 teaspoon curry powder

1 teaspoon fresh lemon juice

1 cup shredded sharp cheddar cheese

2-3 slices bread, toasted & made into bread crumbs (about 2 cups)

1/3 to 1/2 stick butter, melted


Spray 9x13-inch baking dish with PAM. Arrange broccoli in bottom. Put chicken evenly over broccoli. Mix soup, mayonnaise, curry powder, lemon juice and spread over chicken. Sprinkle cheese over the soup mixture.

Mix melted butter and bread crumbs and sprinkle over cheese.

Bake at 350º for 30-35 minute, until hot and bubbly.


I am delighted to have finally made this recipe I've heard about for so long. I forgot to ask Audrey what she served with hers. So we had pasta cooked brown rice and fresh fruit for the side dishes. We had the leftovers for lunch the next day and both Daddy-O and Jessica said they thought it was even better the second day. 

The next time it's my turn to take supper to book club, I think I have my menu!

If the jazz piano thing interests you at all, you will enjoy this video. I am currently signed up with his program. Can I play like this? Of course not. But I'm learning. There are many, many free video tutorials from him on YouTube. Just google "Piano with Jonny YouTube." I played around with those for quite some time. Then maybe you'll be like me and decide to jump in and try the full program. Let me know if you do and we can cheer each other on.


NOTE:  For reasons I don't understand the video is not showing up on the mobile view. At least on my phone. Use this link if you are interested:  https://www.youtube.com/watch?v=0CA0-HpKYZg