Thursday, November 17, 2022

Best Laid (Birthday) Plans


The plan was to have a lovely brunch in a favorite restaurant with family for my birthday. But Covid happened. (Daddy-O has it but isn't too sick, thankfully.) So we were home alone and I cooked my own birthday dinner. Good move on my part. This was so good. And because there was the tiniest bottle of bubbly rosé in the refrigerator left from last year's wine advent calendar, it felt like a felt like a celebration!  I've wanted to try this recipe for a while and I had a chicken in the fridge. Jessica made this here a few weeks ago and told me she makes it almost every week because it's easy. She's right.


This is a "do what I say, not what I do" photograph. I should have tented the chicken with foil sooner, but it was fine. That's the seasoning that got so black, not skin that burned. I'll try the avocado oil next time and see if that makes a different. You're seeing my real cooking, train wrecks and all. Look at the next photo.

Oops!

Working too quickly, I managed to split the wrong side of the chicken ALMOST the whole way through. This dinner was only for the two of us, so I just flipped it over and cut out the backbone. It cooked just fine. Not exactly a photo worthy finish, but since I cut the chicken into pieces and put them on a platter to serve, no one would have been the wiser if we'd had guests.

Cooking boo boos happen. But food is so expensive now, you need to be okay with figuring out a fix. Meat still tough after it's cooked? Chop it up and serve it on sandwiches or over rice. The classic "fix" is crumbling up a cake that stuck to the pan and layering it with pudding and/or Cool Whip to make a trifle. The big trick is NOT to tell anyone that the "fix" wasn't your original plan. 

This really isn't a recipe as much as a starting place for you to cook this dish. Jessica says she's used all kinds of seasonings, but really likes this one. She likes golden potatoes. I had red potatoes on hand. She said sometimes she mixes the seasoning with some oil and rubs it under the skin and rubs plain oil on the outside. If she's feeling extra decadent, she mixes the seasoning with some cold butter for the under-the-skin rub.

ROAST SPATCHCOCK CHICKEN AND VEGETABLES


1 whole chicken, about 3-1/2 to 4 lb

Red potatoes, cut into large chunks

3 or 4 carrots, peeled and cut into large chunks

Olive oil or avocado oil


1-1/2 teaspoons kosher salt

1./2 teaspoon freshly ground black pepper

1 teaspoon paprika
1 teaspoon garlic powder

1 teaspoon oregano

1/2 teaspoon onion powder


Preheat oven to 425º. Line large sheet pan with foil. Mix dry seasoning ingredients. 


Remove giblets from chicken and pat dry. Using sharp knife or sharp kitchen scissors, remove backbone from chicken. Pat the inside dry. Open chicken up and lay it out flat, skin side up on sheet pan. (Google "how to spatchcock.")


Toss vegetables with a little oil and add to pan around chicken. Sprinkle some seasoning over veggies.


Mix a little oil with some seasoning and rub under the skin. Rub outside of chicken with oil and sprinkle rest of seasoning over the bird.


Roast, uncovered, for about an hour. (Smaller bird may be done sooner.) If the chicken is getting brown too quickly (or the spices start to burn), tent with foil.


After it comes out of the oven, let it rest a bit before serving. I cut mine into the normal chicken pieces and placed on a platter along with the vegetable. Jessica pulls the meat off the bones and serves it that way.


My weekend was not what I planned, but it might have been what I needed. I spent the day digging deep into my messy laundry knitting/sewing room, sorting and tossing out and even finishing up projects that were so close to being done. I listened to a book while I worked. I watched some Christmas movies while I worked on a new knitting project.


I woke up this morning and felt good when I looked at the neat laundry room. Daddy-O is beginning to feel better. Life is good.


UPDATE: Before I hit the "publish" button for this post, I got sick. Hopefully sunny days are just around the corner. I'm taking time off until after Thanksgiving, then I'll regroup and see what I have to share.


Sunday, November 6, 2022

A Stew By Any Other Name

Alabama Camp Stew

I'm almost embarrassed to share this recipebecause it's a bunch of cans dumped in a pot. Almost embarrassed. But I'm doing it because it tasted good, it was so easy to make AND Daddy-O went back two times for more.

I came across this recipe on the food blog Southern Plate years ago. Christy, the writer, is from Alabama. What made me remember the recipe was that she said if you have these cans in your grocery cart, when you check out, the cashier is likely to ask if you're making camp stew. That's why she calls it "famous."


At the beginning of the pandemic I stocked up on shelf stable foods when we weren't sure if the grocery stores would stay open. I remembered this recipe and bought all the cans, printed out the recipe and put the cans and recipe together in a box and added the box to my pantry stash. 

Thankfully those days are behind us, but I realized I liked having a food stash. Not as big as my pandemic stash, but extras of things that we use often. Our closest grocery store is 7 miles away. That's a 14 mile, 25-minute round trip drive to the store and back if I find out I'm out of sugar mid-recipe. So I keep extras on hand. 

Yesterday I was going through my stored foods and checking expiration dates (that's part of storing extras at home) and saw that the tomatoes in my camp stew box needed to be used. Tomatoes, unlike many canned foods, should not be used long past the expiration date.

After a long day of working around the house, this easy recipe was worth a try last night. And it sounded like good football watching food. So glad I finally tried it.

I imagine some of you will have a hard time finding the canned pork or beef BBQ. I found it on the bottom shelf at our Ingles store. But knowing that I have readers in California and Maryland and other far flung states, I googled "camp stew" to find other ways to make this. There are recipes for cooking fresh meat. Some bought BBQ from their local barbecue joint. And one person said that instead of canned, she subbed refrigerated BBQ, such as Lloyd's, found in the refrigerated section, near the mashed potatoes, at the store. 

And to be honest, if you're from California or Maryland, you're probably horrified by dumping all these cans together and would never make this anyway. Right?  In my google search, I did find this fun story about How Camp Stew Became A South Alabama Icon. Read it and learn.

I found a zillion versions of this stew online. Sometimes called camp stew, sometimes called Brunswick stew, depending on where you live. One of our friends has a stew cooking every now and then and sells quarts of Brunswick stew that we like. This recipe has a similar flavor. He uses chicken and pork that he has smoked. If you don't need to make gallons of stew, try this one pot recipe.

ALABAMA CAMP STEW (or Brunswick stew if you live in another state)

3 (14-oz) cans diced tomatoes

14-oz can whole kernel corn

14-oz can butter beans or lima beans

1 onion, chopped

2 (10-oz) cans Castleberry’s Pork or Beef in BBQ sauce

10 or 12-oz can chicken breast


Dump all cans, including the liquid, and chopped onion into a large saucepan. (Mine was 4-1/2 qt.) Bring to a boil, then reduce heat and simmer for 30 minutes to 1 hour, stirring occasionally, making sure the bottom doesn’t scorch. 


Made with the Castleberry's pork, the stew had a little kick. And it's a little sweet, like my friend's Brunswick stew. You can do anything you want with the recipe. Add hot sauce if you want it even hotter. Add a diced potato, leave out the corn or add more corn. Use leftover rotisserie chicken instead of canned. Use all chicken (add BBQ sauce) if you don't eat meat. Tinker with seasonings.

What to serve with the Camp Stew? We just had crackers. But this cornbread would be an excellent choice. I made these two pans last Sunday to take to church for a vegetable soup and cornbread fund raiser.

Two batches of Corny Cornbread

CORNY CORNBREAD

1/2 cup vegetable oil  (plus extra to grease the pan)
1-3/4 cups self-rising cornmeal mix  (make sure it's cornmeal mix)
1 cup cream-style corn (frozen or canned)
2 eggs
1 cup sour cream
1 cup grated cheese

Preheat oven to 375 degrees. Generously grease a cast iron skillet or a 7x11-inch baking pan. Preheat pan in the oven while you're mixing the batter.

Mix all ingredients together in a large bowl, stirring with a wooden spoon or rubber spatula until combined. Pour batter into the preheated pan. Place pan in the oven and bake until golden brown, about 30 minutes.


Thursday, October 27, 2022

Fall And Family And Shepherd's Pie


Grandparenting, like most things, is a mix of ups and downs. We've had a good long visit with our two little ones. We did fun things like going to the pumpkin patch just down the road from our farm. Yes. Our neighbors have a pumpkin (and strawberry) farm! Little Lady picked the best pumpkins.


Mixed in with the good was the not-so-good. A sick baby, who thankfully is better now. A puny toddler.  And the grownups all got colds.

Shepherd's Pie - recipe at the bottom

Yet, we still had to eat. This was a new-to-me recipe. I've made shepherd's pie before but mostly without a recipe. This one was much more flavorful. And because I could make it in stages, it was manageable while watching the kiddos. This is truly comfort food. See the recipe below.


Because they stayed here longer than expected to recuperate, we needed to find things to keep Little Lady busy while Mommy worked from home (our home.) If you are searching for toddler activities, check your pantry. Scooping dry beans into containers and pouring them back in the bowl kept her occupied for a long time.


And you know we always bake—even with the smallest ones. Banana muffins were fun to make and fun to eat. Even her baby brother could mangle a little muffin and eat the crumbs.


Mommy sent me an Instagram post with this quick and easy activity—Halloween matching. You could also match shapes or colors or animals or fruits & vegetables or Christmas items. Just draw a few simple shapes on a long paper (I used the back side of some pan lining foil) and then make a bunch of post-its with matching drawings. Let the little one match them up. 

When Mommy took a work break she made more post-its and stuck them around the house for a scavenger hunt match game. 


Not sure how, but as busy as we were I somehow managed to make a new hat for Baby Brother. Nap times are a glorious thing. And hats are quick to make. No pattern this time, just knitted round and round,


I doubled the recipe because this night we were feeding 4 hungry adults and we wanted leftovers. Made a 9x13-inch dish and a 1-quart dish for the freezer. In another week or so, when it's only the two of us here, that will be our supper and I'll get a night off in the kitchen.

To manage cooking while tending to babies, I made the meat part early in the morning and put it in the refrigerator. Then late afternoon while Little Lady was eating her early dinner, I made the mashed potatoes for the top. These are really good mashed potatoes, with garlic and parmesan cheese added in. 

This list of ingredients looks so long, but it's a really easy dish to put together. Just pull out all the ingredients before you start. And I like to measure the seasoning before I start cooking.

SHERPHERD'S PIE

2 tablespoons olive oil

1 cup chopped onion

1 lb. lean ground beef

2 teaspoons dried parsley leaves

1 teaspoon dried rosemary

1 teaspoon dried thyme

1/2 teaspoon salt

1/2 teaspoon black pepper

1 tablespoon Worcestershire sauce

2 cloves garlic, minced

2 tablespoons all-purpose flour

2 tablespoons tomato paste

1 cup beef broth

1 cup frozen peas & carrots

1/2 cup frozen corn


2 lb. potatoes, peeled & cubed

1 stick butter

1/3 cup half & half (add more if needed)

1/2 teaspoon garlic powder

1/2 teaspoon salt

1/4 teaspoon black pepper

1/4 freshly grated parmesan cheese


Heat oil in large skillet. Saute onions until translucent, about 5 minutes. Add ground beef to skillet and break apart. Sprinkle with parsley, rosemary, thyme, salt & pepper. Cook until beef is no longer pink. Add Worcestershire and garlic, stir and cook 1 minute.


Add the flour and tomato paste. Stir until well blended. Add broth, frozen peas and carrots and frozen corn. Bring to a boil, then reduce heat and simmer for 5 minutes, stirring occasionally. Set meat mixture aside. (At this point, I refrigerated the meat mixture until ready to finish the dish later in the day.)


Preheat oven to 400º.


Place potatoes in a large pot and cover with water. Cook until potatoes are tender.

Drain potatoes and return to hot pot. Let potatoes rest in the pot for 1 minute to evaporate any remaining liquid.


Add butter, half & half, garlic powder, salt and pepper. Mash potatoes and stir until mixed. Stir in parmesan cheese. Add more half & half if potatoes are too stiff to spread.


Pour meat mixture into a 9x9-inch or 7x11-inch baking pan. Spread into an even layer. Spoon potatoes on top and carefully spread over meat layer. (If your pan is full to the top, you can set it on a baking sheet to catch anything that might bubble over.)


Bake uncovered for 25-30 minutes. Cool for 15 minutes before serving.


This would be a great dish to take to a neighbor. You could take it baked, or take it ready to bake with directions attached. I'm also thinking I could make and freeze the meat part and then thaw and make the potato topping the day of serving. There are so many ways to give yourself a boost in the kitchen.


I am seriously looking forward to pulling our small casserole out of the freezer for an easy dinner.


Monday, October 17, 2022

Little People In The House

Gingerbread Men

Little Lady has been reading the gingerbread man story at school. "Run, run, as fast as you can!" And the first day her family got to the farm she told us she had two things she wanted to do at the farm. Go fishing. (Thankfully pretend fishing in the yard was enough.) And she wanted to bake gingerbread men. If you are doing this with small children in the house, make a plan. 


1.  Mix dough before the little ones get up and and put into refrigerator to chill.


2.  While baby brother is napping, let the toddler help cut the cookies.


3.  Abandon all preconceived ideas of how a gingerbread man should be decorated.


4.  Appreciate that this recipe only makes enough dough for about 15 cookies.
That about matches our attention span.


She only eats the decorations and then tells me, "I need a new one."

GINGERBREAD MEN 


1/2 cup shortening

1/2 cup sugar

1/2 cup dark molasses

1/4 cup water

2-1/2 cups all-purpose flour (or use self-rising and omit salt & baking soda)

1/4 teaspoon salt

1/2 teaspoon baking soda

3/4 teaspoon ginger

1/4 teaspoon nutmeg

1/8 teaspoon ground allspice


Cream shortening and sugar. Blend in molasses, water, flour, salt, baking soda, ginger, nutmeg, and allspice. Cover and chill for 2 to 3 hours.


Heat oven to 375º. On a lightly floured board, roll dough to 1/4-inch thick. Cut with gingerbread man cutter and place on an ungreased baking sheet. (I use parchment paper on my pan.)


Decorate with candies, chocolate chips, raisins, can diced cherries, etc. 


Bak 10 to 12 minutes. Immediately remove from baking sheet and let cool. 


Makes about 15 4-inch cookies.


(In case you're wondering, Little Lady is two and a half.)


Tuesday, October 11, 2022

The Best Kind Of Friends


There is nothing like having good friends. Good friends who've known you for a long time. A couple of these friends hosted a bridal brunch recently. There were two quiches left over, along with an extra loaf of zucchini bread. "Come on! Let's finish up the quiche." That's the kind of invitation that goes only goes out to really good friends. And five of us gathered around the table to enjoy this feast.

I do wish I had made a photo of the plate. It was as beautiful as the original brunch plate. And every bit as delicious. These ladies all are fabulous cooks. And I was happy to get a chance to enjoy the bounty. Their menu was ham and broccoli quiche, fruit salad "boats" and zucchini bread. The plate was colorful with the perfect variety of textures. Every morsel was scrumptious.

Two small romaine leaves were fitted together to make a "boat" to hold the fruit. The assorted fresh fruit that filled the boats was diced and then sprinkled with pomegranate seeds. All those colors! Again. I should have made a photo. But I was starving and didn't think about it until after we finished.

Lemon Daffodil Dessert

Joanne said, "I can make you another dessert plate. Then you can take a picture of that."  Of course I said yes. Then  I took that extra plate home for Daddy-O. He loves that all of my friends are good cooks.

Out of curiosity I googled "lemon daffodil dessert." Oh my goodness. There are several ways to make this. There are lemon daffodils cakes, too. But it looked like most of the recipes are from three or four decades ago. It was interesting that most of them called for "commercial" angel food cake. Makes me think there was one original recipe that got passed all over the south. They all used that word "commercial." I think I would have said "bought." 

This version is from one of those community cookbooks that has the best recipes. And you can look at this page and tell it's a favorite cookbook. I don't have this one in my collection (it belongs to Joanne) but I'm curious to know what the rest of their menu was. 

Old cookbooks often are vague with their instructions. *New cooks...know that everything here is fine to eat as is, so you can vary the amounts if you want to. Or need to.* Here is the lemon dessert the way Joanne makes it.

LEMON DAFFODIL DESSERT

Juice of 4 lemons

1/2 cup sugar

1 (14-oz) can condensed milk, such as Eagle Brand

most of a large container of Cool Whip

purchased angel food cake, enough to cover bottom of pan

Combine juice, sugar, milk. Fold in Cool Whip. Tear cake into small pieces and cover the bottom of a 9x13-inch pan. Pour lemon mixture over cake pieces and mix together a little. Save enough Cool Whip mixture to spread over the top to make it smooth. Cover and chill for 24 hours before serving. 


And now you want to know about that cute dish towel at the top? Some of these ladies had made a trip to the mountains to buy apples last week while I was away. I couldn't go with them but they bought me a treat.Yep. Friends. The good kind.


PS....We have a house full of grandbabies all week, so no new blog posts until they head home. And I recuperate.


Friday, September 30, 2022

Port In A Storm

White Chicken Chili

We cleaned out the refrigerator at the lake last weekend and I brought home one package of chicken breasts from the freezer there. Then I couldn't think of a thing to do with it. I haven't cooked much in several weeks. And I hate to admit, it's been nice not cooking.


Our wonderful anniversary trip to the mountains with fabulous meals was followed by a weekend at the lake and lakeside dining. Then the lobster roll truck came to town this week. A rare treat for a small town in the deep South. Another night off in the kitchen for me.


But the chicken had thawed and had to be used. Then a snippet of a recipe popped up on Instagram. Not a real recipe, but a "this is what I toss in the slow cooker" with a photo. She said she eyeballed all the seasonings. You know me. I wrote down how I did this, complete with measurements, so that next time—and there will be a next time—I won't be guessing about how much oregano or chili powder to use.


The chili went in to the refrigerator until the family arrived. They were at the beach for fall break and left yesterday ahead of the storm. It was much, much less severe on the east coast, but still good they got out of the way. Fall break was relocated to our farm.


Instead of playing on the beach or in the ocean, or rescuing stranded starfish, these girls learned to latch hook today. I've saved these craft kits for a long, long time. This was the perfect day to pull them out. 
 

There are many ways to make white chicken chili. I've made more than one version—spicy, creamy, you name it. This is hands-down the most uncomplicated recipe ever. Fewer seasonings to measure. Nothing to sauté. Keep it in mind when you don't feel like cooking, but the family still expects to eat supper.

This is a really tame version of white chicken chili. Because of some dietary needs in my family I kept the seasonings very much on the mild side. You can use 2 cans of green chilies, up the chili powder, add some cayenne and make it as spicy as you like it. I was surprised that I liked this very simple version as much as I did. Comfort food to the max. 

WHITE CHICKEN CHILI

2 boneless skinless chicken breasts, about 2 lb

1 onion, chopped

2 (15-oz) cans great northern beans, drained & rinsed

1 can shoepeg (white) corn kernels, drained

1 or 2 cans chopped green chilies (I used 1)

32 oz. low-sodium chicken broth

1 teaspoon oregano

Scant teaspoon chili powder

Cayenne to taste, optional (I left this out)

Salt & pepper to taste 

1 cup half & half


Add all ingredients to slow cooker. Cook on LOW for 7 to 8 hours. Or HIGH for 3 to 4 hours.

Remove chicken to a shallow pan and used two forks to shred. Put shredded chicken back into slow cooker. Add half & half to mixture.


I put about half of this in the freezer for another cold, windy, rainy day. And I see it the next time topped with shredded colby-jack cheese with warm cornbread on the side. Yum!


Monday, September 26, 2022

It's Been A While


Thanks to readers who checked to see if we are okay since I have been absent here. 
We are. But after weeks and weeks of "not so okay" 
we were able to sneak in a little get away in the mountains.


It was also a celebration of our anniversary. 
More than 40 years together and we still delight in each others company.


We came home and dumped the laundry and repacked.
We missed so much lake time this summer.
But this weekend was absolutely perfect for coffee on the porch.
For maybe our last boat ride.


And now we are home. Looking forward to fall.


Monday, August 29, 2022

Doing Nothing? Hardly

Do Nothing Cake 

My blog breaks keep getting longer and longer, don't they? What can I say. I'm getting older and older. We have had a strange month here but things are getting back to normal. So I was back in the kitchen today. It's my turn to take dessert to book club. 

Easy Skillet Apple Pie

I planned to take somthing easy--like the Easy Skillet Apple Pie. It's always a winner. And it's a little bit of a show off recipe when you walk in with a cast iron pan. Easy to make, but I needed a trip to the store for apples and pie crust and ice cream.  Then my day didn't start like I thought it would. 

Brownie Pudding

Not to worry. I decided I would make a Brownie Pudding like the granddaughters baked this summer. Even easier to make than the apple pie. We have never had it at book club and I had all the ingredients here. It's so good. But it's so much better with ice cream. That still meant a trip to the grocery store. Time to change gears one more time.

Do Nothing Cake

Do Nothing Cake!!! Even the name suited my situation. A quick check in the pantry yielded both cans of crushed pineapple–a 15-oz can for the cake and an 8-oz can for the frosting. The only other ingredients are self-rising flour*, sugar, eggs and vanilla. It is a rare day when I don't have those basics on hand. Best of all...I didn't need ice cream! NO shopping needed today.

If you google "do nothing cake" the traditional recipes have a coconut-pecan topping. Life is better for Daddy-O when he avoids nuts so when I saw this recipe in our rural electric co-op magazine years ago, I knew we needed to switch it up. I found this pineapple topping online and it worked so well that I can't imagine this cake any other way now.

It has been 10 years since this recipe has been here on the blog. It is definitely time to re-introduce it. 

DO NOTHING CAKE

2 cups self-rising flour
2 cups granulated sugar
2 eggs
1 teaspoon vanilla
1 large can (15-oz.) crushed pineapple

Preheat oven to 350 degrees. Blend all ingredients together with a spoon. Pour into a greased and floured 9x13-inch baking pan. Bake for 25-35 minutes, or until golden brown and a toothpick inserted into the center comes out clean.

Icing:
1/2 stick butter
1-1/2 cups powdered sugar
1 cup crushed pineapple, drained

Combine ingredients in a bowl. Blend well. Pour over hot cake.

PS...the cake was even better the next day. More moist.


All of the desserts linked above are delicious. All are pretty simple to make. But this cake is hands down the easiest to make and the easiest to take. One dish. No ice cream to keep frozen on someone else's kitchen. And it is every bit as delicious as the others. This is a moist, tender cake that we have loved for years.


*If you do not keep self-rising flour on hand, you can also google "do nothing cake" and find recipes that use plain flour, baking powder and salt. 


Wednesday, July 27, 2022

Not The Week We Were Expecting

Greek Pasta Salad

Daddy-O is under the weather. I am mostly staying out of his way, letting him snooze. Lack of appetite is one of his symptoms. But then his medicine says "Take after breakfast and dinner." As on a full stomach. 

This recipe popped up on my computer yesterday and I had all the ingredients here. I thought it would make a nice light dinner. I mixed it up while he napped. I'm happy to say he ate this for dinner.


This recipe is the only greek recipe I've ever seen that didn't include olives. I don't like olives. I wonder if the recipe developer doesn't like them either. The only good thing I can say about olives is that it's easy to leave them out—or in this case, add them in. 

Because it doesn't have a lot of other vegetables that would need to be peeled and chopped, this salad is very simple to make. The star of this recipe is the dressing––it's really good and really easy, so keep it in mind if you want homemade greek dressing for a green salad later. 

GREEK PASTA SALAD

1 (16-oz) box penne pasta (or other short cut variety such as rotini or bowtie)
2/3 cup olive oil
juice of 1 lemon, about 1/4 cup
1/2 cup mayonnaise
3 tablespoons Cavendar's seasoning, or other greek seasoning
1 (6-oz) container of crumbled feta cheese
1 cup grape tomatoes, halved
1/4 cup fresh basil slivers

Cook pasta. While it's cooking whisk together olive oil, lemon juice, mayonnaise and greek seasoning. When pasta is cooked, drain, rinse with cold water and pour into large bowl. Add dressing mixture, cheese, tomatoes and basil. Mix until combined. Cover and refrigerate overnight.  Will keep in refrigerator for 4-5 days.


When the mood strikes—or you have vegetables you need to use up– you can change this up by adding other vegetables. Red onion, artichoke hearts, red peppers, green peppers, cucumbers are all candidates. 
Or toss in some leftover cooked chicken  and make this a main dish. 

Note: Daddy-O got up this morning and made the coffee. That's a good sign!


Tuesday, July 19, 2022

Mimi Camp Has Come And Gone


Mimi Camp this year started as soon as we got home from the lake. And unlike all the other years it started without a plan because we had been busy with the family at the lake and with the lake renovations before that. But because we had skipped two Covid years we were determined to do something. This is just a peek at a few of the things we did. And we had two recipes worth sharing. 


I crawled into bed the first night home from the lake after tucking the girls into their beds and I laid there wondering what on earth we could do in the morning. And what was I going to put in ''the box." I was hoping they wouldn't remember that we usually start our camp day by opening the official Mimi Camp box to see the clues for the day's activity. (They remembered.) I couldn't even find the actual box but thankfully had an empty box with a lid that hadn't made it to the trash dump yet. 


Early that first morning I filled it with an assortment of fruits and vegetables from the fridge. Some were wilted and about to be tossed anyway. But they were a great for creating food art. They added herbs from the garden. The girls worked all afternoon making food paintings. We talked about different ways to see ordinary things.


I can't even begin to put the rest of the week in order, but there was fishing at the pond behind the house. And a picnic. On a blanket. On the ground. 


According to Baby Girl that's the definition of a real picnic. It has to be on a blanket on the ground. We came home with no fish but it was all great fun.


Another morning they found my gallon jar of buttons in the box along with an old flannel shirt that Daddy-O sacrificed to the cause. We cut off the sleeves and cut off the cuff button and learned to sew that button back on. I wanted them to be able to button it back up. Button sewing turned out to be the sleeper hit of the week. They kept sewing buttons. Both girls agreed the hardest part was tying the knot in the thread.


I thought we would have fun going through an old cookbook of mine that has a chapter of recipes for each decade from the 1930s to the 1970s. The plan was to find a recipe from each decade. We started off with a bang and made ice cream from the 1930s the first night. This is the 1930s recipe. 

PEPPERMINT ICE CREAM

2/3 cup sweetened condensed milk
1/2 cup water
1/2 teaspoon peppermint extract
3 drops red food coloring (I was out of red, so we used green)
1 cup whipping cream

Combine the condensed milk, water, extract and food coloring. Whip cream until thick and custard like and fold into the peppermint mixture. Pour mixture into a 3-cup refrigerator tray. Freeze until partially frozen. Break mixture into chunks into a chilled mixer bowl. Beat until smooth. Return to cold refrigerator tray. Freeze until firm. Makes 3 cups.


Since our ice cream had to be green, Baby Girl said, "Isn't it supposed to have chocolate chips in it?" So we added those. And Little Sister asked, "Why can't we use your little churn?"  I explained about refrigerator freezer desserts from way back. (My mother made a great frozen lemon dessert in a metal ice cube tray.) But then thought she might be on to something. So we skipped the "beat the cream" part and mixed it all together and poured into my countertop churn. 1930s meets 2022. Worked like a charm.


When the girls got up another morning, they found a five pound bag of flour in the box. And each girl separately made a loaf of no-knead bread. The only thing I did was move the heavy Dutch oven in and out of the hot oven. If Mimi Camp had badges, both of them would have earned the bread baking badge.


The next night Little Sister made caprese skewers for a late afternoon snack on our patio and we added some bread wedges to our tray.


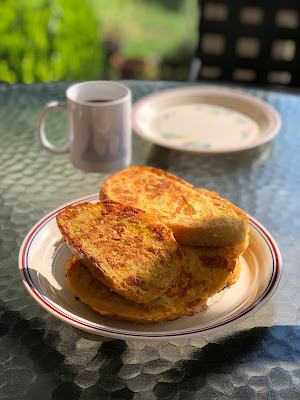
And Daddy-O used the very last of the bread for French toast on Saturday morning. We didn't want to waste a crumb of their delicious bread.


Our "foods from the decades" exploration had one more success when they made brownie pudding from the 1940s. After that, they looked at the 1950s recipes and decided to abandon this project when they saw shrimp in jello. EVERYTHING was in jello in the fifties! 

BROWNIE PUDDING

1 cup all-purpose flour

3/4 cup granulated sugar

2 tablespoons unsweetened cocoa

2 teaspoons baking powder

1/2 teaspoon salt

1/2 cup milk

2 tablespoons cooking oil

1 teaspoon vanilla

3/4 cups packed brown sugar

1/4 cup unsweetened cocoa powder

1-3/4 cup hot water


Stir together flour, sugar, 2 tbsp cocoa, baking powder and salt. Mix in milk, oil and vanilla. Pour into greases 8x8-inch baking pan. Combine brown sugar, 1/4 cup cocoa and hot water; pour over batter. Bake at 350º for about 40 minutes. Serves 6 to 8. 

The chocolate sauce layer on the bottom gets thicker as it cools. We liked ours warm, not hot.


So much more happened. But this hits the highlights. If I'm a smart Mimi I'll start collecting ideas for another camp right now. Baby Girl informed me that she planned to come to Mim Camp until she finished high school. Maybe college. "By then I'll have learned all that Mimi knows."