Sunday, December 19, 2021

Merry Christmas To All!


I just put this on the stove. It's simmering right now. I'm taking a preemptive step. I'm trying to balance the holiday menus coming this week. I've made this soup so many times. Personally, I love vegetable soup that's full of potatoes and corn and beans. With a big piece of cornbread on the side. But this one is also good and has barely any starchy vegetables, thus it's lower in calories. And I'll have a couple of saltine crackers with it instead of cornbread. This time I did use two cups of low-sodium chicken broth as part of the liquid for a bit more flavor.

According to the original source, this soup keeps in the fridge for five days. So I have lunch ready from now until Christmas Eve. It's so much easier to make a healthy meal choice when it's ready and waiting in the refrigerator. 

Not-Quite-Free Soup (photo from months ago)

You might rather hang on to this recipe for after the holiday when you are ready for a reset after maybe too much food. I'll probably make it again then.


NOT-QUITE-"FREE" SOUP

1 16- oz bag frozen vegetables for soup
1/2 head cabbage, finely chopped
1 onion, diced (I only had a 1/2 onion)
1 15-oz can cut green beans 
1 28-oz can crushed tomatoes
1 pkg dry Ranch Dressing mix
5-6 cups water
freshly ground black pepper, to taste 

Put all ingredients into a pot. Bring to a boil. Lower heat and simmer for 45 minutes or longer, until vegetables are as tender as you like them.

~~~~~~~~~~~~~~~~~~~~~~~~~~

And here is another favorite recipe when you want to eat lighter. All of this "free" and "zero point" stuff refers to WW (formerly Weight Watchers.) They have changed their system again so I have no idea how you count this anymore. 

I'm pretty sure this recipe would work well in the slow cooker if you don't use an Instant Pot.

ZERO POINT CHICKEN TACO SOUP (Instant Pot) 
        ...recipe from SlapDashMom.com (check her site for other good recipes)

1 small onion, chopped
1 (15-oz) can black beans, drained
1 (15-oz) can light red kidney beans, drained
1 (8-oz) can tomato sauce
10-oz bag frozen corn
2 (10-oz) cans Rotel tomatoes (I used Mild)
1 packet taco seasoning (I used mild, low-sodium)
1 teaspoon cumin
1 teaspoon chili powder
2 boneless, skinless chicken breasts (fresh or frozen)
1/2 cup water

Place all ingredients into pot. Put lid on, close and set vent to "seal." Use manual button and set to 8 minutes. Let it "natural release" for at least 10 minutes. (Longer is fine.) Then release remaining pressure, if there is any. Remove chicken and shred with two forks. Add shredded chicken back into soup. Serve. 


This is more like a chili than a true soup, but it's yummy. It's gluten-free. And it freezes beautifully. You can certainly cook this in something besides an Instant Pot. I used my IP last night and carried it to the dinner in the pot because the lid fastens securely and I could plug it in when I got there to keep it warm.


And I'm closing the lid on my computer now. I'll see you here after the holidays. Take care of yourself in these coming busy days. 


Sunday, December 5, 2021

Correction: Check The Skillet Apple Pie Recipe

If you read the previous post right after I hit "publish" and you plan to make this pie, you need to make sure you see that I've corrected the recipe. It calls for FOUR pounds of apples. Not two like I wrote. Good thing I had more coffee this morning and saw my mistake.

Here is the entire recipe again. With the proper amount of apples. It has also been corrected on the previous post. You probably would have figured out when you made it that it needed more apples. They should be piled high in the pan.

EASY SKILLET APPLE PIE 

4 lbs apples, half Granny Smith & half Braeburn or Macintosh
good squeeze of lemon juice
1 teaspoon cinnamon
3/4 cup sugar
pinch of salt
1/2 cup butter (1 stick)
1 cup firmly packed brown sugar
1 box refrigerated pie crust (2 crusts per box)
1 egg white
2 tablespoons sugar

Preheat oven to 350º. Peel and slice apples into 1/2 inch slices. Squeeze lemon juice over apples and toss.  Then toss apples with cinnamon and 3/4 cup sugar.
Melt butter in 10-inch cast iron skillet over medium heat. Stir in brown sugar and cook, stirring constantly, for 1 to 2 minutes until sugar is melted. Remove from heat and place one pie crust on top of butter mixture. Spoon apples over pie crust. Top with remaining pie crust. (I didn't try to crimp the edges because the pan is hot. Just tuck in anything that hangs over.) 
Whisk egg white until foamy and brush over crust. Sprinkle with sugar. Cut slits in the top crust so the steam can escape. 
Bake for 1 hour to 1 hour 10 minutes, until golden brown and bubbly. If the crust is browning too quickly, shield with foil for the last 10 minutes.
Cool for 30 minutes before serving. And y'all...it begged for a scoop of vanilla ice cream on top!


Sorry, y'all. I'll try to do better. 


Saturday, December 4, 2021

Looking Back At Thanksgiving

Skillet Apple Pie

This look at our Thanksgiving nearly got lost when I interrupted my blogging to add the paper angel how-to a few days ago. But this recipe is too good and too easy not to share. You'll find the recipe at the end.


We had a revolving door kind of family gathering. But we did get to see everyone but J-Daddy who had to stay home while some home repairs were in progress. Our little girls are becoming big girls.


As soon as they headed home the other set of family arrived. I really think they waved at each other as they were coming and going up and down I-85. This smallest granddaughter is learning all about life at the farm. She is an independent little thing who has learned about opening and closing pasture gates already. And she had a go at driving the tractor with Daddy-O. That's a rite of passage here.


And on our last night of family time we enjoyed a backyard bonfire. We never got to the marshmallow part of this evening, so we will likely have Christmas s'mores in a few weeks. (FYI...this was our first fire in our Solo fire pit. It does indeed work as advertised.)


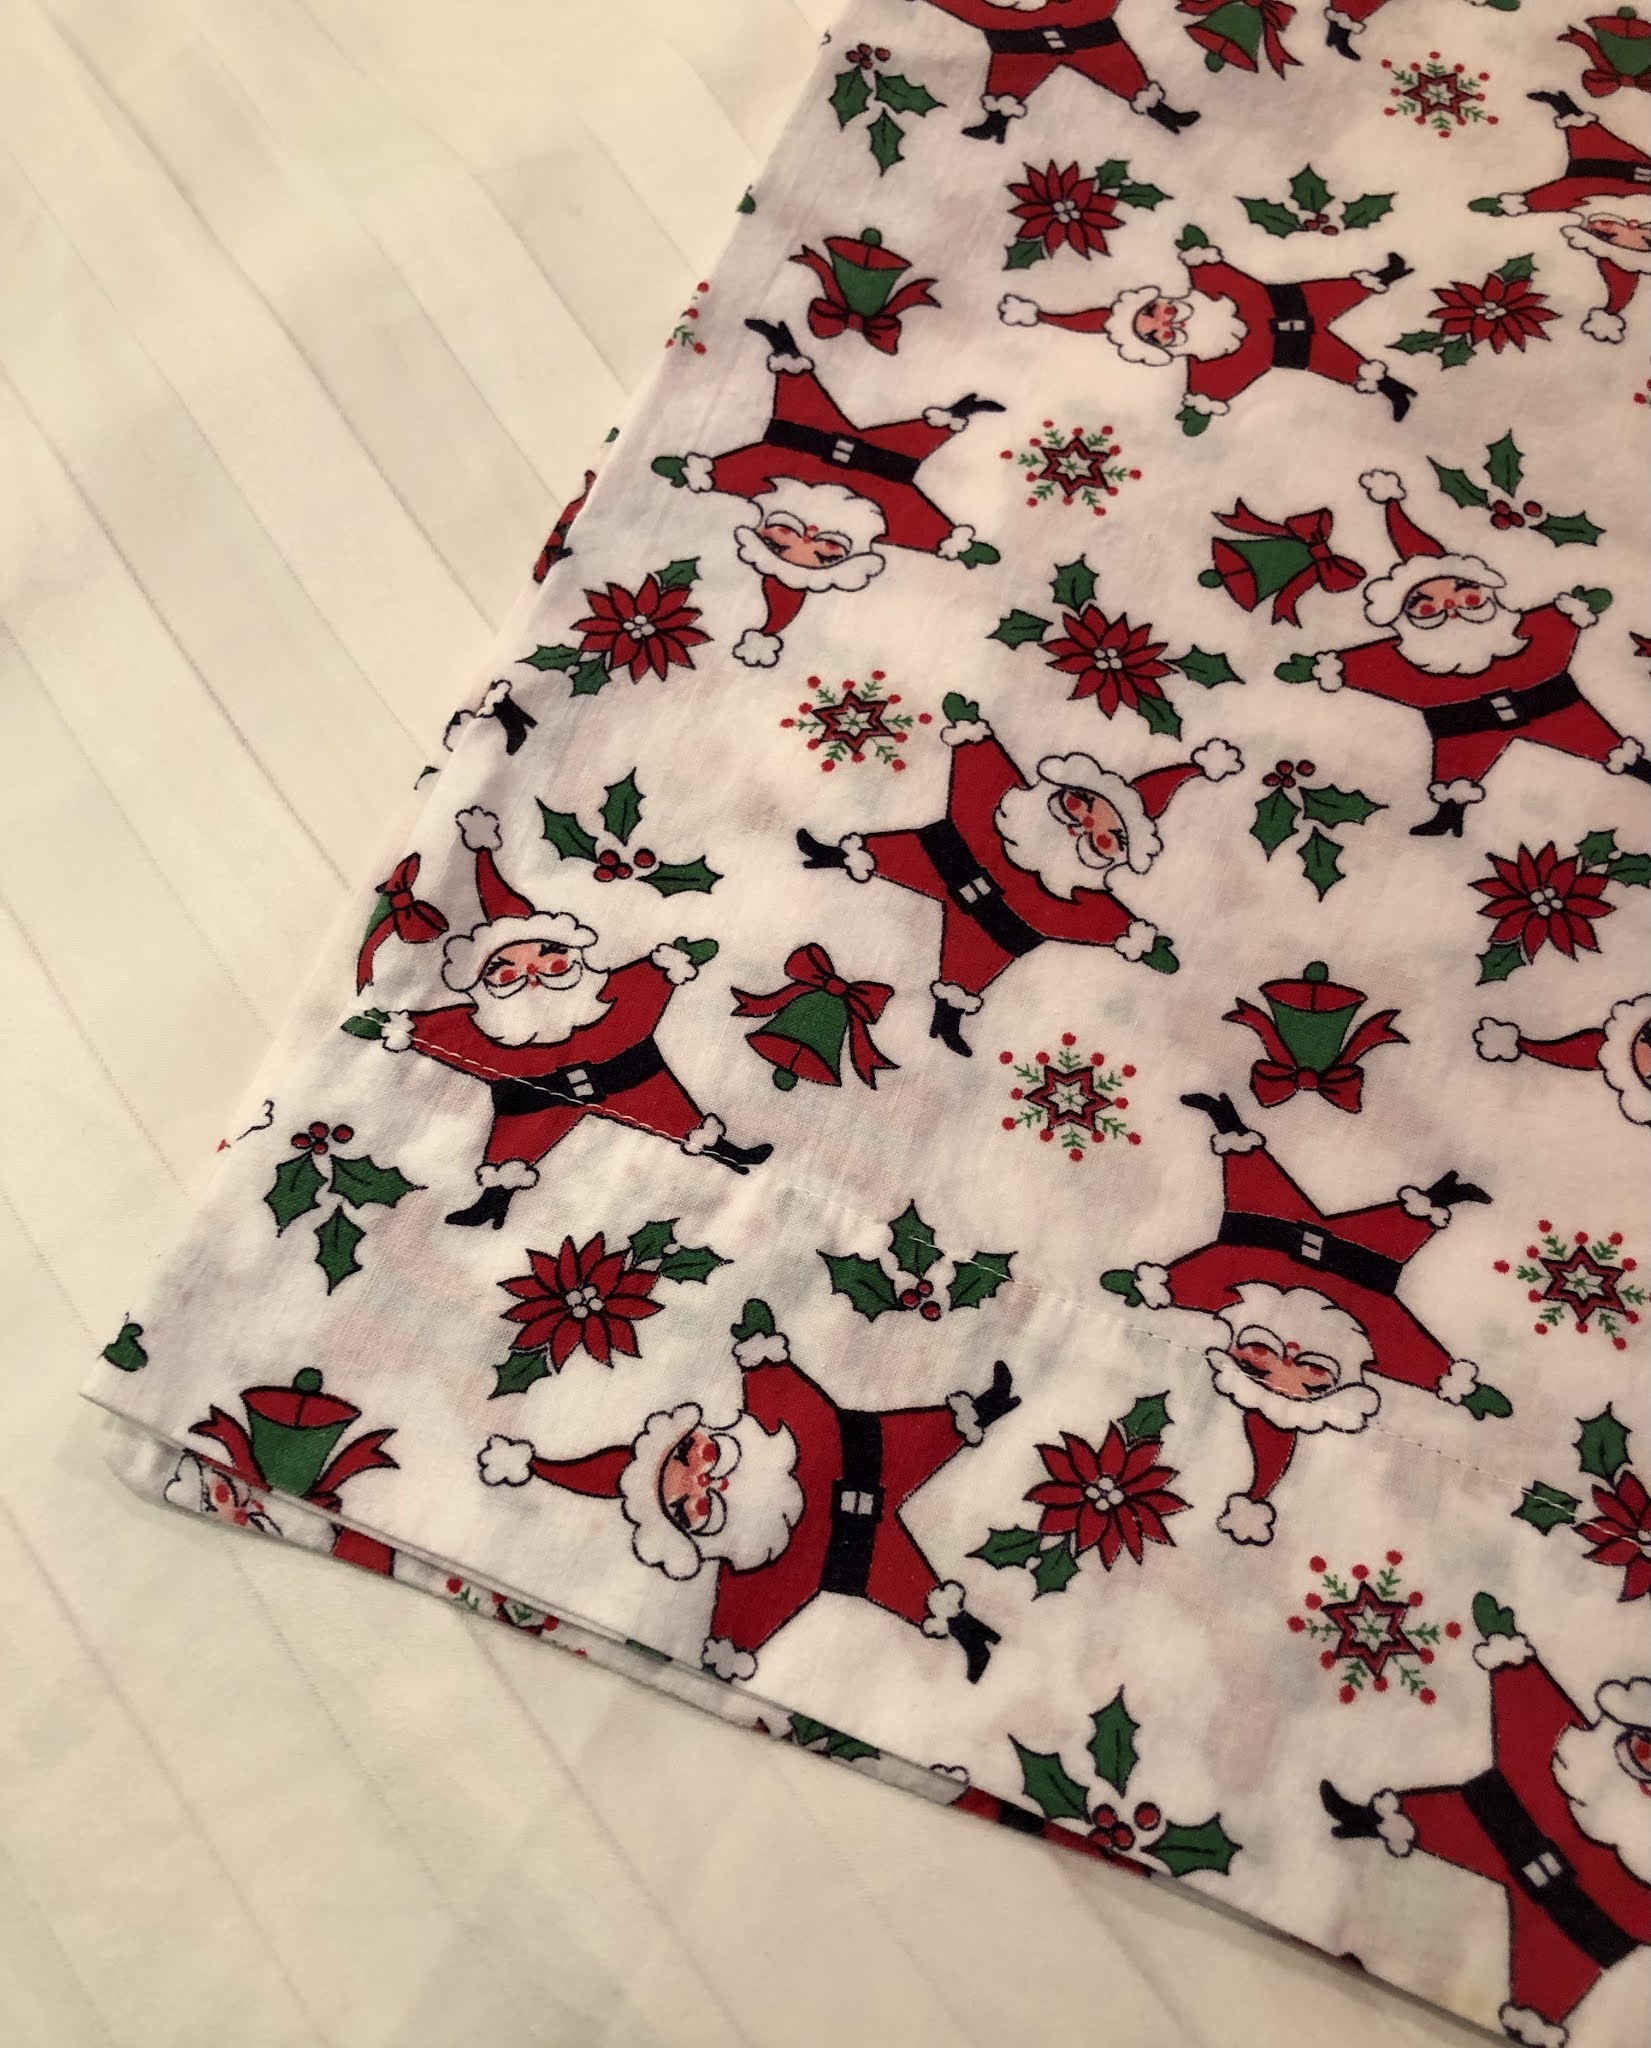
I promise. I'm getting to the pie recipe. But I wanted to talk about pillowcases for just a minute. The Santa Claus pillow case here was made by my mother many many years ago. Our children, and now our grandchildren look forward to sleeping on them Christmas Eve. I have four of these. It's a family tradition that I'm sure my mother never anticipated would last this long. She really was not a maker in general. Except for these pillow cases that I've had for decades now. 

I've found that the best traditions are the ones that just happen. I've never had much luck with intentional plans to create a tradition. But I treasure these that create themselves.


In that spirit, daughter Jessica wanted a set for her house. I think the plan—in the beginning—was that she was going to make some herself. But along came a baby and a house move and she sent up the mom-style bat signal. And even then I let that fabric sit on my sewing machine for a long time. 

But this Christmas they are in their new old (as in historic) house and it was time. I whipped myself into action just days before they came for Thanksgiving and sent her home with two sets. Two pillow cases for a queen bed and three for the king size bed.


I had let this fabric sit on my sewing machine for a long time. And then I LOVED working with this fabric. It felt so good in my hands. I can imagine how good they will feel at bedtime. Jessica found this cotton Tana Lawn by Liberty online and ordered both colors because she loved the whimsical Christmas print.


Because the fabric was so special I made these pillow cases with French seams that will wear well.  Hopefully Jessica will be tucking in her grandchildren on Christmas Eve years from now and tell about Mimi who made the pillow cases.


And now to the pie recipe. Finally. It was the easiest thing to make. And it makes a great presentation in the skillet. I'm sending a big thank you to my friend Missy who texted me the recipe and said, "also made this...a huge hit!" Missy is one of those friends who never steers me wrong in the kitchen. (Notice she said "also." I'll get to her other recipe soon.)

When I started this, I envisioned a sticky, hard-to-clean mess in the bottom of the skillet. But as it baked it turned into a thinner caramel type syrup. Cleaning was no problem. Hang on to this recipe. It's easy enough for a family supper and good enough for a company meal. 


4 lbs apples, half Granny Smith & half Braeburn or Macintosh
good squeeze of lemon juice
1 teaspoon cinnamon
3/4 cup sugar
pinch of salt
1/2 cup butter (1 stick)
1 cup firmly packed brown sugar
1 box refrigerated pie crust (2 crusts per box)
1 egg white
2 tablespoons sugar

Preheat oven to 350º. Peel and slice apples into 1/2 inch slices. Squeeze a little lemon juice over apples and toss. Then toss apples with cinnamon and 3/4 cup sugar and a pinch of salt.
Melt butter in 10-inch cast iron skillet over medium heat. Stir in brown sugar and cook, stirring constantly, for 1 to 2 minutes until sugar is melted. Remove from heat and place one pie crust on top of butter mixture. Spoon apples over pie crust. Top with remaining pie crust. (I didn't try to crimp the edges because the pan is hot. Just tuck in anything that hangs over.) 
Whisk egg white until foamy and brush over crust. Sprinkle with sugar. Cut slits in the top crust so the steam can escape. 
Bake for 1 hour to 1 hour 10 minutes, until golden brown and bubbly. If the crust is browning too quickly, shield with foil for the last 10 minutes.
Cool for 30 minutes before serving. And y'all...it begged for a scoop of vanilla ice cream on top!


I set my skillet on a cookie sheet just in case anything dripped while baking. It did not. But it turned out the pan made it easier to get the skillet into and out of the oven.