Monday, January 24, 2022

Welcome Baby Boy!


 Taking a break while I’m on a true “grandmother gig.”  Little Lady has a baby brother. After four granddaughters we have a grandson! I’ll be back here in a few weeks. 



Saturday, January 15, 2022

Making Up For Lost Time

Farm fun.

We've had extra family in residence since a few days before Christmas. What a glorious time we've had! After so many months of not seeing grandchildren (because of Covid) and more months of only seeing them at a distance (because of Covid) we actually have been in the same house together for weeks. Making up for lost time. 

We have tried to cram in all activities and projects and activities we haven't been able to do in a long time. We sang Christmas carols around the campfire on Christmas Eve, complete with 3-part harmony. It's nice to be in a family of musicians. We celebrated Christmas and birthdays. We've read so many bedtime stories. The girls put on plays and puppet shows. They've had family hikes to the river.

Enchiladas Con Carne from The Defined Dish.

Mommy and J-Daddy have done most of the cooking the entire time, so we have feasted. (I pulled out the bigger jeans this morning.) I should have made photos of the wonderful meals to share with you. But I focused on making memories instead of photos. (Hint: Many of their recipes. including this one, come from The Defined Dish cookbook.) 

Racing down the hay bales.

The not-so-little-anymore girls had great fun playing on the hay bales in the pasture behind the house. Climbing up, running across the tops, jumping from bale to bale. The best kind of farm fun. They also helped Daddy-O feed the cows which includes tractor driving.

Notice the baby blanket cape?
I crocheted it for her mom.

Those same girls have baked. Little Sister made applesauce muffins last week. And this week Baby Girl baked blueberry muffins all by herself. Except for putting them in and out of the hot oven. She did the measuring and mixing. Grandmothers will let little people do more things than the mamas do. So what if part of the ingredients land on the floor? 


They have both worked on yarny things. Little Sister knows how to knit, but I've been surprised that Baby Girl is the one who seems to love needlework best. (And you know that may totally flip next week and Big Sister will be the yarn lover.) She's a whiz with a knitting spool. I got a knitted bracelet for Christmas. And about two weeks ago, I taught her to crochet. Yes. She's left handed. She was quick to learn. At age 7, she bounces between projects and activities, but she would come back to this again and again.

I had so much fun showing her how to get started that I thought maybe I should try a crochet project again. It has been decades since I crocheted anything. Back in the day, I crocheted afghans for everyone. That was before I knew much about knitting. And definitely before I though about keeping a record of all the ones I made. Photographing every thing we did was not a thing. But there were many many afghans. 

Baby afghan I made for Mommy 40 years ago.

I have never known much about crocheting. Just enough to made a ripple afghan, also known as a chevron blanket. which was popular in the 1970s. (You can find a more formal pattern with tutorial for a blanket similar to mine at this website. Look at her gorgeous colors.)  I made striped ones in college colors. I made ones in gradient stripes. I made them in smaller sizes in variegated baby colors. Some were made of beautiful wool yarn. But many were made of the lowly workhorse yarn Red Heart. It's all acrylic. And it lasts forever. I still have one wool afghan here...the first one I ever made. And I've mended holes in it so many times. But these acrylic ones? They look almost new.

Little Lady taking a pretend nap this morning.

Little Lady loves to snuggle up under this old ripple afghan I made for her mommy over 20 years ago. It's been tossed in the washer and dryer over and over. I imagine this afghan will be around long after I'm gone. We have a few baby afghans that were made for Mommy by neighbors who were contemporaries of my mother-in-law who would be almost 120 if she were still alive. Those old blankets are still beautiful and still in use.

Lots and lots of new yarn.

So with all of these memories and thoughts of crochet floating through my head this week, I ordered a boat load of Red Heart yarn to make another afghan. Baby Girl looked at all the yarn and declared, "It will take you YEARS to make a blanket." She might be right. But that's okay. 

Ripple Afghan made for Jessica about 20 years ago.

Here is the pattern that I've used over and over. I still have the sheet of notebook paper where I wrote down the directions so very long ago. It's not the best written one, but I managed with it for years. Because I didn't know the directions could have been better. 

RIPPLE AFGHAN

Hook: size H

Yarn: 12 skeins Red Heart (12 x 260 yds)


Still working from this pattern, written on a sheet of notebook paper over 40 years ago:


Chain 225 sts. Turn.  Skip 2 ch st.  *Sc in next 6 ch st, always working in the back of each stitch .  Make 3 sc in next ch st.  Sc in next 6 chain st. Skip 2 ch st.*  Repeat for length of chain.  Chain 1 at end of row. Turn. Skip 2 ch st. Repeat pattern for remaining rows.  


This is how the side edge looks if you use my very old pattern.
It's not a straight edge.


And guess what? There is a major winter storm predicted to move in tonight! So these folks are staying a little longer. The fun continues.


Sunday, January 2, 2022

2022 - The Year Of Low Expectations

Quick & Easy Cake w/One Minute Chocolate Frosting

We are leaving 2021 in the dust and stepping into 2022. The best words I've heard about the new year is to make this the year of low expectations. (Look for @sarcasticlutheran post on Instagram for her full New Year blessing.) Yep. You read it right. Low expectations. We've had two years of things not going as planned and disappointment on top of disappointment and having hopes dashed. So this year, let's start out expecting so little of the world, of ourselves and of others, that when anything at all goes right, it is a reason for delight. I am okay with that.

But we did start our year as we always do. With the traditional black eyed peas and collards meal on New Year's Day. We eat peas to insure we have plenty of coins jingling in our pockets and the collards are for dollar bills—folding money. There were fewer of us around the table this time, so I made fewer side dishes. And we survived.


And again, as always, we celebrated Mommy's birthday. They so often are traveling home on her actual birthday that is has become our tradition to combine the New Year's Day meal with her birthday cake.


I spent a good bit of time yesterday trying to find this chocolate frosting recipe here on my blog. I've made it many times and just assumed (you know what they say about "assuming") that I had posted it here. It was nowhere to be found.

I finally looked in a couple of other places and found a old printed copy, complete with butter stains on the page. This is an old, old recipe that makes a fudge frosting that hardens about as quickly as you put it on the cake. That makes it a perfect match for a 9x13-inch sheet cake. I pour it on and spread it as fast as I can. I didn't even stop to push "cancel" on the timer. 

I found this recipe years ago when I didn't have the ingredients for some other favorite frostings. This uses the most basic of ingredients that I always have on hand. And now the recipe is safely tucked away here in the recipe index where I can find it next time.

ONE-MINUTE CHOCOLATE FROSTING

1 cup sugar granulated sugar
1/4 cup cocoa
1/4 cup butter
1/4 cup milk
1 teaspoon vanilla

Melt butter in saucepan. Add sugar, cocoa, and milk to pan and stir. Bring to a full rolling boil and boil for 1 minute. Add vanilla. Remove from heat. Cool partially (not very long) and then beat with a mixer for 3 minutes or until spreadable consistency. Spread (or pour) on cake while the icing is still warm. It will get firm when it cools. 

I pour this over the 9x13 cake and work as quickly as possible. Next time I'll beat mine a little less than 3 minutes. 

Here is the cake I make most often. It never fails. 

QUICK AND EASY CAKE

2 cups self-rising flour 
1-1/2 cups sugar
1 cup oil
1 cup milk
3 eggs
1 teaspoon vanilla 

Mix all ingredients together in a large bowl. Beat until well mixed. This can be baked in layers or a 9x13-inch pan. (Greased and floured, of course. Or, use baking spray.) Bake at 350 degrees for 30 to 40 minutes, until golden brown and the top springs back when lightly touched.


There are a couple of other easy chocolate icing recipes here on the blog. And we also love the caramel frosting on this cake. We make the cake in layers for the caramel frosting.

I do not consider myself a cake baker, but with this basic cake recipe and these frosting recipes, I can get by.


Sunday, December 19, 2021

Merry Christmas To All!


I just put this on the stove. It's simmering right now. I'm taking a preemptive step. I'm trying to balance the holiday menus coming this week. I've made this soup so many times. Personally, I love vegetable soup that's full of potatoes and corn and beans. With a big piece of cornbread on the side. But this one is also good and has barely any starchy vegetables, thus it's lower in calories. And I'll have a couple of saltine crackers with it instead of cornbread. This time I did use two cups of low-sodium chicken broth as part of the liquid for a bit more flavor.

According to the original source, this soup keeps in the fridge for five days. So I have lunch ready from now until Christmas Eve. It's so much easier to make a healthy meal choice when it's ready and waiting in the refrigerator. 

Not-Quite-Free Soup (photo from months ago)

You might rather hang on to this recipe for after the holiday when you are ready for a reset after maybe too much food. I'll probably make it again then.


NOT-QUITE-"FREE" SOUP

1 16- oz bag frozen vegetables for soup
1/2 head cabbage, finely chopped
1 onion, diced (I only had a 1/2 onion)
1 15-oz can cut green beans 
1 28-oz can crushed tomatoes
1 pkg dry Ranch Dressing mix
5-6 cups water
freshly ground black pepper, to taste 

Put all ingredients into a pot. Bring to a boil. Lower heat and simmer for 45 minutes or longer, until vegetables are as tender as you like them.

~~~~~~~~~~~~~~~~~~~~~~~~~~

And here is another favorite recipe when you want to eat lighter. All of this "free" and "zero point" stuff refers to WW (formerly Weight Watchers.) They have changed their system again so I have no idea how you count this anymore. 

I'm pretty sure this recipe would work well in the slow cooker if you don't use an Instant Pot.

ZERO POINT CHICKEN TACO SOUP (Instant Pot) 
        ...recipe from SlapDashMom.com (check her site for other good recipes)

1 small onion, chopped
1 (15-oz) can black beans, drained
1 (15-oz) can light red kidney beans, drained
1 (8-oz) can tomato sauce
10-oz bag frozen corn
2 (10-oz) cans Rotel tomatoes (I used Mild)
1 packet taco seasoning (I used mild, low-sodium)
1 teaspoon cumin
1 teaspoon chili powder
2 boneless, skinless chicken breasts (fresh or frozen)
1/2 cup water

Place all ingredients into pot. Put lid on, close and set vent to "seal." Use manual button and set to 8 minutes. Let it "natural release" for at least 10 minutes. (Longer is fine.) Then release remaining pressure, if there is any. Remove chicken and shred with two forks. Add shredded chicken back into soup. Serve. 


This is more like a chili than a true soup, but it's yummy. It's gluten-free. And it freezes beautifully. You can certainly cook this in something besides an Instant Pot. I used my IP last night and carried it to the dinner in the pot because the lid fastens securely and I could plug it in when I got there to keep it warm.


And I'm closing the lid on my computer now. I'll see you here after the holidays. Take care of yourself in these coming busy days. 


Sunday, December 5, 2021

Correction: Check The Skillet Apple Pie Recipe

If you read the previous post right after I hit "publish" and you plan to make this pie, you need to make sure you see that I've corrected the recipe. It calls for FOUR pounds of apples. Not two like I wrote. Good thing I had more coffee this morning and saw my mistake.

Here is the entire recipe again. With the proper amount of apples. It has also been corrected on the previous post. You probably would have figured out when you made it that it needed more apples. They should be piled high in the pan.

EASY SKILLET APPLE PIE 

4 lbs apples, half Granny Smith & half Braeburn or Macintosh
good squeeze of lemon juice
1 teaspoon cinnamon
3/4 cup sugar
pinch of salt
1/2 cup butter (1 stick)
1 cup firmly packed brown sugar
1 box refrigerated pie crust (2 crusts per box)
1 egg white
2 tablespoons sugar

Preheat oven to 350º. Peel and slice apples into 1/2 inch slices. Squeeze lemon juice over apples and toss.  Then toss apples with cinnamon and 3/4 cup sugar.
Melt butter in 10-inch cast iron skillet over medium heat. Stir in brown sugar and cook, stirring constantly, for 1 to 2 minutes until sugar is melted. Remove from heat and place one pie crust on top of butter mixture. Spoon apples over pie crust. Top with remaining pie crust. (I didn't try to crimp the edges because the pan is hot. Just tuck in anything that hangs over.) 
Whisk egg white until foamy and brush over crust. Sprinkle with sugar. Cut slits in the top crust so the steam can escape. 
Bake for 1 hour to 1 hour 10 minutes, until golden brown and bubbly. If the crust is browning too quickly, shield with foil for the last 10 minutes.
Cool for 30 minutes before serving. And y'all...it begged for a scoop of vanilla ice cream on top!


Sorry, y'all. I'll try to do better. 


Saturday, December 4, 2021

Looking Back At Thanksgiving

Skillet Apple Pie

This look at our Thanksgiving nearly got lost when I interrupted my blogging to add the paper angel how-to a few days ago. But this recipe is too good and too easy not to share. You'll find the recipe at the end.


We had a revolving door kind of family gathering. But we did get to see everyone but J-Daddy who had to stay home while some home repairs were in progress. Our little girls are becoming big girls.


As soon as they headed home the other set of family arrived. I really think they waved at each other as they were coming and going up and down I-85. This smallest granddaughter is learning all about life at the farm. She is an independent little thing who has learned about opening and closing pasture gates already. And she had a go at driving the tractor with Daddy-O. That's a rite of passage here.


And on our last night of family time we enjoyed a backyard bonfire. We never got to the marshmallow part of this evening, so we will likely have Christmas s'mores in a few weeks. (FYI...this was our first fire in our Solo fire pit. It does indeed work as advertised.)


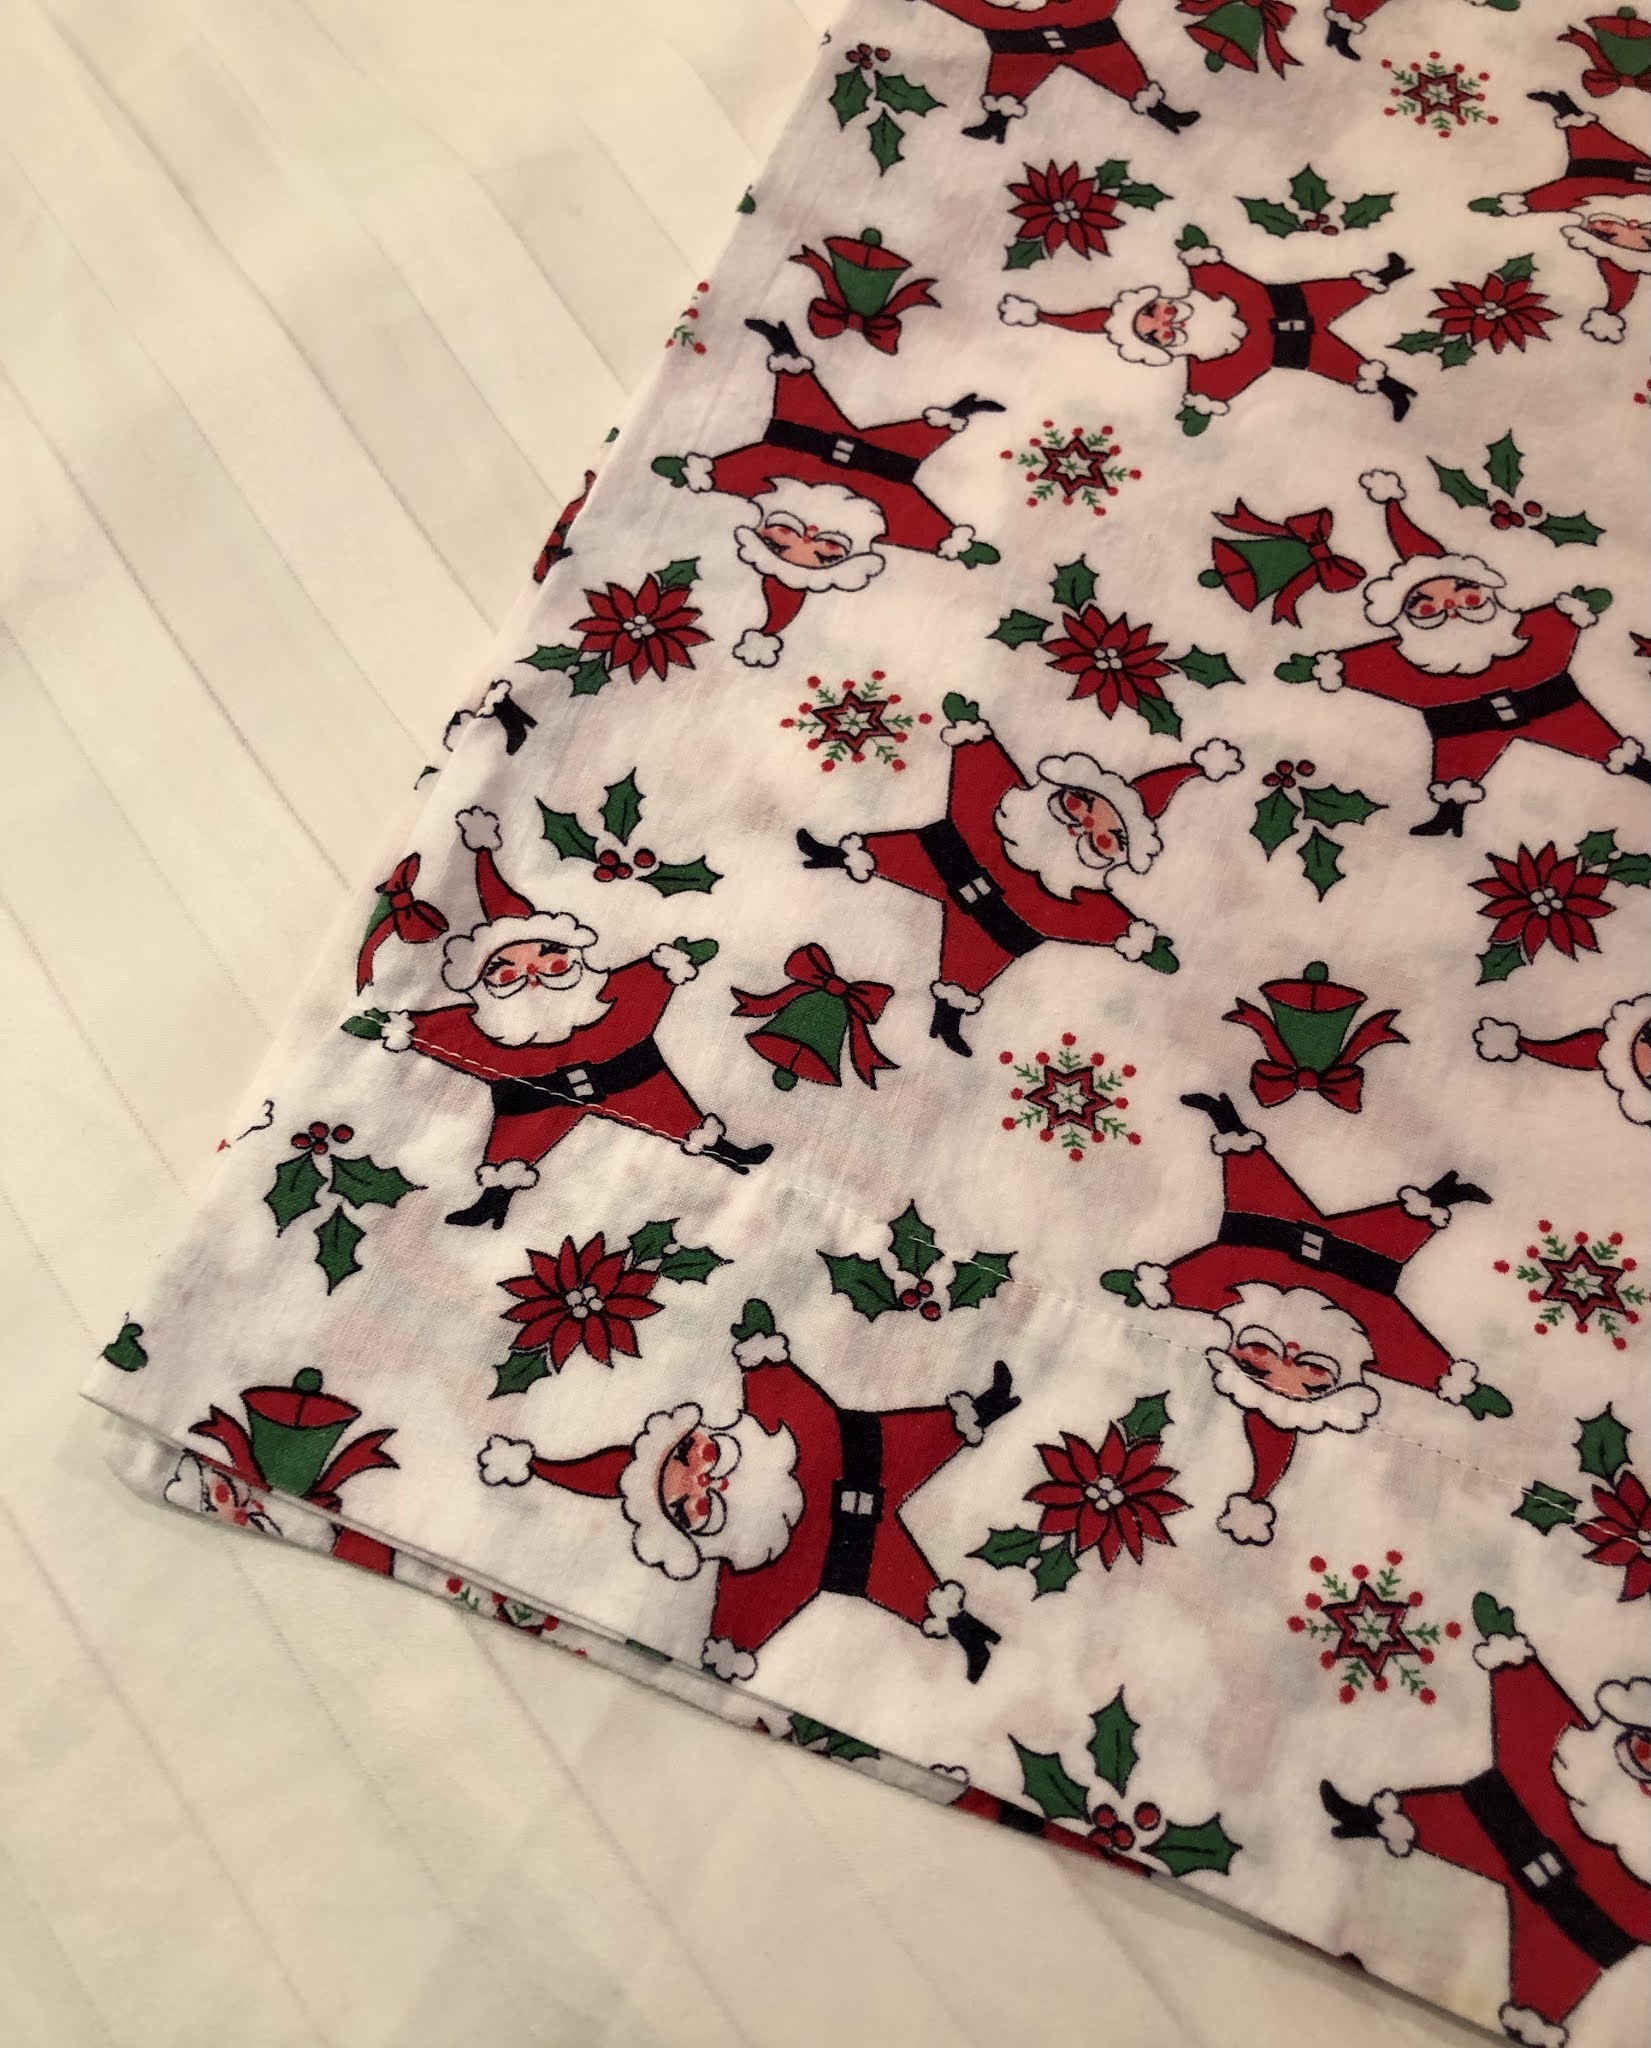
I promise. I'm getting to the pie recipe. But I wanted to talk about pillowcases for just a minute. The Santa Claus pillow case here was made by my mother many many years ago. Our children, and now our grandchildren look forward to sleeping on them Christmas Eve. I have four of these. It's a family tradition that I'm sure my mother never anticipated would last this long. She really was not a maker in general. Except for these pillow cases that I've had for decades now. 

I've found that the best traditions are the ones that just happen. I've never had much luck with intentional plans to create a tradition. But I treasure these that create themselves.


In that spirit, daughter Jessica wanted a set for her house. I think the plan—in the beginning—was that she was going to make some herself. But along came a baby and a house move and she sent up the mom-style bat signal. And even then I let that fabric sit on my sewing machine for a long time. 

But this Christmas they are in their new old (as in historic) house and it was time. I whipped myself into action just days before they came for Thanksgiving and sent her home with two sets. Two pillow cases for a queen bed and three for the king size bed.


I had let this fabric sit on my sewing machine for a long time. And then I LOVED working with this fabric. It felt so good in my hands. I can imagine how good they will feel at bedtime. Jessica found this cotton Tana Lawn by Liberty online and ordered both colors because she loved the whimsical Christmas print.


Because the fabric was so special I made these pillow cases with French seams that will wear well.  Hopefully Jessica will be tucking in her grandchildren on Christmas Eve years from now and tell about Mimi who made the pillow cases.


And now to the pie recipe. Finally. It was the easiest thing to make. And it makes a great presentation in the skillet. I'm sending a big thank you to my friend Missy who texted me the recipe and said, "also made this...a huge hit!" Missy is one of those friends who never steers me wrong in the kitchen. (Notice she said "also." I'll get to her other recipe soon.)

When I started this, I envisioned a sticky, hard-to-clean mess in the bottom of the skillet. But as it baked it turned into a thinner caramel type syrup. Cleaning was no problem. Hang on to this recipe. It's easy enough for a family supper and good enough for a company meal. 


4 lbs apples, half Granny Smith & half Braeburn or Macintosh
good squeeze of lemon juice
1 teaspoon cinnamon
3/4 cup sugar
pinch of salt
1/2 cup butter (1 stick)
1 cup firmly packed brown sugar
1 box refrigerated pie crust (2 crusts per box)
1 egg white
2 tablespoons sugar

Preheat oven to 350º. Peel and slice apples into 1/2 inch slices. Squeeze a little lemon juice over apples and toss. Then toss apples with cinnamon and 3/4 cup sugar and a pinch of salt.
Melt butter in 10-inch cast iron skillet over medium heat. Stir in brown sugar and cook, stirring constantly, for 1 to 2 minutes until sugar is melted. Remove from heat and place one pie crust on top of butter mixture. Spoon apples over pie crust. Top with remaining pie crust. (I didn't try to crimp the edges because the pan is hot. Just tuck in anything that hangs over.) 
Whisk egg white until foamy and brush over crust. Sprinkle with sugar. Cut slits in the top crust so the steam can escape. 
Bake for 1 hour to 1 hour 10 minutes, until golden brown and bubbly. If the crust is browning too quickly, shield with foil for the last 10 minutes.
Cool for 30 minutes before serving. And y'all...it begged for a scoop of vanilla ice cream on top!


I set my skillet on a cookie sheet just in case anything dripped while baking. It did not. But it turned out the pan made it easier to get the skillet into and out of the oven. 


Tuesday, November 30, 2021

Paper Angels


Years ago I attended a community Christmas dinner at Mommy's church and I remember walking into their gym and seeing the many tables beautifully decorated with angels. So many angels. When I looked closer, I saw that each angel was simply cut from a single sheet of heavy white paper, like card stock or cover stock.

I did not take one of the angels from the table when the meal was over. My mother taught me not to take without asking. But later thanks to heroic efforts by Mommy and one of the associate ministers at that church, they tracked down a paper angel for me. And they shared a website that showed how to fold these adorable angels. The directions were in some slavic language, but the pictures were useful.

Jessica and I made stacks of these angels for a cattlemen's dinner the following year. And yay for me, I saved the angels and added them to my accumulation of Christmas table decorations. (I decorated for the cattlemen's association for years.) So when a friend asked this week if I remembered how to make the angels, I told her we could use one of mine to trace some for her. I thought it would be good for Joanne to see the original link but I cannot find that original site. I thought it might be wise to make a new set of instructions right here. In English.

These are so easy to make. And they are extremely economical. It just takes time. The tracing was the hardest part. This morning I realized that as I was making a new, more permanent pattern, I could print the cutting lines and eliminate the tracing.
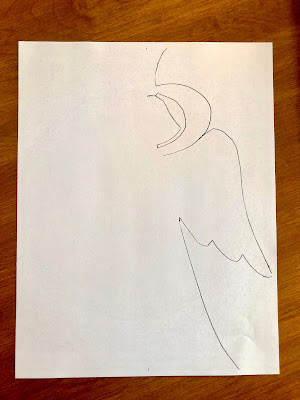

This is what the printed pattern looks like.
Fold it in half to cut.


If you trace by hand, you would fold the paper first and place your template on the fold.
YOU CUT THIS OUT FOLDED!


When I first saw the pattern I thought that cutting out the interior around the head was going to be impossible without tiny sharp scissors. But then realized that if you cut the line above the head (see blue arrow) first, you just keep cutting around the arms and head. Then it was pretty simple.


I cut this one with my not-so-sharp scissors I use for gift wrap.


It's possible that you might need to smooth out the printed/traced lines as you cut. And when I printed the pattern, the lines didn't quite reach the edge of the paper. You crafty people can extend it to the edge. Try to cut so that the pencil/printer line is cut off. My goal was to have a pure white angel. I didn't always achieve my goal.


Open the paper enough to make the angel stand, arms straight up.


Fold the arms and trumpet forward, giving a little pinch at the shoulders.


And then fold the arms down, pinching the "hands" at the trumpet.


You can download the PDF for the angel pattern here: Paper Angel Template   I hope. I've never attached a PDF to the blog. If you are the artsy type, you could freehand the pattern onto folded paper and make a template.


Friend Joanne is going to put an angel on a charger plate with greenery and votive candles. I honestly don't remember exactly how I used them on the tables years ago. I do remember that the air from the heat vents would blow them over. They are only paper. So I taped them to the table on the back side.