Showing posts with label Sweets. Show all posts

Monday, May 29, 2023

Hey Cookie!

Chocolate Chip Cookies

We headed down the interstate over the weekend. It was a holiday, the end of school and a dance recital all rolled into one. All things to be celebrated. It was a delightful surprise to walk in the front door and find that Little Sister was in the middle of baking cookies as a welcome treat.

She has become quite the cook. She bakes. She makes entire meals now. How good it has been to watch her kitchen skills increase. You'll have to ask her mom how good her kitchen cleaning abilities are.


Baby Girl has been working hard on her tumbling skills. How she bends, flips and twists like that is beyond me! I tell her she must be made of rubber. We enjoyed the entire recital. From the tiniest ballet dancers to the graduating seniors who have studied dance for 15+ years. As a former dance mom, let me say this was the best organized recital I've ever attended. One number flowed right into the next. The program lasted about 90 minutes but it felt much shorter. It takes masterful planning for that to happen.

And we had the added pleasure of sitting in the new performing arts center that is part of the county school district. It is truly first class. Thankfully (for us) Baby Girl's recital was in the morning (there were 3 recitals that day) so we were able to go out for lunch afterward.


Then we headed home to enjoy these special cookies. There are many good recipes for chocolate cookies. This one is as good as any I've ever had. Little Girl asked for a cookbook for Christmas last December. I gave her the White Lily cookbook and she has been steadily working her way through it. I have sampled a few of her creations. Everything has been delicious.

This recipe says it make 36 cookies. Little Sister went for bigger cookies and made 24. I love that she's gaining the confidence to make a recipe her own. And I completely approve of her adjustment. These were big cookies, but not giant. They were just right. They were crisp on the edges, tender on the inside. Exactly how I like them.

Chocolate chip cookies made into ice cream sandwich.

I didn't think about a photo until I reached into the bag for a second cookie.

CHOCOLATE CHIP COOKIES (from White Lily)

1 cup unsalted butter, softened

1 cup firmly packed light brown sugar

1/2 cup granulated sugar

2 eggs, lightly beaten, room temp

2 teaspoons vanilla extract

3 cups White Lily all-purpose flour

1 teaspoon baking soda

1/2 teaspoon salt

1 (12-oz) bag chocolate chips


In a large mixing bowl, beat butter and sugars with a mixer at medium speed until fluffy, 3 or 4 minutes, stopping to scrape sides of bowl. Beat in eggs and vanilla until light and fluffy.


In a medium bowl, stir together flour, baking soda and salt. Add flour mixture to butter mixture all at once. Stir in chocolate chips. Refrigerate for at least 1 hour.


Preheat oven to 375ยบ. Line baking sheets with parchment paper. Using 2-tablespoon scoop, scoop dough and place 3-inches parts on prepared pans.


Bake until bottoms are golden brown, 8-10 minutes. Let cool on pans for 5 minutes. Remove from pans to wire racks and let cool completely.


Makes 36 cookies.


NOTE:  Little Sister used the next larger size scoop and made 24 cookies and adjusted the baking time accordingly.


The Kitchen Tip in the cookbook says you can freeze the scooped dough balls for up to 3 months and then bake them a few at a time when you want warm cookies.


Wednesday, May 10, 2023

Vintage Dessert

I’m on grandmother duty but I wrote this post before I left home. 

Chocolate Eclair Cake

Here's another vintage recipe. This is the dessert I served to my book club pals. The recipe can be made ahead and it's really easy. The recipe has been around a long time but this was the first time I've made it.  It isn't really a cake at all. And it's not baked. It's assembled. It was very popular a few decades ago and it still shows up at church dinners from time to time. So I've enjoyed it at those occasions.

But there's another reason this recipe holds a special memory for me. When my girls were about middle school age, a dear friend called me one day and said, "I've made your dinner for tonight. Stop by and pick it up when you're out." Now, I live in an area where taking a meal is common when there is an illness, a death or a new baby. But I'd never heard of anyone sending you supper "just because." There should be more people like my friend.

She was older than I and she knew all about those crazy years of driving kids back and forth to school and the after school activities. I practically lived in my car. Putting dinner on the table was one more thing on my long to-do list. On this one wonderful day we had a home cooked dinner and I didn't have to make it.

I cannot remember what the meal was but I've never forgotten the dessert. And after all the years I made it myself. 

You can find newer versions of this no bake cake that use a homemade chocolate ganache instead of canned frosting. But let's be honest. We've already used instant pudding and Cool Whip for this dessert, so the recipe isn't going to be "real" or "whole" food anyway. Canned frosting surely was easy. I had never microwaved it to make it pourable. But it worked really well. Tastes good, too.


CHOCOLATE ECLAIR CAKE


1 (14.4-oz) box graham crackers

3 cups milk

2 (3-oz) packages of instant French vanilla pudding mix

1 (8-oz) Cool Whip, thawed

1 (16-oz) can chocolate fudge frosting


Spray a 9x13-inch pan with cooking spray. Place a single layer of graham crackers in the bottom of dish. Break some cookies, if necessary, to fill in spaces. 


In a large bowl, whisk together the milk and two packages of pudding mix. Mix until smooth. Let sit for 5 minutes. The fold in whipped topping.


Spread half the pudding mixture over the crackers. Top with another layer of crackers, then spread the remaining pudding mix over. Top with a third layer of crackers.


Remove the lid and foil liner from can of frosting. (Be sure to remove all the foil.) Microwave the canoe frosting for 20-30 seconds, or until frosting is pourable. 


Pour frosting over the top layer of graham cracker and spread to cover with offset spatula.


Cover and refrigerate until ready to serve. Best made 8 to 24 hours ahead to let crackers soften. (I used a 9x13-inch dish with a lid instead of covering with plastic wrap. If the plastic touches the frosting, it won’t be smooth.)


Any leftovers can be frozen for up to 3 months. Which reminds me.....there is a little left in our freezer!
 

Tuesday, October 11, 2022

The Best Kind Of Friends


There is nothing like having good friends. Good friends who've known you for a long time. A couple of these friends hosted a bridal brunch recently. There were two quiches left over, along with an extra loaf of zucchini bread. "Come on! Let's finish up the quiche." That's the kind of invitation that goes only goes out to really good friends. And five of us gathered around the table to enjoy this feast.

I do wish I had made a photo of the plate. It was as beautiful as the original brunch plate. And every bit as delicious. These ladies all are fabulous cooks. And I was happy to get a chance to enjoy the bounty. Their menu was ham and broccoli quiche, fruit salad "boats" and zucchini bread. The plate was colorful with the perfect variety of textures. Every morsel was scrumptious.

Two small romaine leaves were fitted together to make a "boat" to hold the fruit. The assorted fresh fruit that filled the boats was diced and then sprinkled with pomegranate seeds. All those colors! Again. I should have made a photo. But I was starving and didn't think about it until after we finished.

Lemon Daffodil Dessert

Joanne said, "I can make you another dessert plate. Then you can take a picture of that."  Of course I said yes. Then  I took that extra plate home for Daddy-O. He loves that all of my friends are good cooks.

Out of curiosity I googled "lemon daffodil dessert." Oh my goodness. There are several ways to make this. There are lemon daffodils cakes, too. But it looked like most of the recipes are from three or four decades ago. It was interesting that most of them called for "commercial" angel food cake. Makes me think there was one original recipe that got passed all over the south. They all used that word "commercial." I think I would have said "bought." 

This version is from one of those community cookbooks that has the best recipes. And you can look at this page and tell it's a favorite cookbook. I don't have this one in my collection (it belongs to Joanne) but I'm curious to know what the rest of their menu was. 

Old cookbooks often are vague with their instructions. *New cooks...know that everything here is fine to eat as is, so you can vary the amounts if you want to. Or need to.* Here is the lemon dessert the way Joanne makes it.

LEMON DAFFODIL DESSERT

Juice of 4 lemons

1/2 cup sugar

1 (14-oz) can condensed milk, such as Eagle Brand

most of a large container of Cool Whip

purchased angel food cake, enough to cover bottom of pan

Combine juice, sugar, milk. Fold in Cool Whip. Tear cake into small pieces and cover the bottom of a 9x13-inch pan. Pour lemon mixture over cake pieces and mix together a little. Save enough Cool Whip mixture to spread over the top to make it smooth. Cover and chill for 24 hours before serving. 


And now you want to know about that cute dish towel at the top? Some of these ladies had made a trip to the mountains to buy apples last week while I was away. I couldn't go with them but they bought me a treat.Yep. Friends. The good kind.


PS....We have a house full of grandbabies all week, so no new blog posts until they head home. And I recuperate.


Monday, August 29, 2022

Doing Nothing? Hardly

Do Nothing Cake 

My blog breaks keep getting longer and longer, don't they? What can I say. I'm getting older and older. We have had a strange month here but things are getting back to normal. So I was back in the kitchen today. It's my turn to take dessert to book club. 

Easy Skillet Apple Pie

I planned to take somthing easy--like the Easy Skillet Apple Pie. It's always a winner. And it's a little bit of a show off recipe when you walk in with a cast iron pan. Easy to make, but I needed a trip to the store for apples and pie crust and ice cream.  Then my day didn't start like I thought it would. 

Brownie Pudding

Not to worry. I decided I would make a Brownie Pudding like the granddaughters baked this summer. Even easier to make than the apple pie. We have never had it at book club and I had all the ingredients here. It's so good. But it's so much better with ice cream. That still meant a trip to the grocery store. Time to change gears one more time.

Do Nothing Cake

Do Nothing Cake!!! Even the name suited my situation. A quick check in the pantry yielded both cans of crushed pineapple–a 15-oz can for the cake and an 8-oz can for the frosting. The only other ingredients are self-rising flour*, sugar, eggs and vanilla. It is a rare day when I don't have those basics on hand. Best of all...I didn't need ice cream! NO shopping needed today.

If you google "do nothing cake" the traditional recipes have a coconut-pecan topping. Life is better for Daddy-O when he avoids nuts so when I saw this recipe in our rural electric co-op magazine years ago, I knew we needed to switch it up. I found this pineapple topping online and it worked so well that I can't imagine this cake any other way now.

It has been 10 years since this recipe has been here on the blog. It is definitely time to re-introduce it. 

DO NOTHING CAKE

2 cups self-rising flour
2 cups granulated sugar
2 eggs
1 teaspoon vanilla
1 large can (15-oz.) crushed pineapple

Preheat oven to 350 degrees. Blend all ingredients together with a spoon. Pour into a greased and floured 9x13-inch baking pan. Bake for 25-35 minutes, or until golden brown and a toothpick inserted into the center comes out clean.

Icing:
1/2 stick butter
1-1/2 cups powdered sugar
1 cup crushed pineapple, drained

Combine ingredients in a bowl. Blend well. Pour over hot cake.

PS...the cake was even better the next day. More moist.


All of the desserts linked above are delicious. All are pretty simple to make. But this cake is hands down the easiest to make and the easiest to take. One dish. No ice cream to keep frozen on someone else's kitchen. And it is every bit as delicious as the others. This is a moist, tender cake that we have loved for years.


*If you do not keep self-rising flour on hand, you can also google "do nothing cake" and find recipes that use plain flour, baking powder and salt. 


Tuesday, July 19, 2022

Mimi Camp Has Come And Gone


Mimi Camp this year started as soon as we got home from the lake. And unlike all the other years it started without a plan because we had been busy with the family at the lake and with the lake renovations before that. But because we had skipped two Covid years we were determined to do something. This is just a peek at a few of the things we did. And we had two recipes worth sharing. 


I crawled into bed the first night home from the lake after tucking the girls into their beds and I laid there wondering what on earth we could do in the morning. And what was I going to put in ''the box." I was hoping they wouldn't remember that we usually start our camp day by opening the official Mimi Camp box to see the clues for the day's activity. (They remembered.) I couldn't even find the actual box but thankfully had an empty box with a lid that hadn't made it to the trash dump yet. 


Early that first morning I filled it with an assortment of fruits and vegetables from the fridge. Some were wilted and about to be tossed anyway. But they were a great for creating food art. They added herbs from the garden. The girls worked all afternoon making food paintings. We talked about different ways to see ordinary things.


I can't even begin to put the rest of the week in order, but there was fishing at the pond behind the house. And a picnic. On a blanket. On the ground. 


According to Baby Girl that's the definition of a real picnic. It has to be on a blanket on the ground. We came home with no fish but it was all great fun.


Another morning they found my gallon jar of buttons in the box along with an old flannel shirt that Daddy-O sacrificed to the cause. We cut off the sleeves and cut off the cuff button and learned to sew that button back on. I wanted them to be able to button it back up. Button sewing turned out to be the sleeper hit of the week. They kept sewing buttons. Both girls agreed the hardest part was tying the knot in the thread.


I thought we would have fun going through an old cookbook of mine that has a chapter of recipes for each decade from the 1930s to the 1970s. The plan was to find a recipe from each decade. We started off with a bang and made ice cream from the 1930s the first night. This is the 1930s recipe. 

PEPPERMINT ICE CREAM

2/3 cup sweetened condensed milk
1/2 cup water
1/2 teaspoon peppermint extract
3 drops red food coloring (I was out of red, so we used green)
1 cup whipping cream

Combine the condensed milk, water, extract and food coloring. Whip cream until thick and custard like and fold into the peppermint mixture. Pour mixture into a 3-cup refrigerator tray. Freeze until partially frozen. Break mixture into chunks into a chilled mixer bowl. Beat until smooth. Return to cold refrigerator tray. Freeze until firm. Makes 3 cups.


Since our ice cream had to be green, Baby Girl said, "Isn't it supposed to have chocolate chips in it?" So we added those. And Little Sister asked, "Why can't we use your little churn?"  I explained about refrigerator freezer desserts from way back. (My mother made a great frozen lemon dessert in a metal ice cube tray.) But then thought she might be on to something. So we skipped the "beat the cream" part and mixed it all together and poured into my countertop churn. 1930s meets 2022. Worked like a charm.


When the girls got up another morning, they found a five pound bag of flour in the box. And each girl separately made a loaf of no-knead bread. The only thing I did was move the heavy Dutch oven in and out of the hot oven. If Mimi Camp had badges, both of them would have earned the bread baking badge.


The next night Little Sister made caprese skewers for a late afternoon snack on our patio and we added some bread wedges to our tray.


And Daddy-O used the very last of the bread for French toast on Saturday morning. We didn't want to waste a crumb of their delicious bread.


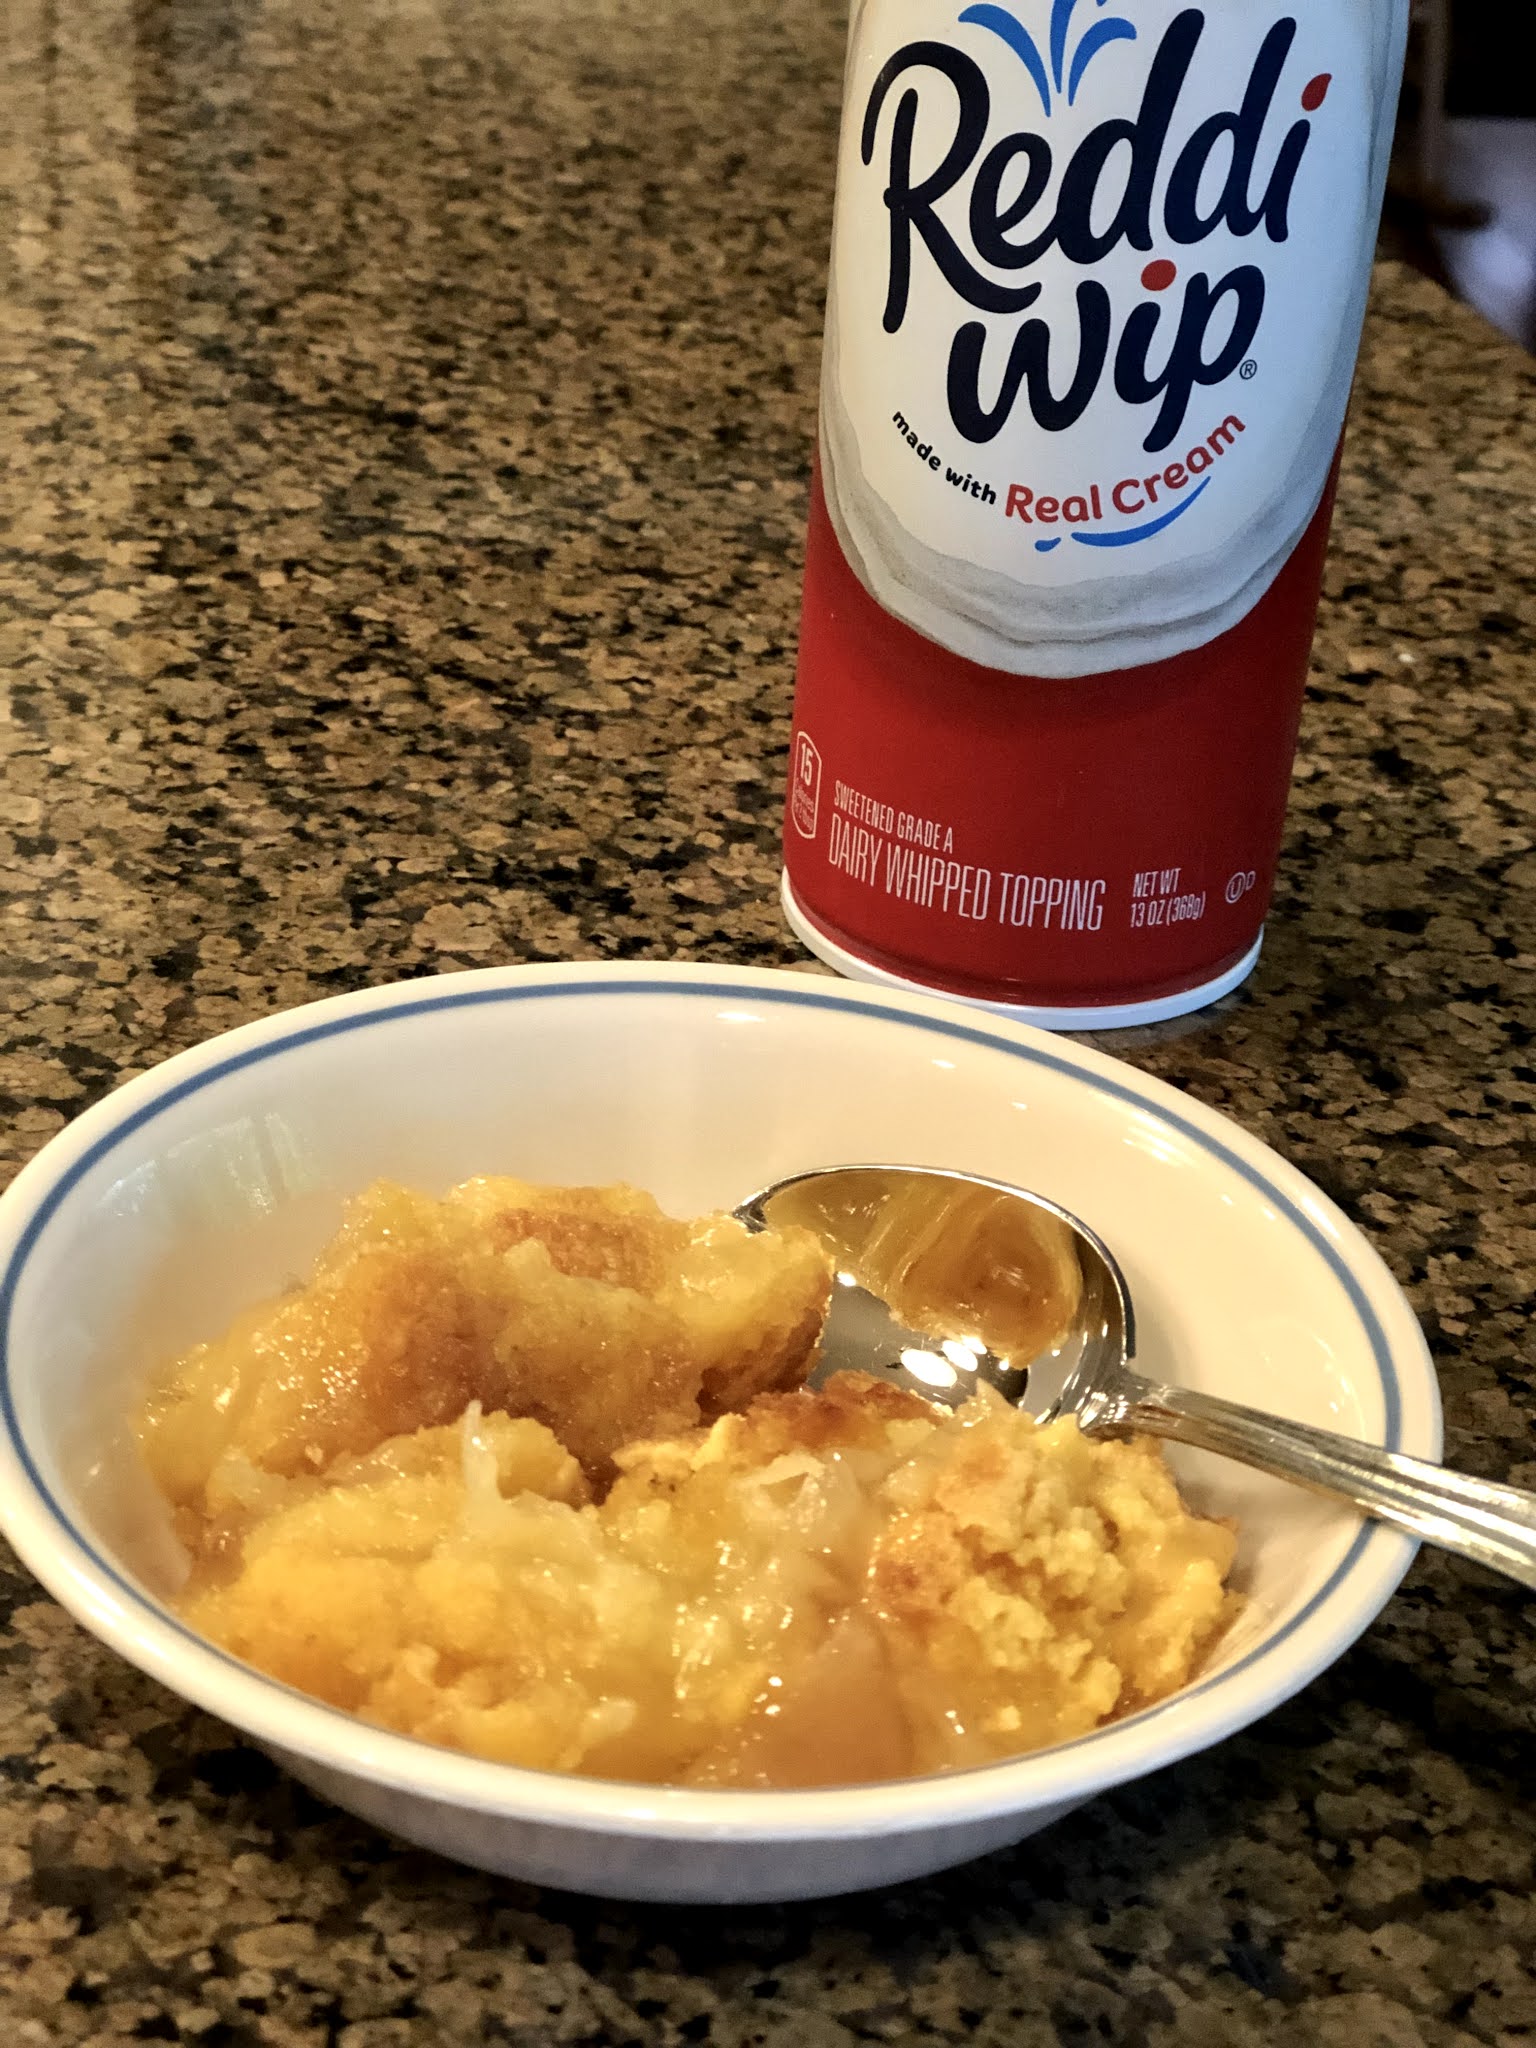
Our "foods from the decades" exploration had one more success when they made brownie pudding from the 1940s. After that, they looked at the 1950s recipes and decided to abandon this project when they saw shrimp in jello. EVERYTHING was in jello in the fifties! 

BROWNIE PUDDING

1 cup all-purpose flour

3/4 cup granulated sugar

2 tablespoons unsweetened cocoa

2 teaspoons baking powder

1/2 teaspoon salt

1/2 cup milk

2 tablespoons cooking oil

1 teaspoon vanilla

3/4 cups packed brown sugar

1/4 cup unsweetened cocoa powder

1-3/4 cup hot water


Stir together flour, sugar, 2 tbsp cocoa, baking powder and salt. Mix in milk, oil and vanilla. Pour into greases 8x8-inch baking pan. Combine brown sugar, 1/4 cup cocoa and hot water; pour over batter. Bake at 350ยบ for about 40 minutes. Serves 6 to 8. 

The chocolate sauce layer on the bottom gets thicker as it cools. We liked ours warm, not hot.


So much more happened. But this hits the highlights. If I'm a smart Mimi I'll start collecting ideas for another camp right now. Baby Girl informed me that she planned to come to Mim Camp until she finished high school. Maybe college. "By then I'll have learned all that Mimi knows." 


Sunday, January 2, 2022

2022 - The Year Of Low Expectations

Quick & Easy Cake w/One Minute Chocolate Frosting

We are leaving 2021 in the dust and stepping into 2022. The best words I've heard about the new year is to make this the year of low expectations. (Look for @sarcasticlutheran post on Instagram for her full New Year blessing.) Yep. You read it right. Low expectations. We've had two years of things not going as planned and disappointment on top of disappointment and having hopes dashed. So this year, let's start out expecting so little of the world, of ourselves and of others, that when anything at all goes right, it is a reason for delight. I am okay with that.

But we did start our year as we always do. With the traditional black eyed peas and collards meal on New Year's Day. We eat peas to insure we have plenty of coins jingling in our pockets and the collards are for dollar bills—folding money. There were fewer of us around the table this time, so I made fewer side dishes. And we survived.


And again, as always, we celebrated Mommy's birthday. They so often are traveling home on her actual birthday that is has become our tradition to combine the New Year's Day meal with her birthday cake.


I spent a good bit of time yesterday trying to find this chocolate frosting recipe here on my blog. I've made it many times and just assumed (you know what they say about "assuming") that I had posted it here. It was nowhere to be found.

I finally looked in a couple of other places and found a old printed copy, complete with butter stains on the page. This is an old, old recipe that makes a fudge frosting that hardens about as quickly as you put it on the cake. That makes it a perfect match for a 9x13-inch sheet cake. I pour it on and spread it as fast as I can. I didn't even stop to push "cancel" on the timer. 

I found this recipe years ago when I didn't have the ingredients for some other favorite frostings. This uses the most basic of ingredients that I always have on hand. And now the recipe is safely tucked away here in the recipe index where I can find it next time.

ONE-MINUTE CHOCOLATE FROSTING

1 cup sugar granulated sugar
1/4 cup cocoa
1/4 cup butter
1/4 cup milk
1 teaspoon vanilla

Melt butter in saucepan. Add sugar, cocoa, and milk to pan and stir. Bring to a full rolling boil and boil for 1 minute. Add vanilla. Remove from heat. Cool partially (not very long) and then beat with a mixer for 3 minutes or until spreadable consistency. Spread (or pour) on cake while the icing is still warm. It will get firm when it cools. 

I pour this over the 9x13 cake and work as quickly as possible. Next time I'll beat mine a little less than 3 minutes. 

Here is the cake I make most often. It never fails. 

QUICK AND EASY CAKE

2 cups self-rising flour 
1-1/2 cups sugar
1 cup oil
1 cup milk
3 eggs
1 teaspoon vanilla 

Mix all ingredients together in a large bowl. Beat until well mixed. This can be baked in layers or a 9x13-inch pan. (Greased and floured, of course. Or, use baking spray.) Bake at 350 degrees for 30 to 40 minutes, until golden brown and the top springs back when lightly touched.


There are a couple of other easy chocolate icing recipes here on the blog. And we also love the caramel frosting on this cake. We make the cake in layers for the caramel frosting.

I do not consider myself a cake baker, but with this basic cake recipe and these frosting recipes, I can get by.


Saturday, December 4, 2021

Looking Back At Thanksgiving

Skillet Apple Pie

This look at our Thanksgiving nearly got lost when I interrupted my blogging to add the paper angel how-to a few days ago. But this recipe is too good and too easy not to share. You'll find the recipe at the end.


We had a revolving door kind of family gathering. But we did get to see everyone but J-Daddy who had to stay home while some home repairs were in progress. Our little girls are becoming big girls.


As soon as they headed home the other set of family arrived. I really think they waved at each other as they were coming and going up and down I-85. This smallest granddaughter is learning all about life at the farm. She is an independent little thing who has learned about opening and closing pasture gates already. And she had a go at driving the tractor with Daddy-O. That's a rite of passage here.


And on our last night of family time we enjoyed a backyard bonfire. We never got to the marshmallow part of this evening, so we will likely have Christmas s'mores in a few weeks. (FYI...this was our first fire in our Solo fire pit. It does indeed work as advertised.)


I promise. I'm getting to the pie recipe. But I wanted to talk about pillowcases for just a minute. The Santa Claus pillow case here was made by my mother many many years ago. Our children, and now our grandchildren look forward to sleeping on them Christmas Eve. I have four of these. It's a family tradition that I'm sure my mother never anticipated would last this long. She really was not a maker in general. Except for these pillow cases that I've had for decades now. 

I've found that the best traditions are the ones that just happen. I've never had much luck with intentional plans to create a tradition. But I treasure these that create themselves.


In that spirit, daughter Jessica wanted a set for her house. I think the plan—in the beginning—was that she was going to make some herself. But along came a baby and a house move and she sent up the mom-style bat signal. And even then I let that fabric sit on my sewing machine for a long time. 

But this Christmas they are in their new old (as in historic) house and it was time. I whipped myself into action just days before they came for Thanksgiving and sent her home with two sets. Two pillow cases for a queen bed and three for the king size bed.


I had let this fabric sit on my sewing machine for a long time. And then I LOVED working with this fabric. It felt so good in my hands. I can imagine how good they will feel at bedtime. Jessica found this cotton Tana Lawn by Liberty online and ordered both colors because she loved the whimsical Christmas print.


Because the fabric was so special I made these pillow cases with French seams that will wear well.  Hopefully Jessica will be tucking in her grandchildren on Christmas Eve years from now and tell about Mimi who made the pillow cases.


And now to the pie recipe. Finally. It was the easiest thing to make. And it makes a great presentation in the skillet. I'm sending a big thank you to my friend Missy who texted me the recipe and said, "also made this...a huge hit!" Missy is one of those friends who never steers me wrong in the kitchen. (Notice she said "also." I'll get to her other recipe soon.)

When I started this, I envisioned a sticky, hard-to-clean mess in the bottom of the skillet. But as it baked it turned into a thinner caramel type syrup. Cleaning was no problem. Hang on to this recipe. It's easy enough for a family supper and good enough for a company meal. 


4 lbs apples, half Granny Smith & half Braeburn or Macintosh
good squeeze of lemon juice
1 teaspoon cinnamon
3/4 cup sugar
pinch of salt
1/2 cup butter (1 stick)
1 cup firmly packed brown sugar
1 box refrigerated pie crust (2 crusts per box)
1 egg white
2 tablespoons sugar

Preheat oven to 350ยบ. Peel and slice apples into 1/2 inch slices. Squeeze a little lemon juice over apples and toss. Then toss apples with cinnamon and 3/4 cup sugar and a pinch of salt.
Melt butter in 10-inch cast iron skillet over medium heat. Stir in brown sugar and cook, stirring constantly, for 1 to 2 minutes until sugar is melted. Remove from heat and place one pie crust on top of butter mixture. Spoon apples over pie crust. Top with remaining pie crust. (I didn't try to crimp the edges because the pan is hot. Just tuck in anything that hangs over.) 
Whisk egg white until foamy and brush over crust. Sprinkle with sugar. Cut slits in the top crust so the steam can escape. 
Bake for 1 hour to 1 hour 10 minutes, until golden brown and bubbly. If the crust is browning too quickly, shield with foil for the last 10 minutes.
Cool for 30 minutes before serving. And y'all...it begged for a scoop of vanilla ice cream on top!


I set my skillet on a cookie sheet just in case anything dripped while baking. It did not. But it turned out the pan made it easier to get the skillet into and out of the oven. 


Friday, July 23, 2021

Where Has Summer Gone?

Apple Pineapple Dump Cake


Goodness, what a summer! (Is it still summer?Is it all over? I've lost track.) After many, many months of barely seeing family—at least close enough to touch them—we had an uninterrupted six weeks of family in residence. And for one of those weeks, we had the entire family together. That hasn't happened in nearly two years. It was fabulous. But it's taken me a couple more weeks to recover from all the fun. 


We did some house swapping during this family time. Besides the farm, we have a lake cabin and its little sister cottage that sits a few feet away from the cabin. So after much moving around between "houses" it's been a bit of a treasure hunt to find things at home. Partly because we just forgot where things were. That was a long time to be away.


For most of the six weeks, we lived at the lake and let Mommy, J-Daddy and the little girls enjoy the wide open space at the farm. But they also had time at the lake to enjoy the water activities. Thankfully, the farm and the lake aren't too far apart, so we got to see them wherever they were.


The pandemic lockdown started just weeks after Little Lady was born, so Little Sister and Baby Girl had only see her once right after she was born. They were all excited to be together at long last. And Little Lady tried her best to do everything the big girls did. It was fun to watch it all.

We miss having them here, but it's also been good to settle down and do some of our regular things. One of the activities we've enjoyed during our year of stay-at-home is the virtual Chautauqua series from our local Chautuaqua society. Earlier this week we enjoyed a lecture on "Food Fads from the 1940s through the 1960s." I watched "with" a friend in Manhattan and we had so much fun texting as we listened, sharing our memories about many of these foods. 

If you are interested, the lecture is available on YouTube until Thursday, August 5th, 2021. Here is the link and the description from the Spartanburg County Library:

"Remember Jell-O salads and cheese sprayed out of a can? When every pantry held Velveeta and all the kids wanted to drink Tang? Join historian and author Leslie Goddard for a nostalgic look at the food innovations and marketing approaches that transformed how we ate at midcentury."

And you might think I made this dessert the night of the lecture to be on theme. I did not. To be honest, I REALLY wanted dessert that night and this was the only thing I could come up with that used ingredients I had in the house. In my mind, it's a desperation dessert. But it certainly checked all the boxes of the food fad lecture!


APPLE PINEAPPLE DUMP CAKE

1 (28-oz) can apple pie filling (the kind with extra fruit)
1 (20-oz) can crushed pineapple packed in juice
1 box yellow cake mix (the two layer size)
2 sticks (1 cup) of butter, melted

Spray or grease a 9x13-inch pan. (I lined mine with foil for easy clean-up. It was that kind of night.)
Dump ingredients into pan in this order: spread pie filling over the bottom of pan, pour crushed pineapple with the juice over the pie filling; sprinkle dry cake mix over the pineapple; pour melted butter over the dry cake mix. Don't stir.

Bake at 350ยบ for 50 to 60 minutes, until golden brown.

You could swap the apple pie filling for another fruit filling. I've done this before with cherry pie filling. And you could sprinkle chopped nuts over the top before baking, too. We don't do nuts here any more, but the crunch of the toasted nuts would be a nice addition.


This is really rich, but it hit the spot. And hopefully satisfied my dessert craving for weeks to come. I would have added a scoop of ice cream to my dish if there had been any in the freezer. Of course, if there had been ice cream here, I wouldn't have made dessert!


REMINDER:  If you subscribed to this blog by using the email box that was on the right hand sidebar, remember that there are major changes happening to that service. I have read all of the alerts and to be honest, I didn't understand most of what they said. BUT if you used that sign up option, and find that in the coming weeks you are no longer getting any blog notices, that may be why. I think there are other feed services out there that you can use. 

And you can always find the blog by searching for it. thegrandmothergig.blogspot.com  Check in from time to time to see what's new.