Wednesday, December 24, 2014

Best Laid Plans, And All That


We have joined the ranks of those whose Christmas does not look like the ones in the TV commercials and magazine pages. Watching the news and the weather reports and messages on Facebook makes me know ours could be worse, but this year is surely not the Christmas we were expecting.

Then I started thinking about that very first Christmas. The authentic Christmas. And I'm beginning to think maybe that's what we are having this year—an authentic Christmas. And that maybe an authentic Christmas is more important than the regular merry one.

That first Christmas involved a long journey, a baby, worried parents, angels, shepherds, wisemen and unexpected circumstances. Our Christmas has all of those elements, too.

Our Baby Girl has been very sick and is spending her first Christmas in the hospital in the midwest. Of course, Mommy is there with her. We have certainly all worried.

Our long journey was driving out halfway to get the big girls and bringing back them here. All of the other family lives near us. Now their daddy is driving about a million miles (well, 1000 miles feels like a million) to be here a couple of days, to make sure Santa knows these girls are here at the farm.


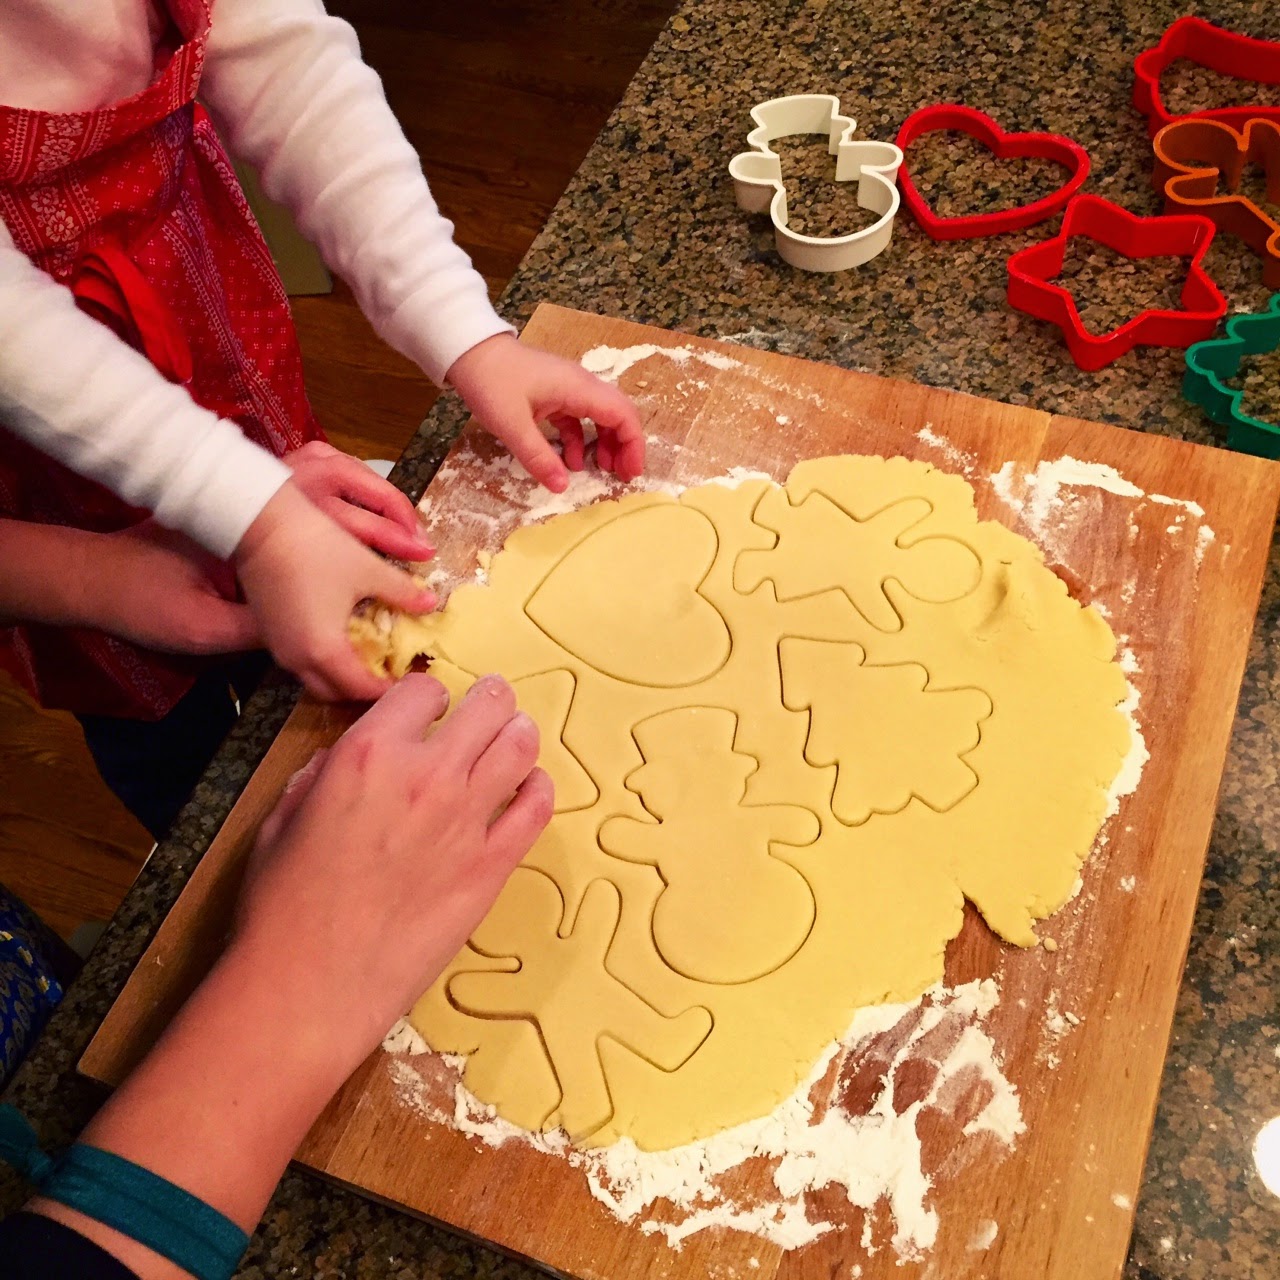
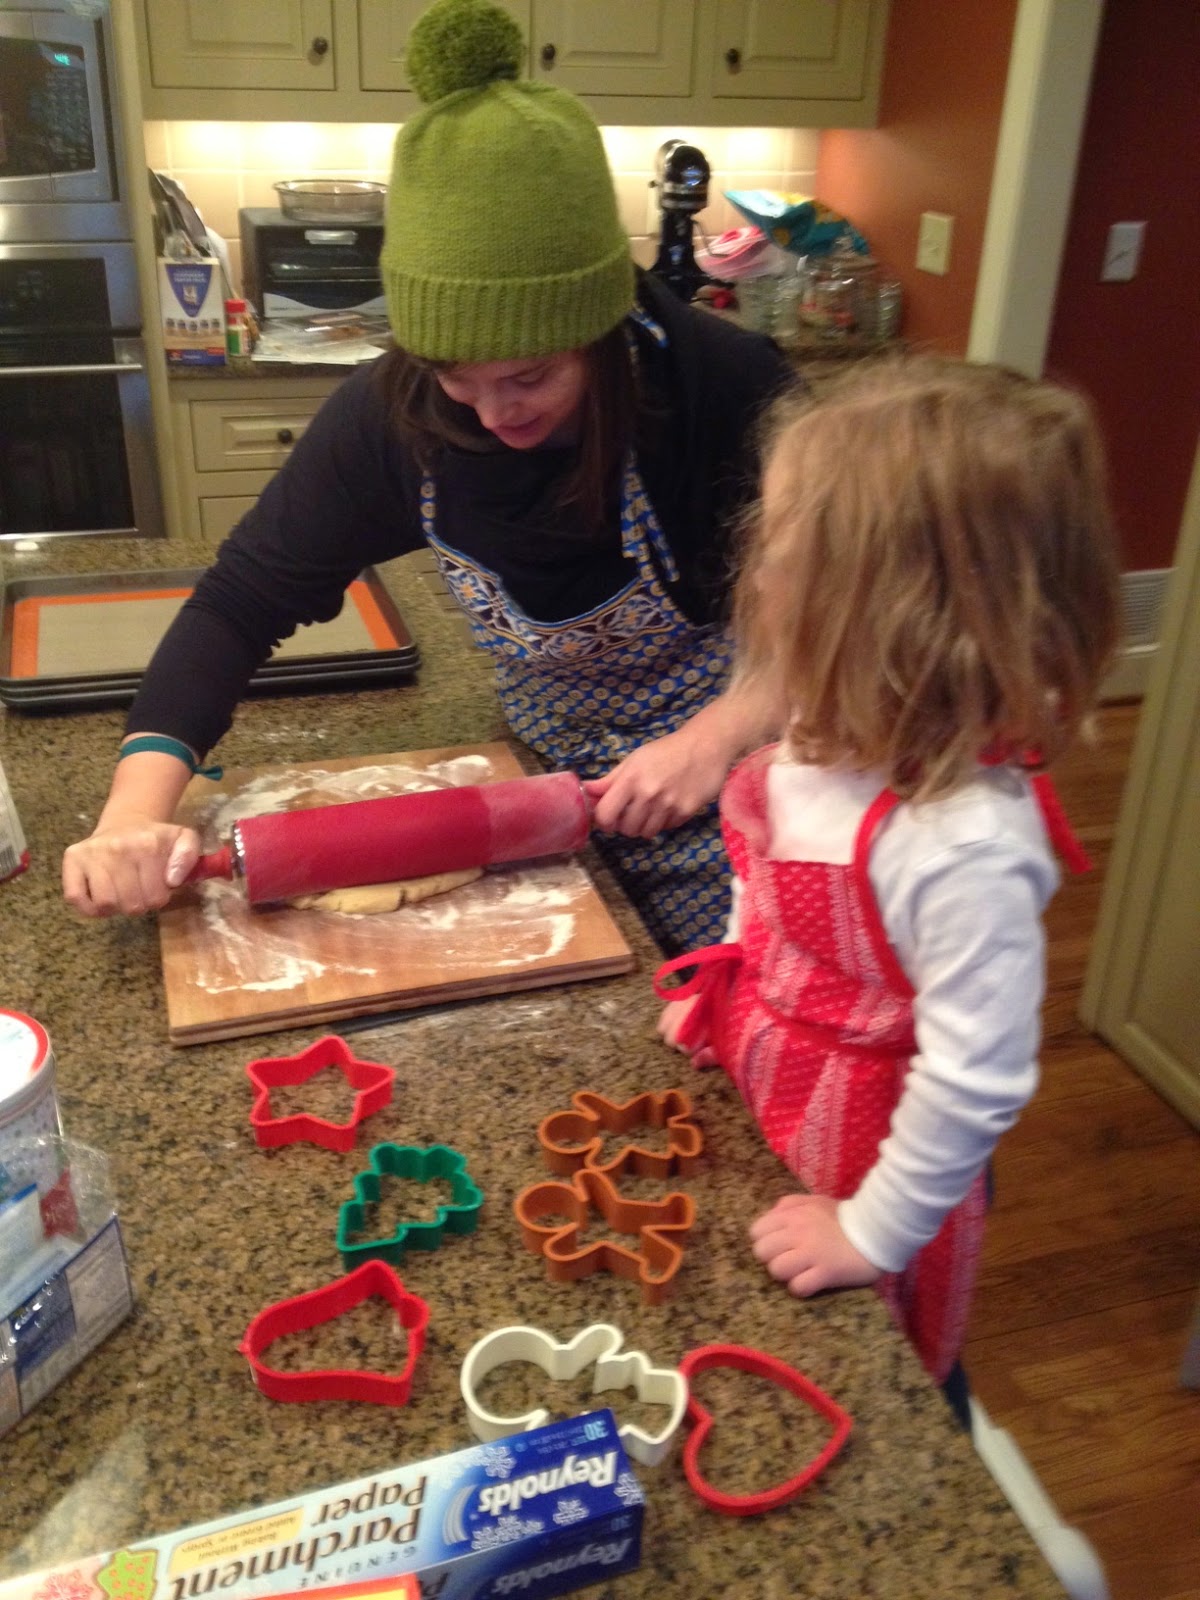
But we've had Christmas angels, too. Number one is Aunt Jessica who has made sure her sister's gifts that were shipped here were all properly sorted out and wrapped. And more importantly, when Little Sister looked up at her and said, "We need to bake cookies for Santa," she took over and made those special cookies with both sisters. (Loved it when Little Sister looked down at the floor and squealed, "It looks like SNOW!")


There have been angels in the midwest, too. Angels who have brought gifts to the hospital for the baby. Angels who are taking Christmas dinner to mommy tomorrow. And there are so many other praying angels that we have leaned on.

The wiseman? That's Daddy-O, who looked at me hard when I was ready to jump on a plane and fly out there. He told me, "You are right where you need to be. Right here with 4-year-old Little Sister, keeping her settled and calm during all this." Of course, he is right, although my heart is out there with them. Big Sister also qualifies as a wiseman (wise woman?) as she has helped keep things on keel here and has rocked along without complaint as things have changed rapidly and has been so good with her little sister who doesn't quite understand what's going on.


What about the shepherd? We don't have sheep on the farm, but we do have cows who need to eat in the winter. The cousin down the road stepped in and took care of feeding them while we were on the road. Watching over the animals in the field—that's close enough.

Yes, this has not been the Christmas we planned. Just like that very first one was not the trip Mary and Joseph planned. But we will celebrate. Differently than we thought, but we will still find joy. The excitement in this four-year-old's eyes is still there. She has missed her mommy, but Mimi and Aunt Jessica are managing okay. We are not "Mommy" but we are passable substitutes.


Baby Girl is getting better. And we will be happy to see her after Christmas. One day, years from now, we will tell her about this unusual Christmas.


The Grandmother Gig will be taking a little break  to focus on the matters at hand. There are lots of grandmother things that need doing right now. I'll see you back here in the new year. Merry Christmas from all of us here on the farm!


For unto you is born this day in the city of David a Saviour, which is Christ the Lord. And this shall be a sign unto you; Ye shall find the babe wrapped in swaddling clothes, lying in a manger. And suddenly there was with the angel a multitude of the heavenly host praising God, and saying,
             "Glory to God in the highest, and on earth peace, good will toward men."
                                                             
                                                                                   ~from Luke 2


Friday, December 19, 2014

Last-Minute Recipe: Toasted Pecans


Less than a week to go to Christmas. Like most of you, I've been busy here with Christmas things, non-Christmas things and life in general. Some of the plans I made have gone by the wayside. Some were replaced by something easier/faster. Others were scratched off completely.

Here is a super quick recipe that might fill the bill for your last minute needs. It is such a typical Southern nibble to have on hand. My grandmother made these often when I was little. She had several pecan trees in her back yard, so there were always pecans in her kitchen. When I was little, I didn't love these, but I do remember the grown-ups were always excited to find that Grandmother had taken a pan of these out of the oven. Now that I'm grown, I know why they were excited. These are wonderful. 

When Jessica was home at Thanksgiving, she made these to take back to the city. She was using these as an add-on for a little gift for friends. So fast. So easy. So delicious. If you are gifting them, pack them  as soon as they have cooled, or you will find everyone at your house will be sneaking a taste and soon there won't be enough to give away! I'm making some today to have for Christmas.

TOASTED PECANS

pecan halves
butter
salt

Put pecan halves on a baking sheet in a single layer. Add a few pats of butter. Place in a 350 degree oven. Bake about 15 minutes, stirring a couple of times.
The time is only approximate, so watch closely! (Do not walk away from the kitchen to do something else!)

Use your nose to help you know when they are done, because you can begin to smell the nuts when they are nearly ready. Taste the nuts, allowing for the nuts to crisp a little more as they cool. Watch closely. Nuts can burn easily.

Salt nuts to taste.  


A 1-lb bag of pecans fills a large baking sheet. For this many, use 5-6 good-size pats of butter.


Monday, December 15, 2014

The Gift (Again...and Again)


I posted this blog in 2011. But the story is worthy of sharing again. The past couple of weeks have been hectic for me, and I'm sure many of you have felt the same way. Stories like this remind us of how we should be observing the season.


I was rummaging through a drawer last week looking for something and I found this little stocking at the bottom of the drawer. It's a reminder of what wonderful children I have.

Many Christmases ago, just as we were leaving for the Christmas Eve service at church, Jessica asked us to wait just a minute. She wasn't quite finished. I knew she was making something but we were busy and I didn't exactly know what she was doing. In a couple of minutes she was ready and had this little stocking in her hand. You can see that the tag says "To Needing." 

When we went up for communion that night, she placed this little stocking on the altar rail. I didn't know what was in it but thought that it was nice that she wanted to leave something. The adults often left a dollar or two there. That money was used for people who came to the church needing help with things like paying the heating bill, or getting their car repaired. The money was always collected after the service and given to the pastor. That little stocking was gathered up along with the dollar bills and that's the last we saw of it.

Weeks later I got a phone call from the pastor telling me that the that little stocking been laying on his office desk since Christmas. The top was stapled together (with lots of staples.) It was stuffed full and it had the tag written in a small child's writing. One day his wife was in the office and picked the stocking up. She asked what it was. He told her that Jessica had left it on the altar Christmas Eve, that it was probably filled with candy and she could throw it away. She weighed it in her hand and said she thought it was awfully heavy for candy. She undid the staples and poured out lots of coins and some rolled up bills. The pastor was astounded. They counted the money and said it held just over $17. 

Jessica had emptied her bank and given it all to the "needing." He was moved by her generosity.  He said he had learned a lesson, too. He had learned not to judge what was on the inside by how the outside looked. When you make up your mind before looking further, it's easy to miss something special. The other bills left on the altar that night were all ones and fives. This little second grader had given more than anyone. She gave all she had. And he had almost thrown the stocking away.

This little stocking is one of my Christmas treasures. 


So, slow down this week. Do one of these things: Look at the stars in the dark night sky. Turn off the TV for a few minutes and sit in front of the Christmas tree. Take a walk in the woods, or through your neighborhood. Declare your kitchen closed one night this week and have sandwiches for supper. Use the extra time to read a story to your children or enjoy a book yourself.  Just remember to slow down. Remember to breathe.

Saturday, December 6, 2014

Cinnamon Goodness


Cinnamon Rolls w/Maple Frosting


If they gave a Nobel Prize for cinnamon rolls, the Pioneer Woman should get one for this recipe. I don't have words to describe the gooey goodness that is a pan of these rolls. They are that good. I just took seven pans of them to church for a bake sale. Pan #8 (the oddly shaped ends and such) stayed here and lasted exactly six and a half minutes after they came out of the oven. 

Daddy-O had to taste them, of course. And, he tasted and tasted and tasted until the pan was empty. I got one bite just to make sure they were okay. They were way more than okay. Glad there was only one bite left for me because I'm not sure I would have found a stopping place.

I made no changes to her recipe. But I am making a few notes here that I think will make it a little easier for you if it's your first time baking them. Her recipe has wonderful photos that show you the step-by-step process. (I have a new appreciation for her. Cooking and photographing at the same time isn't easy.) Please go look at her recipe to see how she does it.  
First pans in the oven.

If you have never used yeast, don't be afraid. This was an easy dough to work with. The big payoff is that you get SEVEN pans of cinnamon rolls. And, maybe a little taster pan for the baker.

Here are my own tips if you are new to this:
  • I used a 4-1/2 qt. saucepan to heat the milk mixture and then added flour straight into the pan after the milk cooled. I let the dough rise right in the saucepan.
  • I used unbleached all-purpose flour. (I like King Arthur.) After my last bread experiment, the soft flours aren't my first choice for this recipe. So I'm skipping my usual White Lily and Martha White flours for yeast recipes calling for all-purpose flour.
  • You can just scoop up the flour and level as you measure. Lightly spooning it into the measuring might give you a really soft, sticky dough. (Add more flour as you roll it out if that happens.)
  • Take off your rings. It's hard to get dough out of the prongs
  • Clean off a lot of counter space before you start. You roll the dough 30-inchs long and then you still need room for the sugar, cinnamon, foil pans, knife, etc.
  • It took about a half of a regular size bottle of cinnamon. If you aren't starting with a new bottle, make sure you have enough.
  • Lay a yard stick at the back of the counter where you roll the dough. 30-inches was longer than I would have guessed. I didn't actually "measure" with the yard stick (who knows where that yard stick has been?) but it gave me a reference so I could eyeball it better. You could also pull off 30-inches of masking tape and put on the front edge of the counter.
  • I rolled the dough out right on my granite countertop. If you have laminate countertops, you should be able to roll the out dough there, but be sure to slide a cutting board or mat under the dough before you cut!
  • Allow about three hours, beginning to end, to make this recipe. There are nice long spaces while the milk cools, and when the dough rises so you can do other things around the house. But we have tried making them on a tight time schedule and today was much easier to have ample time.

Now, go make some. Be brave and just follow the recipe. Release your inner child. It's a little like working with play dough. 


Bake sale table.

If you go to the Pioneer Woman's Cinnamon Rolls 101, you can print out the recipe right from there. Her photos are a huge help, too.

CINNAMON ROLLS

1 quart whole milk (that's 4 cups)
1 cup vegetable oil
1 cup sugar
2  (1/4-oz) packets ActiveDry yeast (that's just the regular little envelopes)
8 cups unbleached all-purpose flour (plus additional 1 cup)
1 heaping teaspoon baking powder
1 scant teaspoon baking soda
1 tablespoon salt
2—3 sticks butter, melted (for brushing over rolled out dough)
2 cups sugar
lots of ground cinnamon (about a half bottle)

MAPLE FROSTING
1 (32-oz.) bag powdered sugar
2 teaspoons maple flavoring
1/2 cup milk
1/4 cup melted butter
1/4 cup brewed coffee
1/8 teaspoon salt

7-8 foil cake pans

Heat the milk, vegetable oil and sugar in a large saucepan over medium heat to just below a boil. (In other words, scald it.)

Set aside and cool to warm (about 100-110 degrees), about 45 minutes. Sprinkle the yeast on top and let it sit for 1 minute.

Stir in 8 cups flour until just combined. Cover with a clean towel and let rise in a warm place for 1 hour. (I put mine on the counter and turn on the under-counter lights.) After an hour (the dough will hae risen and be puffy), add the baking powder, baking soda, salt and the remaining 1 cup flour. Stir to combine thoroughly. You can continue with the recipe now or  put dough in a bowl and refrigerate (covered) for up to 3 days Punch down the dough as necessary. You can also chill the dough for an hour to make it easier to handle.

Preheat oven to 375 degrees.

Remove half the dough and roll out on a floured surface to about 30x10-inch rectangle. Dough will be thin.

Pour 3/4 to 1 cup melted butter over dough and use fingers to spread evenly. Sprinkle 1 cup sugar over dough, then sprinkle generously with cinnamon. You can add more butter or sugar if you need to.

Roll up the long side of the rectangle, rolling toward you, working slowly and rolling tightly. When you get to the end, pinch the other long edge to seal. You now have a long skinny "log." 

Spoon a tablespoon of melted butter in each foil pan and brush to cover bottom. Slice the log into 1-inch slices. Place 7-9 slices in each pan, being careful not to crowd. Cover pans with clean towels or plastic wrap. Repeat with other half of dough.

Let stand at least 20 minutes. Uncover and bake for 15-17 minutes, until golden brown. (But not too brown.) 

While rolls are baking, make the frosting:  Pour sugar into a large bowl. Add milk, butter, coffee, flavoring and salt and whisk until smooth. (Daddy-O did a great job here.) Taste and adjust flavors if needed. Frosting should be thick, but pourable.

When pans come out of the oven, immediately pour frosting over hot rolls. Be generous, covering them completely—all the nooks and crannies and around the edges. The rolls will absorb a lot of the frosting and they will look just right when they cool.


And that's it! Beginning to end took me about three hours. And I let the dough chill for a little while in the refrigerator before rolling. It isn't quite as much work as it sounds like, but do allow enough time. During the cooling and then the rising, I had time to do other things around the house.

Happy Birthday today to Daddy-O! Sorry that all the baking went to church. I'll make something just for you soon. Promise.


Friday, December 5, 2014

One Bite At A Time

The Christmas elephant at our local tree lot in 2012.

I arrived at handbell practice at the last split second this week, as others were rushing in, too. Just before we started I chatted with the bell player beside me. We talked about our busy holiday schedules, wondering how we were going to get it all done. She said that at one of her many meetings this week, the same conversation happened there. And one man on that committee said in his thick Southern drawl, "Y'all don't need to worry about any of this. It's just like eating an elephant. Just eat it one bite at a time." 

In other words, don't get overwhelmed looking at the big work load ahead of you. Just focus on the task at hand. And I'm sticking by my last post—if I don't get everything done, I am going to be okay with that, too.


My music activities are over for this week (until Sunday.) Today is dedicated to baking for the bake sale tomorrow. Bread is rising. Fruit cake is cooling. Cinnamon rolls are in progress. I'll think about cooking for tomorrow's covered dish supper after the bake sale in the morning. "One bite at a time."


These were my little kitchen helpers at Christmas a long time ago. Miss having them nearby.

For the record, I am using Pioneer Woman's Cinnamon Roll recipe. She has a great photo tutorial. Jessica has made these several times and they are always wonderful. A bonus is that the recipe makes SEVEN pans of cinnamon rolls! If you are to make the effort, might as well get a lot for your work.

I'll add a photo of the cinnamon rolls later. (I'm thinking positive. They WILL turn out fine.) So check back in a day or so to see how they came out.
Oh. My. Goodness.


Monday, December 1, 2014

December Is Here


This time of year, it's easy to get caught up in the "there aren't enough days left" kind of thinking. I just happen to have a front row seat for the sunrise every morning. Seeing the sun rise reminds me to enjoy each day as it comes. If I can't get it all done today, so be it. I'll try again tomorrow. At this (old) age, I have figured out that the house won't be perfect no matter how hard I work. So I'm going with less-than-perfect and not-so-tired this year.


Pattern: A Nice Ribbed Sock
Yarn: Madelinetosh Dandelion
Needles: size 1.5

We sent Jessica back down the highway today after an extended Thanksgiving visit. It's always hard to tell your children goodbye. Especially this year when she was the only one who could come home. I sent her home with a new pair of mom-made socks as a reminder that I love her. 

This was the first time I had worked with the Dandelion yarn. If I were a sayer-of-bad-words, I would have used every one of them! But I love the finished product. There is nothing inherently wrong with this wool/linen yarn, but it was a difficult combination of yarn, pattern and needles. Trust Jessica to pick a yarn that challenged me.


Mrs. Claus (otherwise known as Mimi) has more knitting going on, too. But she can't show it to you just yet. Good thing that Mrs. Claus/Mimi finds knitting a relaxing activity. Because there still is a good bit to do. 


Sunday, November 30, 2014

Crusty No-Knead Bread

Crusty No-Knead Artisan Bread

In the midst of decorating, furiously knitting up gifts for Christmas, doing laundry and getting ready for an overnight guest here at the farm this week, I got the crazy notion to try a new bread recipe this weekend. I have baked bread for years and years. The sourdough bread recipe here on my blog is my standby recipe and we love it. But after eating some artisan bread from the wonderful Atlanta restaurant I visited with Jessica a couple weeks ago, it made me want to try this no-knead business myself.

I had given the book, Artisan Bread In Five Minutes A Day, to both daughters a few years ago. But I'll be honest, there are about four chapters of info before you ever get to the recipe! To be a simple bread, they had a slightly complicated way of explaining it.

Then last week, I took a peek at Attic24's blog (link is on my sidebar.) She crochets beautiful things and I like to pop in every now and then to see what's new. And I saw that she had baked some amazing bread. Attic24's No-Knead Bread lead me to this post, Simply So Good's Artisan No-Knead Bread. And even Simply So Good's post has a link to an earlier post on her blog for Crusty Bread.

In a departure from my standard method, I'm not going to give you the recipe. Go to "Simply So Good" and read her recipe there. She has so many photos that explain exactly what she did. Attic24 also has great pictures and she has "translated" the directions into British baking terms.

The loaf on the right was made with White Lily. 
It's usually my favorite flour, but not for this recipe.

I will tell you a few things I learned as I made three loaves of this bread yesterday. (There are so few ingredients and so little work involved, that, yes, I tried this three times in one day. If nothing else, I am persistent.) Some of my problems with the first two loaves I figured out by reading some of the comments in the blog post. There are over 1,000 comments! So I still have more to read.

But this much I've figured out already:

1. Don't use soft Southern flours like White Lily, Martha White, etc. Those loaves needed a chain saw to cut through the crust. Has to do with the protein content. My one successful loaf was made with bread flour. I have bought some unbleached King Arthur flour to try next.

2. Measure the flour by scooping it up with your measuring cup and leveling with a knife. When I used my usual spoon-the-flour-into-the-cup method, I ended up with a batter that I could have poured. Scooping the flour gives you a good bit more flour than spooning.

3. Use RapidRise yeast, not ActiveDry yeast (unless you follow her adaptation for that kind of yeast.) I just buy the strip of three envelopes at the grocery store. Each envelope should make four loaves of bread with this recipe.

4. Be very careful as you handle an extremely hot pot and lid. By the time I was putting the third loaf into the oven, it was way past my bedtime. Because my very sleepy brain was not working clearly, I nearly grabbed the lid handle without a pot holder! Thankfully my brain woke up at the last split second. Injury avoided.

If you are like me and your first attempt isn't great, don't give up. I figured if hundreds and hundreds of people had been successful with this recipe, I could do it, too. Loaf #3 was worth the effort.

Wednesday, November 26, 2014

Crazy In The Kitchen


Today, like so many others, we will be busy in the kitchen. I'll be making most of the foods I'll take tomorrow to our family Thanksgiving gathering. We all pretty much take the same things every year so that all of the favorites are on the table. It would be so sad if I decided to mix it up one year and there was no macaroni and cheese!

Here are links to the recipes I'm making:

Mimi Bread—otherwise known as Sourdough Bread
I've been taking homemade bread since before I was married. It's too late for you to make this for tomorrow because the starter takes several days to make, but you can start now for Christmas. It also makes a great gift.

Sweet Potato Biscuits
Delicious! I'll take these in addition to a few loaves of bread. These can also be frozen for baking later, if you have a party coming up. Or, have them ready for Christmas Day breakfast.

Macaroni & Cheese
In most other parts of the country, this dish involves a cheese sauce and maybe it is baked after the sauce is stirred in. But this recipe is how we do it in the upstate. This is how my grandfather made it. And we still do it the same way.

Cranberry Apple Crunch
Jessica makes this recipe every year. It's good as a side dish. We enjoy the leftovers as dessert with a scoop of vanilla ice cream.

Pecan Toffee Tarts
If time permits, I'll make these, too. When a whole slice of pie is too much, these bite-size treats are just right. (I will tell you I learned that these do not freeze well. The crust isn't crisp after freezing. You can make them the day before, though.)

Turkey in the Slow Cooker
While we aren't responsible for the Thanksgiving turkey, I'll probably do this one for us to enjoy over the weekend. Doesn't make the presentation that an oven roasted turkey does, but it tastes great. We just want this to pretend we have leftovers!

While we are busy stirring, peeling, chopping, and baking today and tomorrow, let us be sure to give thanks for the abundance that we enjoy. And then let us do something to share some of our bounty with others. Drop something in a red kettle in front of a store. Take a name from an angel tree. Even take a plate of dinner to a neighbor. But always, always share.


Afternoon Update:  Bread's done!


Tuesday, November 25, 2014

Holiday Fruit Cake

Holiday Fruit Cake

So easy. Just so very easy. As I was putting it the oven and remarked how simple it was to stir together, Daddy-O said, "Your dad had many great qualities, but if he baked this cake, it had to be easy." That's pretty much true.

Daddy-O's next comments were along the line of, "How much longer 'til we can cut it?" "Can we try it now?" It does take a dense cake some time to cool. So we patiently waited. And then we ate it while it was still a little warm. I've never had it warm before. Daddy made them and we never got the cake until a day or two later.

I will tell you that it came out of the pan easily. I sprayed it liberally with baking spray. When it has completely cooled, I'll wrap it and store in the refrigerator. After we've sampled.


And the verdict? It is as good as we remember. It is not the traditional fruitcake (and maybe that is a good thing) like your grandmother baked. This one is a dense spice cake filled with fruit and nuts. 


Wrap it completely with plastic wrap or foil and store in the refrigerator for 2-3 weeks, or you can freeze it for months. Since there are only two of us here, I might put half in the refrigerator and freeze half for later. 

Here is the recipe that my parents made for so many years. This was the first time I have made it. It won't be the last.


HOLIDAY FRUIT CAKE

1/2  cup water
2 eggs
1 (28-oz) jar None Such mincemeat
1 cup chopped nuts
2 boxes Pillsbury Quick Bread Mix (date nut*, cranberry or nut bread are good choices)
2 cups candied mixed fruit (for fruitcake—I only found a cherry-pineapple mix this time)

Preheat oven to 350 degrees.
Mix all ingredients together. Spray Bundt pan with Baker's Joy (or PAM.) Pour mixture into pan. 
Bake at 350 degrees for 80-90 minutes. Let cool in pan for 15 minutes. Turn out onto rack and complete cooling.
Store cake, well wrapped, in the refrigerator. Freezes well. 


The home economist in me used some basic techniques that I doubt my dad bothered with. I tossed the candied fruit in the dry bread mix to coat it before I added the other ingredients. And I lightly beat the eggs before pouring them in. Just makes it easier to stir everything together. Use a large bowl and a sturdy spoon. And make sure you mix it completely. I spooned the heavy batter into the cake pan instead of "pouring." 

Eating that first slice tonight zapped me right back to my daddy's kitchen. He's been gone for over 10 years now. It's the first time I've tasted this cake since then. This cake recipe is full of good memories for us. We hope you might enjoy it, too.


*The date nut quick bread mix is my favorite.


Monday, November 24, 2014

Fruitcake Lover Or Hater?


What is it about fruitcake that brings out all the bad jokes? Just google "fruitcake jokes" to see what I'm talking about. Now, I fully understand that not everybody likes it, but surely someone besides me and Daddy-O still eat fruitcake! Is it because there is so much bad fruitcake out there, that many people have never tasted a good one?

When I didn't see any mincemeat at the store, I sent Jessica a text to see if she could find a jar in Atlanta. They sell everything! I quickly got a text back saying, "I always think mincemeat is just something they talk about in movies—not as a real ingredient."

At the checkout counter I mentioned that I couldn't find a jar of mincemeat. The manager said, "Oh, we do have it!" It was just in an unexpected place. While I waited for her to bring a jar back to me, I asked the young checkout girl if she liked fruitcake. (I was pretty sure what her answer would be.) She told me no, she didn't like fruitcake and proceeded to say that she had never actually eaten any. Then she said, "I heard if you eat it, you get sick." Come on now. It's fruit and it's cake.

I had to stop at the second grocery store—our town only has two—to find the quick bread mix. And while I was there I did ask if they had candied fruitcake mix. For fruitcake. The stock person told me, "No...but we have candy. Would that work?" She had no clue what I was talking about. I am old, old, old.

For all the jokes and ridicule that surround fruitcake, there is some reason that it still exists. No, it is not because they are indestructible and the ones still existing are left from 1960. There are enough of us who like it, that it has not faded away completely. I'm baking one this year. It reminds me of my dad and mother. And it's a good mid-afternoon snack with a cup of coffee.

This recipe is an easy version, but it tastes as good as the labor intensive ones my grandmother made. It's a recipe that my mother found years and year ago (probably an advertisement for one of the ingredients) and she made them for years. When her health kept her out of the kitchen, my dad took over the fruitcake baking. He would usually make two or three each year and one was always earmarked for us. Now, if my father could make these, you know it's easy.

So if you can remember when fruitcake was respected as a labor of love, give this a try. I still have my grandmother's handwritten fruitcake recipe which takes nearly forever to make. She might think this recipe doesn't even qualify to be called "fruitcake" but it's close enough for me. Shhh....I might like even better than my grandmother's recipe.

Posting the recipe tomorrow. Cake just came out of the oven. 
Daddy-O has been asking for an hour, "When can we eat the cake?."

This week is getting busy. Let's all be sure to slow down and really focus on things we are thankful for. Time goes by too quickly if we don't pay attention


Wednesday, November 19, 2014

Birthday Weekend


All birthdays are worthy of celebration, but some are more significant than others. My birthday last week was one of those. A big part of my celebration was a trip to Atlanta for a long weekend. Jessica had planned lots of surprises. 


Friday we had dinner at one of the top restaurants in the city, where the best chefs cook with only the finest ingredients. Every bite was better than the last. It was all wonderful. A once-in-a-lifetime experience, for sure.


We got up early the next morning to go to the Farmer's Market at the beautiful St. Phillips Episcopal Church. In addition to the fresh winter vegetables, we were tempted by crafts, jams and preserves and baked goods. A bacon scone for breakfast worked for me!


Saturday's dinner was a home cooked meal. Not cooked by me! That was pretty spectacular, just to be the guest for a change. This meal was delicious. And the company even better.


Now while Friday's orange souffle was the perfect end to a gourmet dinner—Saturday's dinner had cake and ice cream. And a candle.  There are reasons celebrations at home are special. Birthday cake is one of them.


The weekend was full of so many special treats. Shopping in the city. Pinkberry. Lunch in Serenbe. Hallmark movies at home. But Jessica saved one more surprise for the last night.


Garden Nights—Holiday Lights is an annual event at the Atlanta Botanical Gardens. We bundled up and braved the cold to walk through the gardens. Lights. Music. Hot chocolate. Holiday spirit everywhere!


We beat the rain by minutes, leaving the garden as the first drops started to fall. What a great way to end my birthday weekend. 


Now I'm back here at home, where I'm the cook. No gourmet dinner for us tonight. It's back to reality. I pulled out a recipe I used to make years ago. After all the rich food for days, I just wanted plain and simple and easy for supper.  

SALISBURY STEAK

1 can (10-3/4 oz.) condensed cream of mushroom soup
1-1/2 lb. lean ground beef
1/2 dry bread crumbs
1/4 cup finely chopped onion
1 egg, slighty beaten
1/3 cup water (for the gravy--not the meat mixture)

Mix thoroughly, 1/4 cup of the soup, ground beef, bread crumbs, onion and egg. (I used my hands to mix it.) Shape firmly into 6 patties. In skillet, brown patties (use a little oil if necessary and pour off excess fat, if there is any.) Blend remaining soup and the water. Pour over patties. Cover and cook for 20 minutes, or until done, stirring occasionally. 

Serve with rice or mashed potatoes.


City lights and gourmet meals are fun for a few days. But it's nice to be back here, sitting in front of the fire with Daddy-O. There's no place like home.


Wednesday, November 12, 2014

Chicken Tortilla Soup


Fully knowing that Daddy-O doesn't care for soup of any kind—unless it's really cold outside—and he doesn't like cornbread at all, I made soup and cornbread for supper last night. It was an easier-to-ask-forgiveness kind of thing. Our high temp yesterday was 73 degrees. The winter storm that is pounding other parts of the country is a top story on TV. And I talked to Mommy and Little Sister this week. They were shopping for boots for Little Sister because they are expecting snow. So it IS soup weather—just not here. 

Daddy-O was a good sport about the supper. He ate the soup and cornbread without complaint. He just didn't have multiple helpings. I loved the soup. I put some in the freezer for those cold nights coming our way. (Now, I would eat soup in the summer time. It's one of my favorite things.)

This chicken tortilla soup is one of the easiest recipes ever.  Even more so, it you have cooked chicken in the freezer, like I did. Mommy told me that her church is having a soup lunch soon and she volunteered to take dessert, but she might have to take soup also. While we were talking, I could hear both little ones playing in the kitchen. It's a wonder she gets anything cooked! This would be a good recipe for the church soup lunch. It's quick to stir together and it doesn't take long to cook. Chopping the onion is the hardest part!


CHICKEN TORTILLA SOUP

2 cups water
14-oz. can low-sodium chicken broth
28-oz. can crushed tomatoes
10-oz. can mild enchilada sauce
4-oz. can chopped green chilies
1 teaspoon chili powder
1 teaspoon cumin
1 heaping teaspoon minced garlic (I used the jarred kind)
2-3 cups shredded cooked chicken (that's about 2 chicken breasts)
2 cups frozen whole kernel corn (I like white corn)
1 small onion, chopped
salt & pepper to taste

toppings: tortilla chips, sour cream and grated cheese 

Mix all ingredients (not the toppings) in a large saucepan. (My pan was the 4-1/2 qt. size.) Bring to a boil, then lower heat and simmer uncovered for 40 minutes, stirring occasionally. Serve with desired toppings.


You can make this soup earlier in the day to help you at the crazy time right before dinner. (We used to call it the "arsenic hour.")  You can even make it a day or two ahead. I put a quart in the freezer after supper last night and will have a "don't have to cook" meal ready for later. When I was in the midwest last spring keeping things together before Baby Girl was born, I sent a thermos of soup many times for Big Sister's school lunch. This would be a great cold school day lunch.

To make this a REALLY easy supper, you could use the meat from a deli rotisserie chicken, or even better, use your own frozen cooked chicken. I like to keep cooked chicken in the freezer. When chicken breasts are on sale, it's easy to cook and freeze some. After cooking I cut it in large chunks and put two chopped breasts, along with a little broth, in each freezer bag. Be sure to label and date!

I am hoping to start a section in the recipe index here of meals, like this one, that are good to take to someone is sick or has had a new baby. Can you help me think of a category title better than "meals-to-take-to-a-sick-friend"?

Saturday, November 8, 2014

Great Pumpkin


Pumpkin Ring Cake

I have loved pumpkin since I was a small child. Pumpkin pie, mostly, because that's about all that people did with pumpkin back then. At least, the people I knew. But pumpkin turns up often now—pumpkin bread, pumpkin soup, pumpkin chili, pumpkin dip. All good.

Years ago, this was a recipe I used all the time when I needed a cake to take somewhere. Sometimes it was when a family had experienced great sadness. Sometimes it was to celebrate. I made it for church dinners and office parties. I could run home from work and mix this up quickly. Then I LOST the recipe. 

This was before Google searches and Pinterest boards. It was just gone. And after a few years, forgotten. But one day last summer when I was cleaning out the garage, I found it! It was in a bag of recipes--newspaper clippings, can labels, magazine pages, all safely stashed in a plastic bag. Why it never made it inside this house when we moved, I'll never know. But it was rescued at last. 

Now this recipe resides safely here on the blog and is listed in the recipe index—just in time for the holidays. A bundt cake always looks so festive. It is great cake for the newer baker. There is no sifting. No "alternately add wet and dry ingredients" and no "cream butter and sugar." Just dump all the ingredients in one bowl and mix. It's moist, dense, pumpkin-y and spicy. Good with a cup of coffee or hot tea. I know my cake baking skills have improved in the 35 years since I first baked this cake, but if you need an easy cake, this is still a good one.

Right this very minute I have this pumpkin cake in the oven. The house smells delicious. A Thanksgiving Hallmark movie is on TV. (Daddy-O left very early this morning to help cook hundreds of quarts of chicken stew at the fire department. I watch Hallmark movies when he isn't here.) The air is crisp outside. I'm starting to feel the first tinge of holiday spirit. This cake might be a good starting place for you, too.


PUMPKIN RING CAKE

3 cups Bisquick baking mix (Reduced Fat or Original)
1 cup granulated sugar
1 cup brown sugar, packed
¼ cup butter, softened
¼ cup milk
2-1/2 teaspoons pumpkin pie spice
4 eggs
1 can (15-oz.) pumpkin (NOT pumpkin pie mix)

Preheat oven to 350°.  Grease and flour a 12-cup Bundt cake pan.

Beat all ingredients with electric mixer on low speed for 30 seconds, scraping bowl constantly.  Beat on medium speed for 3 minutes, scraping bowl occasionally.  Pour batter into pan.

Bake about 50 minutes, or until tooth pick inserted in center comes out clean.  Cool 10 minutes; remove from pan.  Cool completely.  Drizzle with Glaze.

GLAZE

1 cup powdered sugar
1 tablespoon water (or more as needed) 
½ teaspoon vanilla

Mix all ingredients until smooth. (If you need more water, add it a teaspoonful at a time.)