Thursday, December 31, 2020

Goodbye, 2020

Louise Jacks Fudge Pie

We all know about the bad things that took over 2020. Some terrible things. It has been a year like no other. But we found some good things in 2020, too. It's been hard to see the good because we have been so focused on the virus that upended life as we know it. Covid even complicated the "regular" bad things that happened in peoples lives and made those "bad" things terrible.

But I'm looking back at the good things that happened this year...
  • We had a new granddaughter born right after the calendar page flipped over. What a joy it has been to watch her grow!
  • My cabinets and drawers may be the cleanest they have been in years. With so much time at home I've done deep cleaning out that was way overdue.
  • I am exercising faithfully now. Every single day since March 15. I'm using Grow Young fitness online. It's designed for senior adults. (Forgive me, if I laughed at you chair exercisers years ago.) I started at the very beginning—15 minute sessions, all sitting down. Now I'm doing 40 minute sessions, all standing. This is not an advertisement. Just sharing what is working for me. (I asked my dermatologist once what was the best moisturizer I could use. She answered, "Which ever one you're willing to use daily." Kind of the same thing with exercising—find the one you'll stick with.)
  • I have spent extra time at the piano figuring out songs by ear. And by golly, it's getting easier.
  • I gave up coloring my hair and discovered I that I love the silver color that's been hiding under the blonde I've been paying for. It shouldn't have taken a pandemic for me to figure this out. But it did.

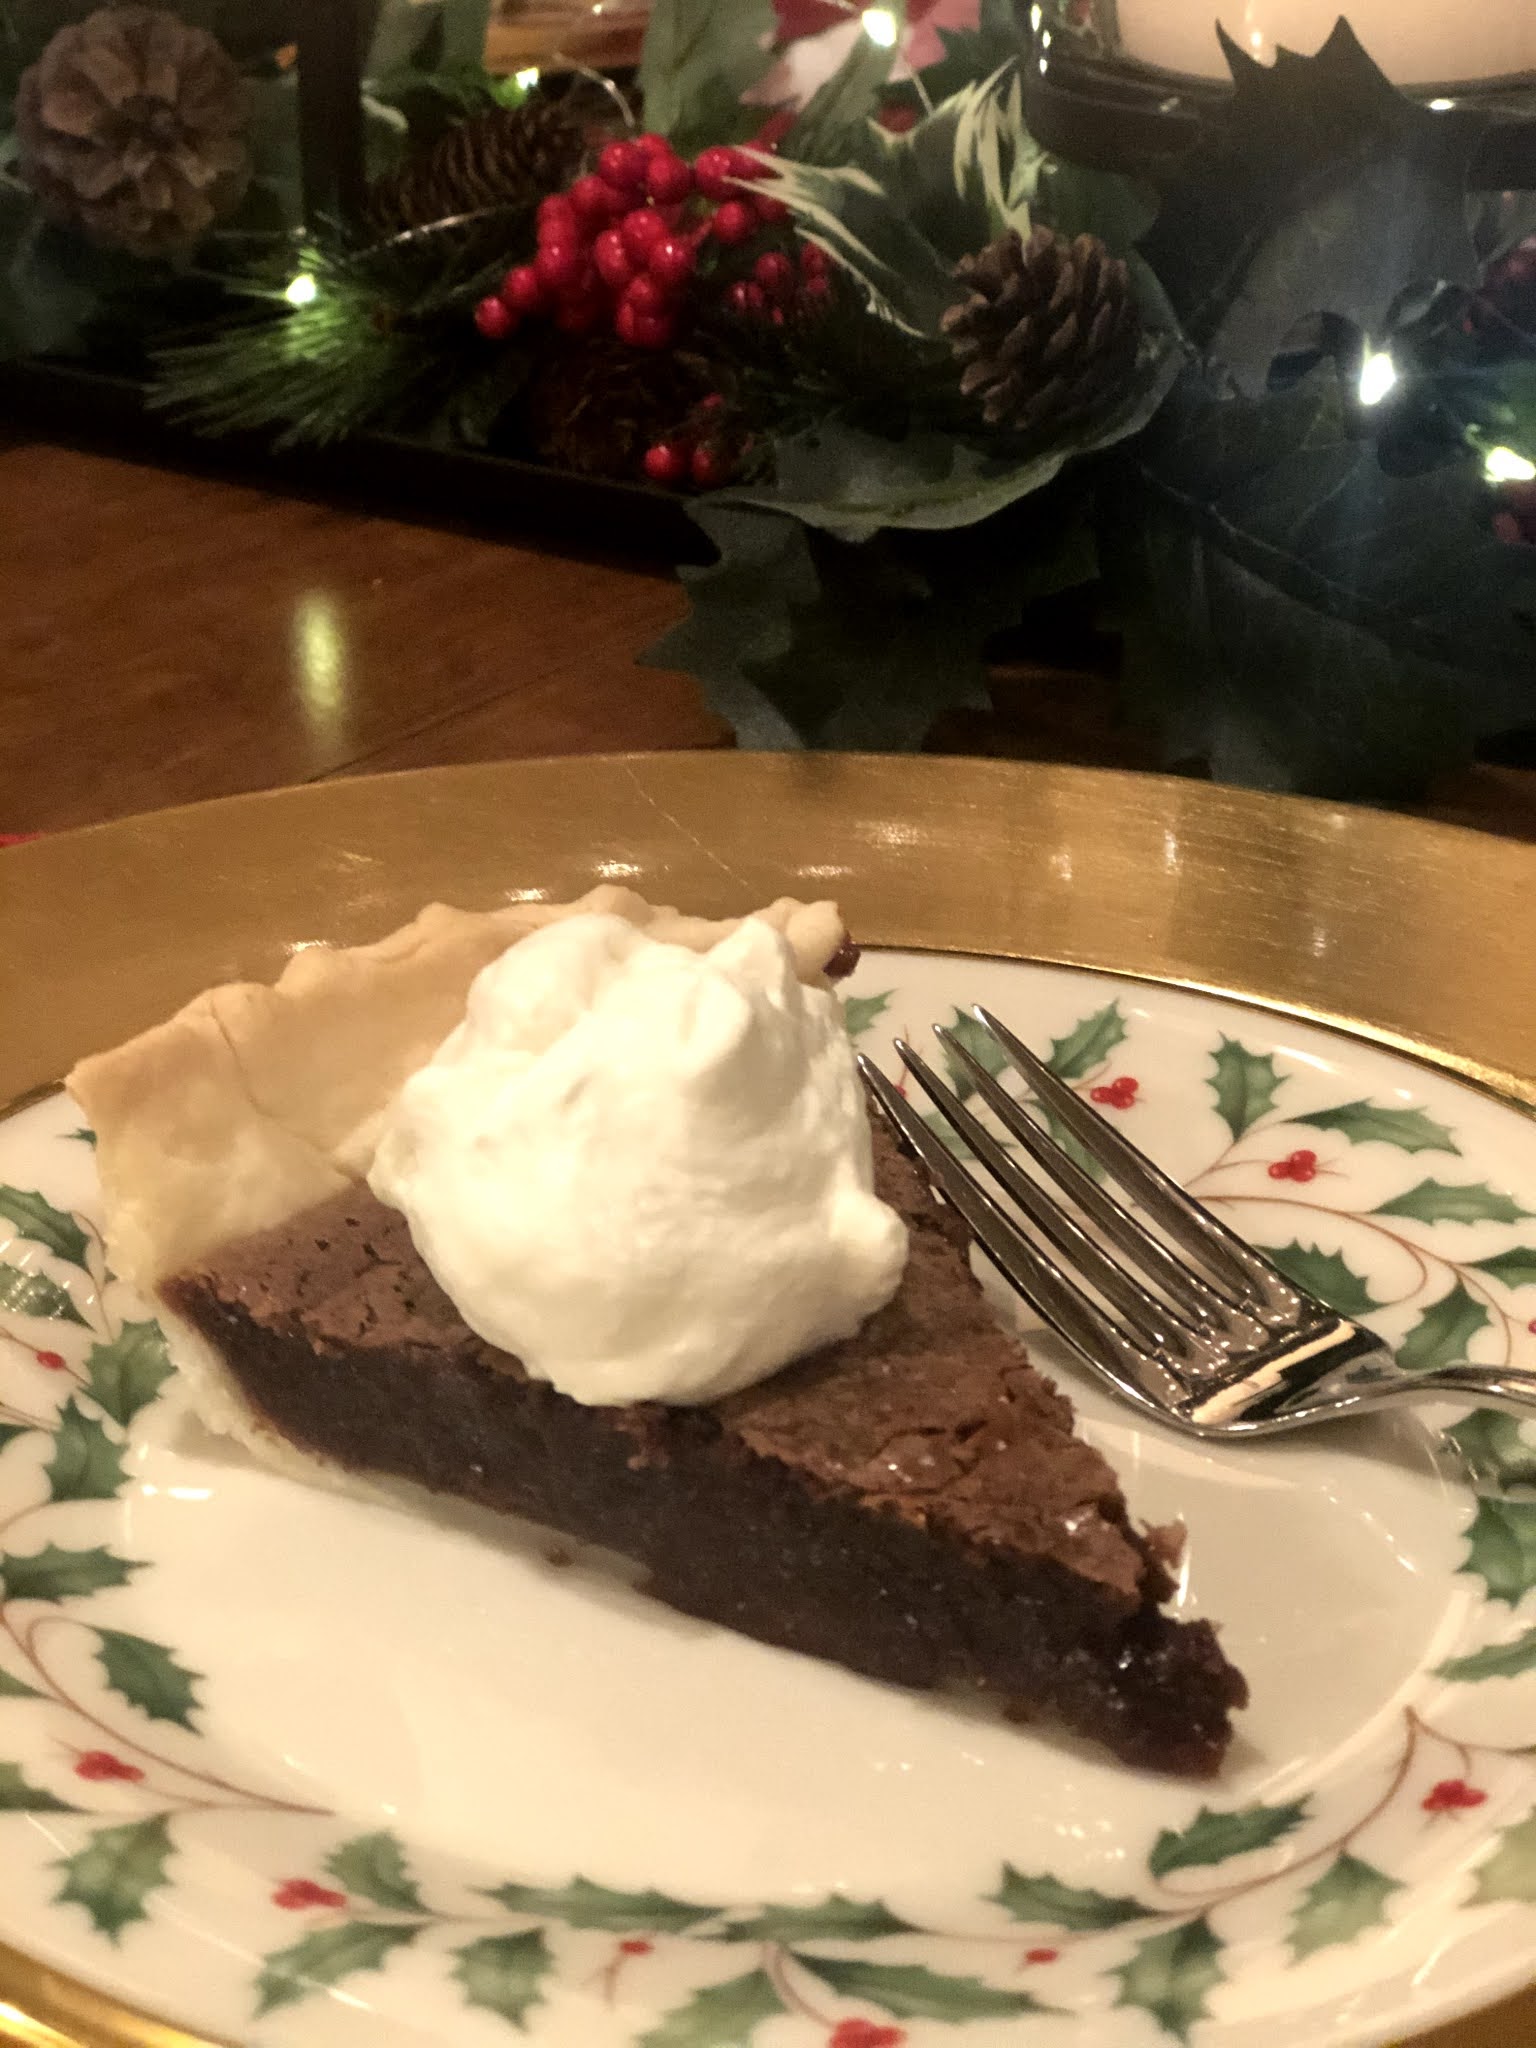
So I'm sitting here on New Year's Eve, planning to watch the ball drop on television. Like we always do. If we can stay awake, we will kiss and toast the new year. But before this year is completely in the rearview mirror I want to share a recipe that we enjoyed on Christmas Eve. One of the many joys of expanding a family is learning about the foods from the other family. This pie, a tradition in our son-in-law's family, was new to me. It was delicious. And so easy. You know me. I am a fan of easy recipes. Todd said I could share his grandmother's fudge pie recipe.


LOUISE JACK'S FUDGE PIE

1 unbaked 9-inch pie shell (we used refrigerated pie crust)
2 oz. unsweetened chocolate
1 stick butter
1/4 cup all-purpose flour
1 cup sugar
2 eggs
1 teaspoon vanilla

Preheat oven to 350º.
Melt butter and chocolate. Add flour and sugar. Mix well. Add eggs, one at a time, beating well after each one until well mixed. Add vanilla. Pour into pie shell. Bake 20-25 minutes, until pie is just set. 

Serve with whipped cream, if desired.

Jessica's version:  She opted for bittersweet Ghiradelli chocolate.  Because the store was out of bittersweet. Since the chocolate was not unsweetened, she adjusted the sugar and used a scant cup. This also worked well.

The chocolate you use may depend on what's in your pantry. But a good quality chocolate is always a good choice.


Here's to a better 2021!


Wednesday, December 16, 2020

Party For Two, Anyone?

Toasted Maple Pecans

Just because you're not having a Christmas party this year doesn't mean you can't have party food. We decided yesterday that it would be fun to have just appetizer type foods for our supper. Then when I picked up my grocery order, there were several items out of stock. I checked out what I had here in the fridge and make a new plan. And it turned out just fine. 

And in another change of plans, Jessica and baby arrived right at dinner time—a day earlier than expected. She decided the smart thing to do was come the day before the predicted bad weather. So it turned out to almost be a party. A party for three. Right after she put the baby to bed, we used Christmas plates and helped ourselves to party foods. And settled in to watch some wonderful Christmas concerts on PBS.


Using what I already had here, I made the very quick and very delicious Baked Sausage Dip that we've made before. And in an effort to balance that heavy recipe with some healthy options, I added carrot and celery sticks and hummus and fresh fruit. It was a perfect combination. 


The other snack food I added to the tray was a little bowl of maple-flavored toasted pecans. I've toasted pecans for years but adding the maple syrup was new to me. It was so easy and it only made a little bowl full. Of course, you could easily make a huge batch but one cup of nuts was all we needed this time. These are not glazed and sugary like pecans sometimes are prepared. But there is enough maple syrup to give them a little extra umph!

TOASTED MAPLE PECANS

1 cup pecan halves

2 tablespoons maple syrup

Salt

Pepper, optional


Preheat oven to 375º. Line a sheet pan (I used a quarter sheet pan) with parchment paper. 

Pour maple syrup over nuts in a small bowl and stir to coat. Spread in a single layer on a sheet pan and sprinkle with salt and pepper if using.


Toast nuts for 10 minutes then stir. Toast for another 2 minutes and taste them. Toast for another 2 minutes if needed. (Mine took the whole 14 minutes.) Let them cool before serving. Store in an airtight container.


Toasting pecans is a judgement call—they need to come out of the oven just before they are crisp because they will crisp up as they cool. 


Having a party for two or three at home is simple. I arranged everything on a tray and just that one step made it look special. A local restauranteur years ago said, "I could sell peanut butter and jelly sandwiches at a premium price if I presented them well." He was speaking at a ladies club and told that group that half of success in the fine dining business was in the presentation. Yes. His food was also delicious, but the other half of his success was in creating the proper ambience and serving the food well. I heard many speakers in that club over the years. He is the only speaker I remember 30 years later.

I am taking a blog break for a few weeks. We, like many of you, are observing Christmas in new ways. Our celebration will be pared down to suit the times. We may discover that there are part of this scaling back that we like. And at the same time we will miss some of our traditions. But Christmas will come in its own fashion this year. And it will be one for the books. I imagine we will be talking about this particular Christmas for years. Be sure to make some good memories, too.

Merry Christmas & Happy New Year to you all!


Monday, December 7, 2020

Soup For The Non-Soup Lover

Mexican Cabbage Soup

During the holiday season—even this strange one—you might feel the need to take a food break. Not a "don't eat anything" break, but a break that calls for lighter foods. Even if the parties have been fewer, some holiday foods might have still made it to your table. (Little Debbie Christmas Tree cakes, anyone? Your special homemade fudge?) We might need foods that are not so carb loaded. But we still want delicious. And I always want easy. My friend Missy told me last week that she had made this soup for her dinner. I quickly looked up the recipe. It fits the bill of not-so-carby while being simple to put together. It's also gluten-free, dairy-free, grain-free and fits paleo and whole30 diets. What it is not, is flavor-free.

I have the same cookbook that Missy used. Both of my daughters cook from it frequently. (Mommy also recommends the Greek Lemon & Oregano Potato Soup.) When I looked up the recipe I realized I had all the ingredients here...if I made a couple of minor changes. I didn't have any beef broth here but I did have a jar of Better Than Bouillon roast beef flavor. I mixed up 6 cups of that. This bouillon base is handy to keep in your pantry, but know that it needs to be kept in the refrigerator after it's opened. And my fire roasted tomatoes were garlic flavored, so I adjusted the amount of garlic I added.

This was a perfect supper on a cold rainy night. And it was the perfect balance to the caramel cake we enjoyed that same evening. It's Daddy-O's birthday week. We had the soup again the following night for supper and Daddy-O said it was even better than the first time.

Starting to simmer.

Daddy-O is a well-known non-lover of soups. There are a couple of exceptions, but in general he does not like soup the way I do. But he declared this one "a keeper." (Could be all the meat in the soup.) That is high praise from him. 

To speed up the "making supper" process, I diced all the vegetables ahead of time. And I measured the spices into a small cup, ready to all to the pot. Then it was simple to make the soup. Here is my version. (Only minor changes from the original.) Don't let the unglamorous name throw you. It's good!

MEXICAN CABBAGE SOUP

    -makes about 3 quarts


1 tablespoon olive oil

1 lb 93% lean ground beef

1 cup diced onion (about 1/2 of a medium onion)

1 large carrot, peeled and diced

1/2 cup diced green pepper

2 teaspoons jarred minced garlic

1 teaspoon kosher salt
1/2 teaspoon black pepper

6 cups low-sodium beef broth (I used Better Than Bouillon to make mine)

1/2 head of cabbage, cut in half & thinly sliced

1 (14.5 can) fire roasted diced tomatoes, undrained

1/2 teaspoon chili powder

1/2 teaspoon oregano

1/4 teaspoon cumin

Pinch of cayenne (or to taste)

Juice of 2 limes (about 1/4 cup)


In a Dutch oven, heat oil over medium high heat. Add ground beef, onion, carrot, green pepper, garlic, salt and pepper. Cook, breaking up ground beef, until beef is no longer pink. 


Mix in broth, cabbage, tomatoes, chili powder, oregano, cumin and cayenne. Bring to a boil, reduce heat to simmer, and cover. Simmer for 20 minutes, until cabbage and vegetables are tender. Stir in lime juice and serve.


If you are looking for a cookbook to add to your collection, The Defined Dish--Healthy and Wholesome Weeknight Recipes is a really good choice. Both of my daughters have cooked many of these recipes, as has my friend Missy. All of them have used the same word when they tell about the recipes here—flavorful. We don't do Whole30, but the recipes here are just good ones. And it's good to mix in some "clean" recipes along with my regulars. 


The ingredient lists can look long, but it's often only because there are more spices/herbs to be measured. I find it helpful to measure all of those before I start cooking. It's the worst to have the main ingredients in the pan only to discover you are out of one of the spices. Plus, it seems to speed up the prep process. I often measure the spices earlier in the day—or even the day before. Less kitchen time required when it's close to dinner time.


Thursday, December 3, 2020

Twice Baked Sweet Potatoes

Twice Baked Sweet Potatoes

This year's odd Thanksgiving has come and gone. We were home alone but thankful for FaceTime and Zoom so that we could have a little visit with the family. While we certainly missed the big family gathering and the tables loaded with food, we didn't starve. Far from it. And I didn't have to cook for a couple of days. LOTS of leftovers. 

Since I was only cooking for us, it was a good time to try a new recipe. Our Thanksgiving table always includes a sweet potato casserole. I love it. It's topped with brown sugar, nuts and cinnamon. It's sweet enough and rich enough to be a dessert—even after I halved the amount of butter my mother used— but here in the south it totally qualifies as a vegetable. 

A plain baked sweet potato is pretty awesome. If they are really good potatoes, they are sweet enough as is. A sprinkle of cinnamon is all you need. But it was Thanksgiving. I wanted something "special." And I found the perfect recipe. Here is my version of the Food Network recipe from The Neelys. It was an easy make ahead dish that was much lighter on the add-ins than my usual. Adding this to my recipe list. 

TWICE BAKED SWEET POTATOES


3 medium sweet potatoes, similar in size & shape

2 tablespoons brown sugar

2 tablespoons cream cheese, room temperature

1/4 teaspoon ground cinnamon

1/8 teaspoon nutmeg

1/8 teaspoon ground ginger

Salt & pepper

Cinnamon sugar (I keep some mixed up in a shaker bottle)


Preheat oven to 400º. Scrub potatoes well. Place on baking sheet and bake 1 hour, or until tender. 


While potatoes are baking, mix remaining ingredients, except for salt and pepper. 

Let potatoes cool enough to handle. Cut potatoes in half and scoop flesh into a mixing bowl. Mix in the butter/cream cheese mixture completely, adding salt & pepper to taste. (I only added a little.) Spoon potato filling back into potato shells. Sprinkle tops with cinnamon sugar.


Place potatoes in a baking dish. If you are making the day ahead, cover and refrigerate. Before serving, bake at 350º for about 30 minutes. If you aren’t making them ahead, bake after stuffing the potatoes for about 15 minutes.


Serves 6


Today, after making these for our Thanksgiving, I actually watched the video of The Neelys making these. They did it slightly differently so that each person got a whole potato. For our meal which had many side dishes, a half potato was plenty big enough.


Sunday, November 29, 2020

The Season Of Hope


Today was the first Sunday of Advent. It's been a while since we had a wreath at home but this year we really needed one. When our girls were small we had a special breakfast each of the four Advent Sundays and lit a candle when we sat down to eat. (Then went to church to see another one lit.) This year it was just coffee in a Christmas mug but that was enough.

I didn't grow up in a liturgical church. (Although I think many non-liturgical churches now observe some seasons like Advent and Lent.) But I have come to love the traditional observances, the changing colors of altar linens that reflect the liturgical calendar, and the creeds that we say together. It's how we feel connected. 


And on this holiday weekend when we were without family here, we figured out that we could still be together. One afternoon the little girls and I had a zoom visit while their parents worked on their outside decorations. Little Sister taught me how to cut paper snowflakes. And then she led me in a dance class. Even Daddy-O got involved in that. It's been a while since he and I danced and it was fun. 

It was all so much fun that we decided to do it again the next day. Then I thought, "Why stop with a couple of days? Let's do the 12 days of Christmas!" They have been out of (virtual) school this week so we got three of the days in. So far they have been in charge of planning what we do. And we have a time limit of about an hour. 

We also spent some time this weekend pulling out Christmas decorations. Daddy-O told me that I've decorated more this year than I have in ages. Maybe ever. It's partly because I've been home more. No road trips to see school Christmas programs or choir cantatas. No weekend in the mountains. Just home. And it's partly because we, like everyone else, needs some extra cheer this year. Our house looks like I'm aiming for a "Festival of Lights." Nothing is fancy, but there are little pre-lit trees in multiple corners and on the porches. I'm waiting on a new wreath with lights for the front door. And then I'll declare it finished.

On our 2nd day of zoom Christmas we drew portraits of each other. We had the 3rd day of Zoom Christmas this afternoon. If you haven't zoomed, it's pretty easy. (Is there anyone who hasn't zoomed yet?) Today they taught me some new zoom skills. We did a screen share where we could both draw on the screen. And we could still see each other and chat—see the small windows on the right?—while we were working. We drew the four seasons today. 

Going clockwise from top left we drew Spring, Fall, Winter and Summer. This was so much fun once I found the buttons to click so that I could change colors and line sizes. And erase. They are patient teachers.


Today's 12 days of Christmas zoom also included tic tac toe. Baby Girl and I are pretty evenly matched so we had a lot of no winner games. And then she led me in a stretch class. Thank goodness, for many months now I've been faithfully doing an online fitness class (Grow Young Fitness) so I was totally able do all that this six year old asked for. Now, my form didn't quite look like hers, but I was close enough considering there's over a half century between our ages! I'm glad there are no photos of that activity.

We have ended each of our Zoom visits with a joke session. After three days we might have told all the winter/Christmas jokes we know. Can't wait to see what they have planned next. 


Daddy-O got into the decorating spirit this weekend, too. When you have a red barn in the pasture beside the house, it begs for a big wreath. There is a wreath on the other barn, too. And it won't be long before there is one on the tractor. 

So all in all, it was a good Thanksgiving weekend. Even though this year has been different, some things always stay the same. The advent candle we lit this morning was the candle of hope. This year in particular, we need that. And we need a candle that reminds us to keep hoping.


Wednesday, November 25, 2020

One For The Books

Pumpkin Crunch

As I searched through the recipes here on my blog to find some of the traditional Thanksgiving foods, like cranberry sauce and pumpkin crunch, I found the recipes attached to photos of previous Thanksgivings where the table(s) groaned under the weight of the dishes. More than once, another surface had to be quickly cleared to find a place for more dishes as the last families arrived with their contribution to the meal.

Like so many of you this year is not going to be that kind of day. We will be having turkey for two. And we surely won't have that many choices of casseroles to fill our plate. I am working on the basics today. Fingers crossed the turkey turns out okay tomorrow. It's a little one. I am never the one cooking the turkey so we hope it will be edible. 

Yesterday I heard from friends and family whose plans were still changing. Plans were aborted at the last minute when people thought really hard about traveling, or sharing a restaurant meal. And one sweet friend planned a celebration of life service this week instead of a Thanksgiving dinner. So what is there to be thankful about this year? 

One of the tables at last year's feast.

For me, high on the list is the huge store of Thanksgiving memories of large gatherings with so much food you never tasted it all. Decades of Thanksgiving memories like that are in my head. And I'm thankful for Zoom so that we can share dessert tomorrow with the littles. Am I thankful that I won't have as many dishes to wash in the morning? Maybe a tiny bit. It was always a lot of work to get the food cooked, packed up and make it to the destination by noon. But it was great fun. 

Maybe you are still having a big gathering. Maybe you are home alone. Maybe it's a small group sitting around tables outside. Maybe some new traditions will be started. I, for one, am just thankful for another day.

If you have never tried this recipe I'm posting it again. It isn't new. We've been making it for years. But I took it to my book club last fall and it was the surprise hit that made it to several Thanksgiving tables last year. Even the non-pumpkin lovers enjoy this one. It's easy. Can be made the day ahead. 

Mine is cooling right now. This year I only put nuts on half of it. (Daddy-O and nuts do not get along well.)  

PUMPKIN CRUNCH

15-oz. can pumpkin puree (not pie filling)
12-oz. can evaporated milk
3 eggs
1/2 teaspoon cinnamon
1 box yellow cake mix
1 and 1/2 sticks butter, melted
1 to 1-1/2 cup chopped nuts

Mix pumpkin, evaporated milk, eggs, and cinnamon thoroughly and pour into a lightly greased 9x13-inch baking dish.
Sprinkle dry cake mix (straight out of the box) over pumpkin mixture. Pour melted butter over cake mix. Sprinkle with chopped nuts. Bake 1 hour at 350º. Let cool completely

Topping:
1 8-oz block cream cheese, softened
1 box powdered sugar
1 8-oz container Cool Whip

Using a hand mixer, blend cream cheese until fluffy. Mix in powdered sugar. Then mix in whipped topping. Spread over cooled pumpkin cake. Refrigerate. Cut into squares to serve. Can sprinkle lightly with cinnamon or chopped pecans to garnish. (I never do this part.) 


Thursday, November 19, 2020

One For The Road


This certainly is not an original idea. I've seen it done several times before as you likely have, too. But in this year of accelerated online shopping, it seemed appropriate to put this box beside our front door for drivers who are working long hours. Sometimes it's after dark when a package is dropped off, like the box delivered last night.

Goodness knows there were plenty of empty pasteboard boxes here to hold the goodies. This one happened to be the exact size I needed. And it works as well as a nice basket. Which I didn't have. Doubt the drivers care one bit.


You could fill a box with anything. (Have any Halloween candy left over?) But I ordered something special because I loved these labels. And we selfishly hope plan to eat some of them. They are delicious. I saw someone on Instagram use these particular treats for a box like this. And I instantly recognized them as ones we loved to buy at a local gift store where Mommy lives. She would use them for teacher gifts. Or a tiny surprise for her little girls. And I may or may not have stopped by that lovely shop more than once and picked up a little bag to enjoy on my drive home.

That shop sadly has closed its doors. We still miss the gift shop...and the cookies. I didn't realize that the cookies are available online until I saw the Instagram story. You can use the search box on the website.  I just discovered stores near me that sell these when I was finding the link for this blog post. If you order, you can choose from many, many labels. There's something for every occasion. Party favors. Thank You. Get Well. Holidays. Stocking stuffers. They also come in bigger packages and large containers if a 2-oz bag isn't enough. 

If I hadn't come across these cute little cookie bags, I would have bought individual packaged cookies from the grocery store. Why not homemade goodies? I do love baking, but in today's world a prepackaged treat is just the safest. It certainly is the easiest. And many people feel more comfortable with a wrapped item. 


Why am I even telling you about this? Not at all to say what a nice person I am. (I do try.)  But I wanted to say that this has been so much fun for us. When Daddy-O comes in near dusk, he asks, "Any more gone today?" "Hey! Another water bottle was taken." And that makes us happy. This little box doesn't hold many at a time, so it's easy to see when one or two have disappeared.

Some of these treats will go to other people—the ones who do helpful things but don't come to our front door. It's just a tiny way to say "I see you. I appreciate what you do." During this season of thanksgiving in a year where so much has been upended, it feels good to say "thank you." 


Disclaimer: I am not advertising at all. But someone is sure to ask about the cookies...
These cute cookie bags came from Oh Sugar! You can order them online (shipping is a little pricey) and get the labels you want. But there are many retail locations that carry them. You can do a search on their website for stores in your area. 


Monday, November 16, 2020

Another March Around The Sun


I took last week off from blogging. It was my birthday week so I treated myself a little. We did get to see Little Lady, and oh, how she had grown. I ate cinnamon rolls. A friend dropped off the cutest little bundt cakes for us so I really did have birthday cake. (I don't think it counts if you have to bake it yourself.) I got birthday cards and text messages and even phone calls to wish me happy birthday. 


I watched Christmas movies to my heart's content while I started pulling out some Christmas decorations.  Hallmark is the king of this market, but I found some good ones on Lifetime. And I haven't even gotten to the new ones on Netflix. We all know that our beloved Hallmark Christmas movies follow a formula—accidental meeting of people who don't get along, forced togetherness turns into love, the first kiss is interrupted and then at the end when all is well and they DO get to kiss, it snows. Maybe they are fun because they are predictable...in a world where not much else is.

My favorite one of the week—above average for this genre—was Christmas In Vienna. It's from Hallmark. It's worth watching just to see the city of Vienna at Christmas. So many scenes of that beautiful city during the holidays. And I happened to see the female lead do an interview a couple of weeks earlier and she really is a classical violinist. It was refreshing to see a real musician in one of these movies. (I checked. It still comes on a few more times in the coming weeks.)


I also gave myself time off in the kitchen. When I did cook it was recipes I've made many times before. Daddy-O had to fend for himself part of the time. That "meat" on the plate is exactly what it looks like. Spam. Don't judge. I didn't have to cook. I promise I will feed him better this week.

I don't have my week's menu plan done (it's a new thing for me and a hard habit to get going) but maybe it will include something that calls for remoulade sauce. Regardless of my menu, I'm posting the recipe here right now, so that I know where to find it later. I nearly panicked when I went to look for the paper copy the recipe and it wasn't where I thought I had put it.

This was delicious a few weeks ago when I made it to go along with crab cakes. Maybe this week I do something with shrimp. 

REMOULADE SAUCE 


1 cup mayonnaise 

2 teaspoons Old Bay seasoning 

1/4 cup flat leaf parsley, chopped 

1 tablespoon horseradish sauce 

1 tablespoon whole grain mustard (I used German mustard) 

2 teaspoons Worcestershire sauce 

1 teaspoon Texas Pete hot sauce (or to taste) 

1 teaspoon lemon juice 

1/2 teaspoon garlic powder


Mix all ingredients and store in refrigerator.


Tuesday, November 3, 2020

Enchilada Chicken Stuffed Sweet Potato in the Slow Cooker

Enchilada Chicken Stuffed Sweet Potato


Today is Election Day 2020. It calls for some easy, comfort food in the kitchen. 
This recipe fits the bill.

I have seen this recipe from SkinnyTaste pop up on Instagram more than once. The idea that I could bake sweet potatoes and make chicken in my slow cooker at the same time intrigued me. So last week when I had sweet potatoes that needed to be used and a pack of chicken breasts in the freezer that needed to be cooked, it seemed like time to try this. I must say this is about the easiest meal I've ever made. Healthy. Delicious. Easy. What more could you ask for? 

I only made one change. I used a can of enchilada sauce instead of making my own like the recipe suggests. Truth be told, I'll probably use canned sauce the next time—and there will be a next time—but I will use medium sauce instead of mild. You might rather go for hot even. But the mild just didn't have enough pizazz here. Top the stuffed potatoes anyway you like. We went for the basics. Sour cream and cheese. And I was delighted to find the very last parsley waiting for me in the garden. It surely makes a better photo with that little pop of green in the picture!


ENCHILDA CHICKEN STUFFED SWEET POTATOES

4 medium sweet potatoes, skin on
1 lb boneless, skinless chicken breasts (my pack had 2 breasts)
1 teaspoon salt
3/4 teaspoon garlic powder
1 (10-oz ) can red enchilada sauce 

Your choice of toppings: sour cream or Greek yogurt, shredded cheese, chopped scallions, cilantro

Wash and dry the sweet potatoes. Wrap individually in foil. (I love the box of foil sheets for this.)
Season chicken with salt and garlic powder. (I used my house seasoning instead) and place on one end of a 6-qt slow cooker. Spoon 1/4 cup enchilada sauce over chicken. Refrigerate remaining sauce for later.

Place potatoes on the other end. Stack them up to fit. Cover and set to cook on LOW for 6 to 8 hours.

When done, remove chicken and potatoes. Place chicken in a bowl and use two forks to shred. Stir in remaining sauce. 

To serve, split sweet potatoes and top with shredded saucy chicken. Sprinkle shredded cheese on each potato and place under broiler for a couple on minutes to melt cheese. (I skipped this step.) Add any other toppings you choose.


I am enjoying seeing fall photos on Instagram. Some even include snow! We don't have much leaf color here yet. Here is what our fall looks like so far...


Tuesday, October 27, 2020

Apple Cake w/Brown Sugar Frosting

Old-Fashioned Apple Cake w/Brown Sugar Frosting


This morning I'm putting this recipe on the blog so that we don't lose it. It's straight from King Arthur, who says it's their most requested apple cake recipe. It tastes like fall. It was good enough that Jessica made it twice. In one weekend. She made one so that we would have a treat. And two days later, the cake was gone but Todd was here, and he asked, "Can you make another one?" One of those times she measured the dry ingredients ahead of time. That made it so easy. Peeling the apples is the labor intense part. 

We did decide that the frosting is really sweet. Almost too sweet for us Southerners who love sweet. (And we live in the land of Krispie Kreme.) It's almost like brown sugar fudge. But did she change it on cake #2? No. Made it exactly like the first one. And the second cake disappeared as fast at the first one. 

Find the original recipe here. There are more mixing tips, including how to make a gluten-free version, and how to make a less sweet frosting. I am posting it here just like Jessica made it.

OLD-FASHIONED APPLE CAKE w/BROWN SUGAR FROSTING

Cake:

2-2/3 cups all-purpose flour

1-2/3 cups sugar

3/4 teaspoon salt

1-1/2 teaspoon apple pie spice*

2 large eggs, room temp

1 stick (8 tbsp) butter

4 cups peeled, finely chopped apples

1 cup chopped toasted pecans, optional

Frosting:

7 tablespoons butter

2/3 cups brown sugar, packed

1/4 teaspoon salt

1/4 cup milk

2-1/4 cup powdered sugar

3/4 teaspoon vanilla

Preheat oven to 375º. Spray a 9x13-inch pan with cooking spray. Mix all cake ingredients, except apples and nuts, in large mixer bowl. Mix just until mixture comes together and becomes uniformly crumbly. Stop mixing at this point. You don't want the mixture to turn into a cohesive mass.

Add apples and nuts if using. Mix until apples release some juice and stiff mixture becomes thick batter. (Dough will be between cookie dough and brownie batter.) It may take about 3 minutes using a stand mixer. (Jessica says you need a stand mixer for this. Don't try to mix by hand.)

Spread batter into greased pan, using wet fingers to spread it if necessary. Bake cake for 45 minutes, or until toothpick put in center comes out clean. (Or with just a few crumbs clinging to it.)

Remove cake from oven and place on rack to cool while you make frosting.

To make frosting:  Melt butter in medium saucepan over medium heat. Stir in brown sugar and salt and cook, stirring until sugar starts to melt and mixture becomes fairly smooth. Add milk and bring to a boil.

Remove syrup from heat and pour into a medium mixing bowl (but large enough to hold all the powdered sugar.) Let syrup cool for 10 minutes. 

Pour powdered sugar into warm syrup, then add vanilla. Whisk everything together until thoroughly combined. Work fast because frosting stiffens up quickly as it cools.

Pour warm frosting onto cake, spreading it quickly over entire surface. (Have an offset spatula ready to spread. Don't lose time digging through the drawer to find it.)

Serve cake warm or at room temp. Store, covered, at room temp for several days. (Ours didn't last that long.)

* No apple pie spice in your pantry? Mix 1 tsp. cinnamon, 1/4 tsp. ginger and 1/4 tsp. nutmeg to make your own.


It is awfully quiet here this week. Like grandparents everywhere we would love to see the little ones more than we do. But we are thankful for photos and good memories. This is Little Lady playing with the decades old Fisher-Price farm that belonged to her mommy and aunt when they were the little girls here. I didn't save all the toys, of course, but I'm happy I did hang on to a few. It's fun to see them in use again.


Tuesday, October 20, 2020

Food And Family

Cheddar Beer Bread

What a week we had! For the first time in months we got to spend time with our sweet smallest granddaughter. She and her mommy were here for over a week. We cooked. We ate. We crawled around in the floor behind her. We played blocks. We sang songs. It was heaven.


We made so many good recipes while they were here. It's the most cooking I've done in ages. Now, you know I cook a lot. But I don't always cook every day. With just two of us here, we count on leftovers for dinner at least a couple of days a week. 

I'll share a few of the favorite recipes in the coming weeks. Maybe the most favorite...and the easiest...was this cheddar beer bread. Mommy sent the recipe to me and Jessica several weeks ago. And before she came to visit, Jessica made it twice at her house. We SHOULD have made it twice here. Yes. It's that good. It is perfect to serve along side a bowl of chili or soup. Or, toast slices for breakfast. It's good by itself.

If your first thought is "I can't bake bread. I don't know how to do yeast recipes." don't skip this recipe. This is a quick bread. It's more like stirring up a batch of muffins. Trust me. You need to make this.

CHEDDAR BEER BREAD

3 cups all-purpose flour

1 tablespoon baking powder

3 tablespoons sugar

1/2 teaspoon salt 

1/4 teaspoon black pepper

1 cup shredded sharp yellow cheddar cheese, divided 

1/4 cup melted butter, divided

1 (12-oz) bottle or can of beer

Preheat oven to 375º. Spray an 8-1/2-inch loaf pan with PAM (or similar) cooking spray. 

In a large bowl, mix together flour, baking powder, sugar, salt, pepper, 3/4 cup shredded cheese, and 3 tablespoons of the melted butter. Add the beer and stir well. Batter will be sticky. Pour batter into loaf pan.

Top with remaining shredded cheese and drizzle with the remaining butter.

Bake bread for 45-55 minutes, or until top is golden and a toothpick inserted in center comes out clean.

General rule is to check the bread at the shortest baking time and see if it needs more. All ovens are different.


Jessica said she used white cheddar at her house because that is what they buy. I always have yellow cheddar here. She said it tastes the same but the yellow cheese makes a prettier loaf.


Pattern:  Tchaikovsky Hat, size Child
Yarn: Jodie Young Ciao (DK), Nougat colorway
Needles:  4 & 7

Last year I knitted a nice wooly hat for Jessica with a fur pompom on the top. She asked for a matching hat for Little Lady. That particular pattern (Entwined by Susan B. Anderson) didn't include small sizes and recalculating the cable design was more work than I wanted to tackle. So I used a similar color yarn and made one of my most favorite knitting patterns—the Tchaikovsky Hat from Curious Handmade. This pattern from designer Helen Stewart is written for four sizes...Baby, Child, Small Adult, Large Adult. I made the child size for this 9-month old. (We measured her head and it was close to the child size.) She will be able to wear it for a few years, I think.


We are going to miss our little busybody this week. She is crawling everywhere, pulling up and walking as she holds on to furniture and "tasting" absolutely everything she picks up. 


Monday, October 12, 2020

Lesson From My Kitchen


When Daddy-O went out to pull up the straggly garden plants, he harvested a few vegetables instead. He discovered a handful of green beans ready to be picked. there have not been any for some time. This was their last hoorah. He also cut about 6 pods of okra. And well, those little tomatoes...I'm not sure they will ever stop! I suppose frost will get them eventually.

One thing I've pushed myself to do this strange summer is to cook without a "recipe." You don't always need a recipe, but you do need to know some basic cooking directions. Last week I wanted to do the easiest dinner possible and use up these last garden vegetables. Sheet pan dinners are as easy as they come.

 Instead of looking for a recipe, I looked for cooking times and temps for chicken tenders. I had a package that needed to be cooked pronto. I've done sheet pan veggies many times and I knew how they cooked. I searched "chicken tenders sheet pan meal." And a few actual recipes popped up. I was not interested in anything but the cooking time/temp. 

My preferred temperature for oven roasted vegetables is 425º on the convection setting. They roast quickly and get beautifully browned and crispy. I had also done them at 400º, so I knew that was an option. On a few times, I've roasted things at 450. 

I needed to know about cooking the chicken tenders on a sheet pan. So many recipes. So many temperatures and times. But I did find a recipe for chicken tenders on a sheet pan at 425º, cooked for 20 minutes.That fit perfectly with how I like my veggies. I didn't bother with recipe specifics. I only wanted the basics. Here's what I did...

SHEET PAN CHICKEN TENDER VEGGIE MEAL
  • Preheat oven to 425º. Use convection setting if you have it. Without convection, it might take a little longer.
  • Line a sheet pan with parchment paper. Put sliced/cut vegetables on pan, being careful not to crowd. Drizzle a little olive oil over all veggies and use hands to toss them, making sure all are coated. Sprinkle with house seasoning, OR salt, pepper, garlic powder, OR seasoning of your choice. 
  • Rub a little olive oil on the end of pan reserved for chicken tenders. Season tenders and line them up on one end of sheet pan. Brush with a little olive oil (I used my hands and rubbed some on) and season. 
  • Press panko crumbs on each tender and spray with olive oil spray or other cooking spray. Sprinkle a little more seasoning on top.
  • Roast for 20-25 minutes. Watch carefully near the end and check that you are not overcooking. 20 minutes was fine for this pan. 
  • Cut grape or cherry tomatoes in half. Toss with a little oil. 
  • With 10 minutes remaining, add tomatoes to the pan and sprinkle with seasoning. 

I turned Daddy-O's meager harvest into a feast for two. It was delicious! And knowing this was the last of the garden vegetables (not talking about the tomatoes) made it even sweeter.

Remember, THIS IS NOT A RECIPE. It's a starting pace. An idea. A launching pad. I had green beans and okra and little tomatoes to cook. You might have other vegetables. Next time I won't have this combo from the garden . Or you might have even a different meat. Spend a few minutes to check recipes for times and temps to make your combination work. Make sure your veggies are dry before you roast them. Wash them, of course, but pat them dry, or let them sit out a while to dry.

You are free to use any seasoning you like. The seasoning for Sausages & Veggies w/Mustard Sauce would be good to use if you want to make your own. And there are many good  bought seasoning mixes. Just pick your favorite. Or, go a little crazy and sprinkle an assortment of herbs over the pan! Another time, I might just cook the chicken tenders this way and do side dishes on the stove top. Do not get locked into this as a "recipe." 

This turned out better than I expected. The chicken tenders were browned and crispy. I did not turn them over during cooking. The vegetables were nice and crispy. I did stir them when I took the pan out to add the tomatoes. And 10 minutes was plenty of oven time for those little guys.

Please know...you can do this at a different temperature. Sometimes I roast vegetables at 400º if that works better with the rest of my meal. That will take a little longer. Watch and go by color. I did use a meat thermometer to check the chicken. That's the safest way. If you don't have one, cut a piece open to make sure it's cooked through.


Here is another panful of my most cooked recipe this summer—Grape Tomatoes & Pasta.  It was as good  this weekend as it's been every time I've made it. I've lost count of how many times I've made this during the summer. It's a delicious way to put a dent in the grape tomatoes harvest. And many of my friends have made this and loved it. I know I can buy the tomatoes and the basil in the store all year, but this has been a special recipe for us, knowing the star ingredients came from our back yard.


And here it is for the very last time with our garden tomatoes. It's a little different than usual. Using that same principle above, I used the basic recipe—which really wasn't a recipe—and changed it up to make do with what I had here.

I didn't have any fresh mozzarella. And I did have green peppers from the garden. So this time I sautéed diced peppers and onions a little before adding the tomatoes which I cut in half this time. After I added the cooked spaghetti and stirred it all together. Then I sprinkled shredded mozzarella on top and popped the pan into a 350º oven for about 10 minutes to let the cheese melt. This was so good.

Be brave in the kitchen. Out of an ingredient? See if you can find a reasonable substitute and skip a trip to the store. Or can you leave something out all together? Be brave.