Showing posts with label Main dish. Show all posts

Saturday, June 29, 2024

To Cook Or Not To Cook...That Is My Question

Garlic Parmesan Chicken Pasta Bake


I'm getting lazier and lazier about cooking. But eating out brings it's own set of things I don't always want to do—getting dressed, driving to town, waiting on the food, etc. It can take longer to go out for dinner than cooking. So last week I tried a new recipe minutes after announcing I wan't cooking dinner. Cooking seemed to be the lesser effort.

The recipe was good enough that we ate it for two nights, then packed up the last bit and took it to the lake for a quick meal down there. We are getting the lake place ready for family that will head this way in a couple of days.


I found the recipe online—actually its found me. It popped up as I was browsing the 'net. You can check out the original recipe at Bowl Me Over. She has good notes about how she made it. This falls in the comfort food category. 

As I often do, my version of this recipe was based on what I had on hand. I plan to make it again sometime and actually try it as it was written. I'll give you the recipe I found, then tell you how I changed it. I've realize as I'm trying to learn improv on the piano, I've been doing improv in the kitchen for years!

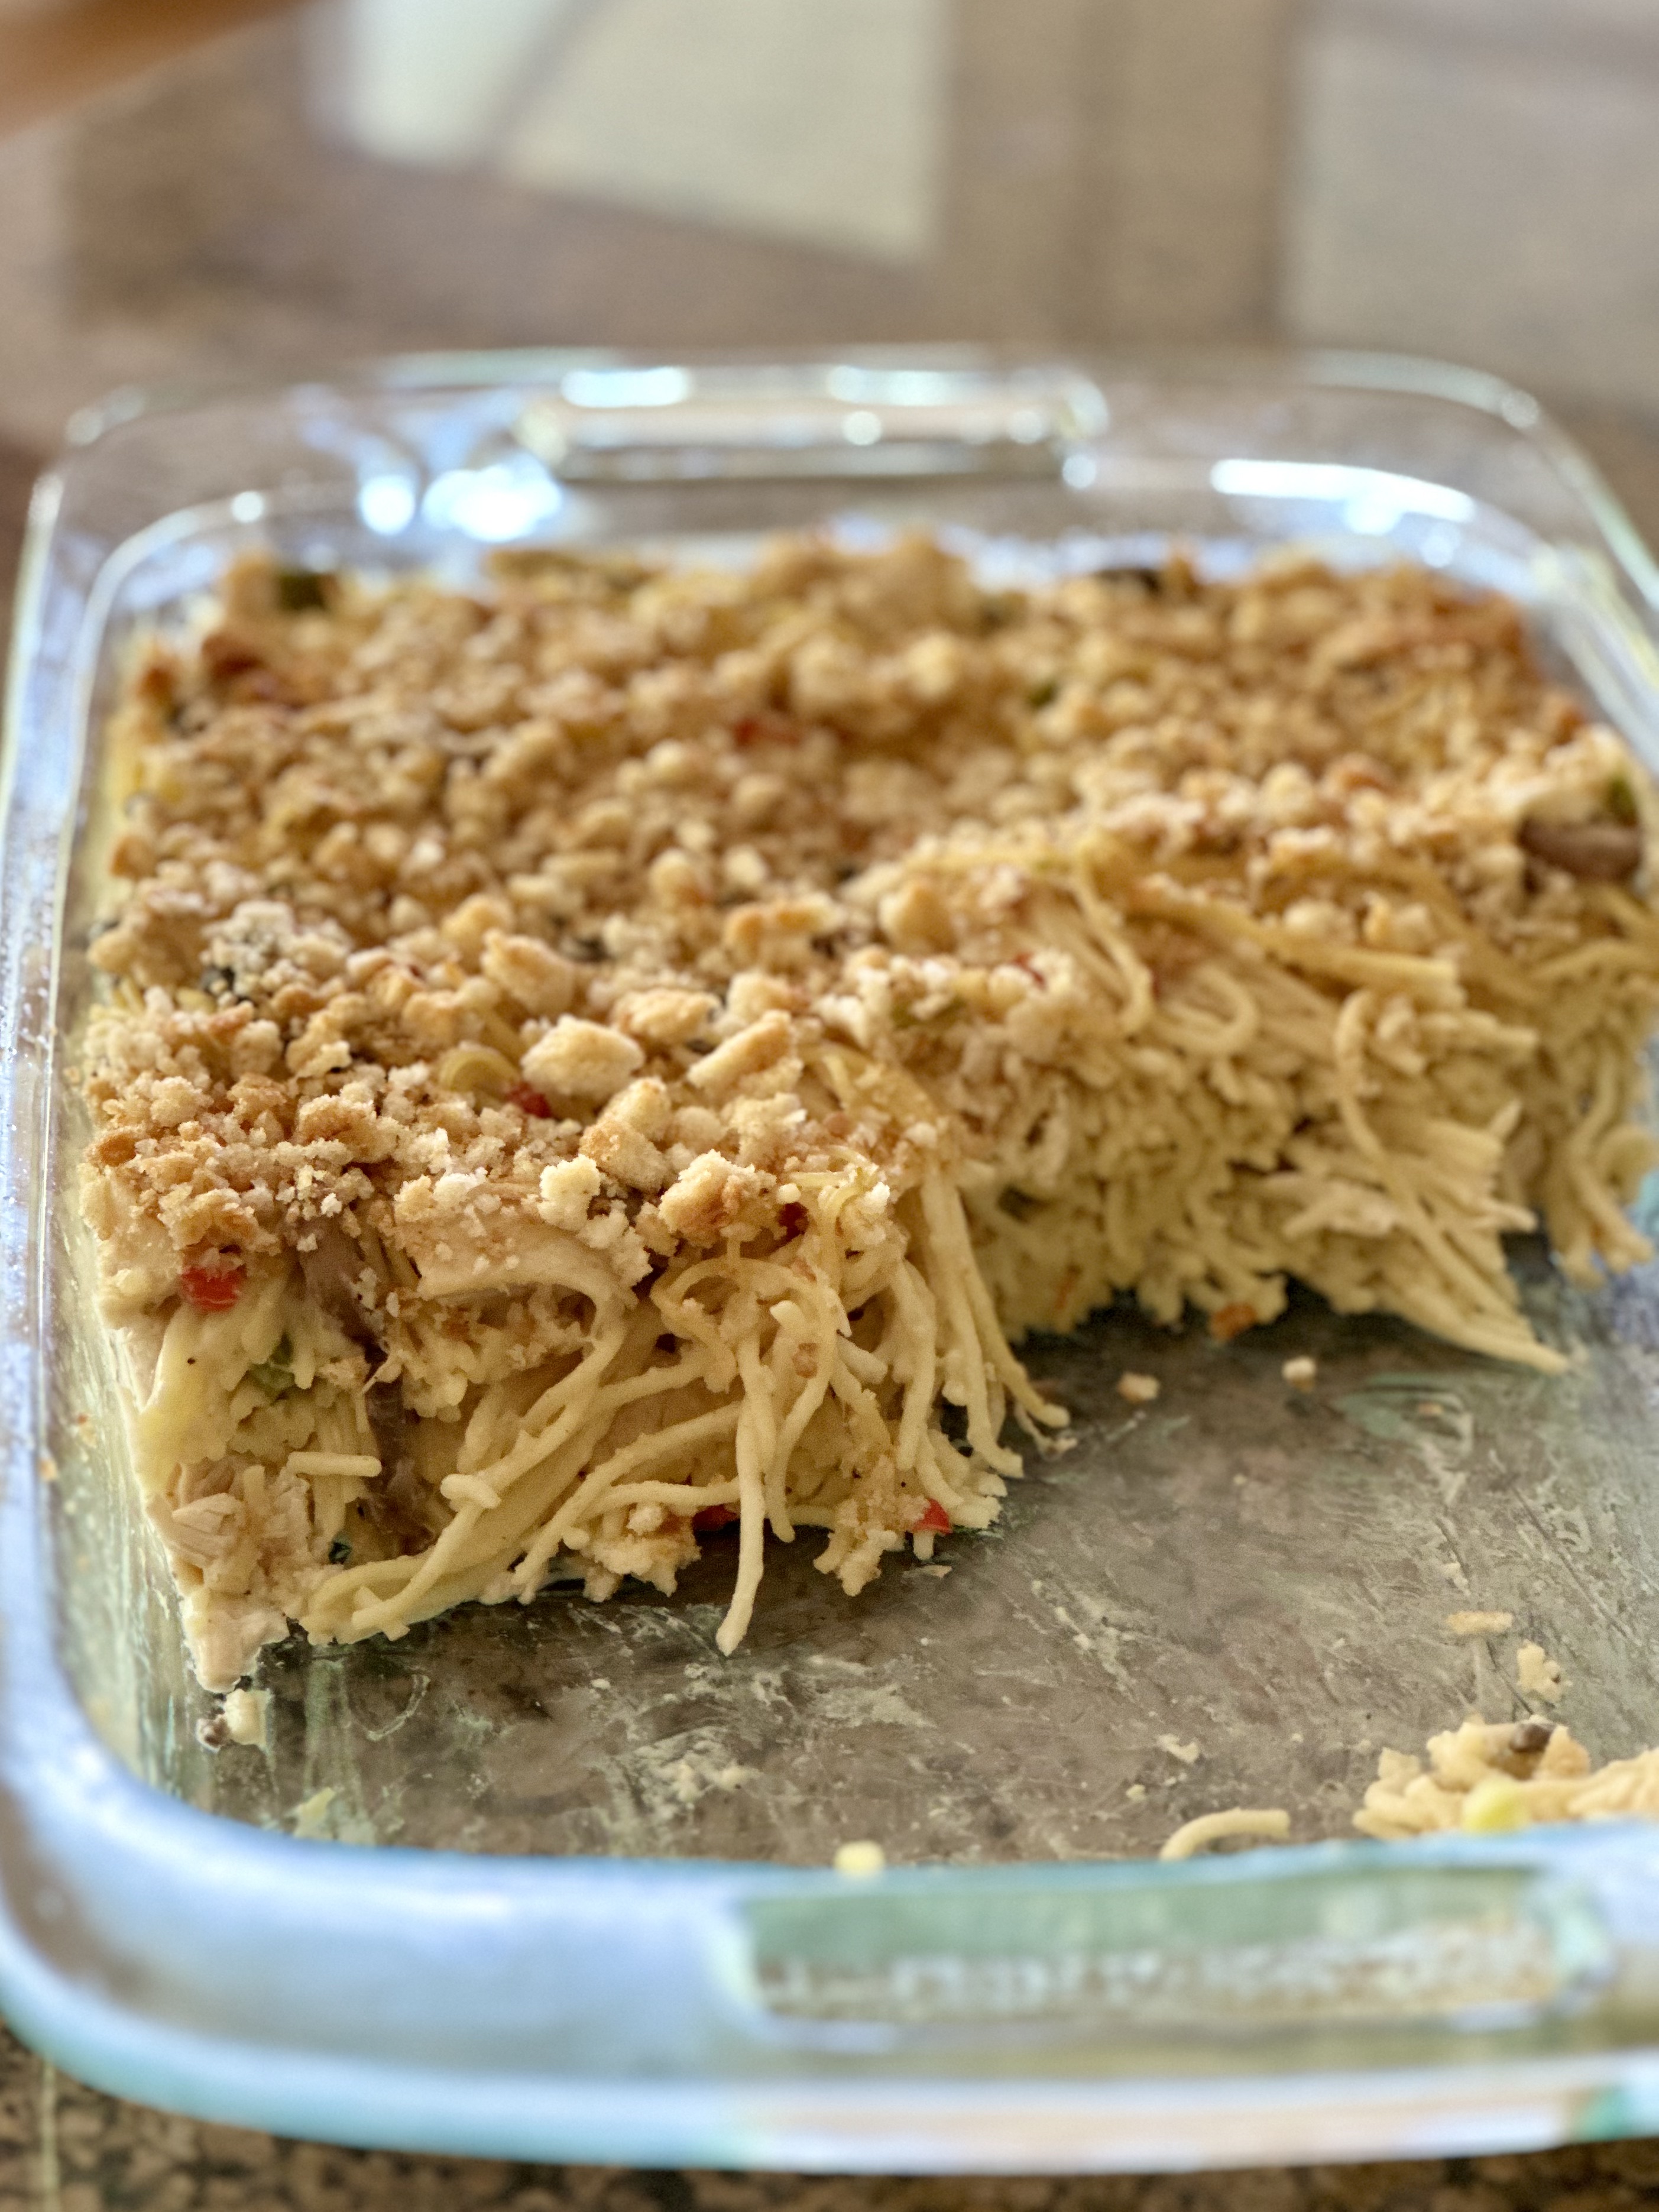
GARLIC PARMESAN CHICKEN PASTA BAKE

1-lb rotini pasta, cooked and drained (save a cup of pasta water)
3 cups cooked chicken, diced or shredded
2-15 oz jars Alfredo sauce
1 cup garlic parmesan sauce
2 cups shredded mozzarella
1/2 cup grated parmesan cheese
1/2 teaspoon salt
1/4 teaspoon black pepper

Preheat oven to 375º. Grease a 9x13-inch baking dish.
While rotini is cooking, mix chicken, Alfredo sauce, garlic parmesan sauce, and half the mozzarella and parmesan. Season with salt and pepper. Stir in the cooked and drained pasta, adding some of the saved water if needed. You want it creamy.
Pour mixture in to baking dish. Top with the remaining cheeses.
Cover with aluminum foil. Bake for 20-35 minutes, or until cheese is melted and bubbly. 
You can broil it for 2-3 minutes to brown the top--but be careful not to burn!
Remove pasta from oven and let rest, covered with foil, for 5 minutes before serving. 


As I typed this recipe out, I realized how much I improvised. I knew I was changing some ingredients because I had to. But I failed to read the part about covering the dish with foil before I baked it! When will I ever learn to read ALL of the recipe!!! Nevertheless, it was good. It would have been a little creamier if I had covered it. Next time I'll know.

Okay. Here are my variations: 
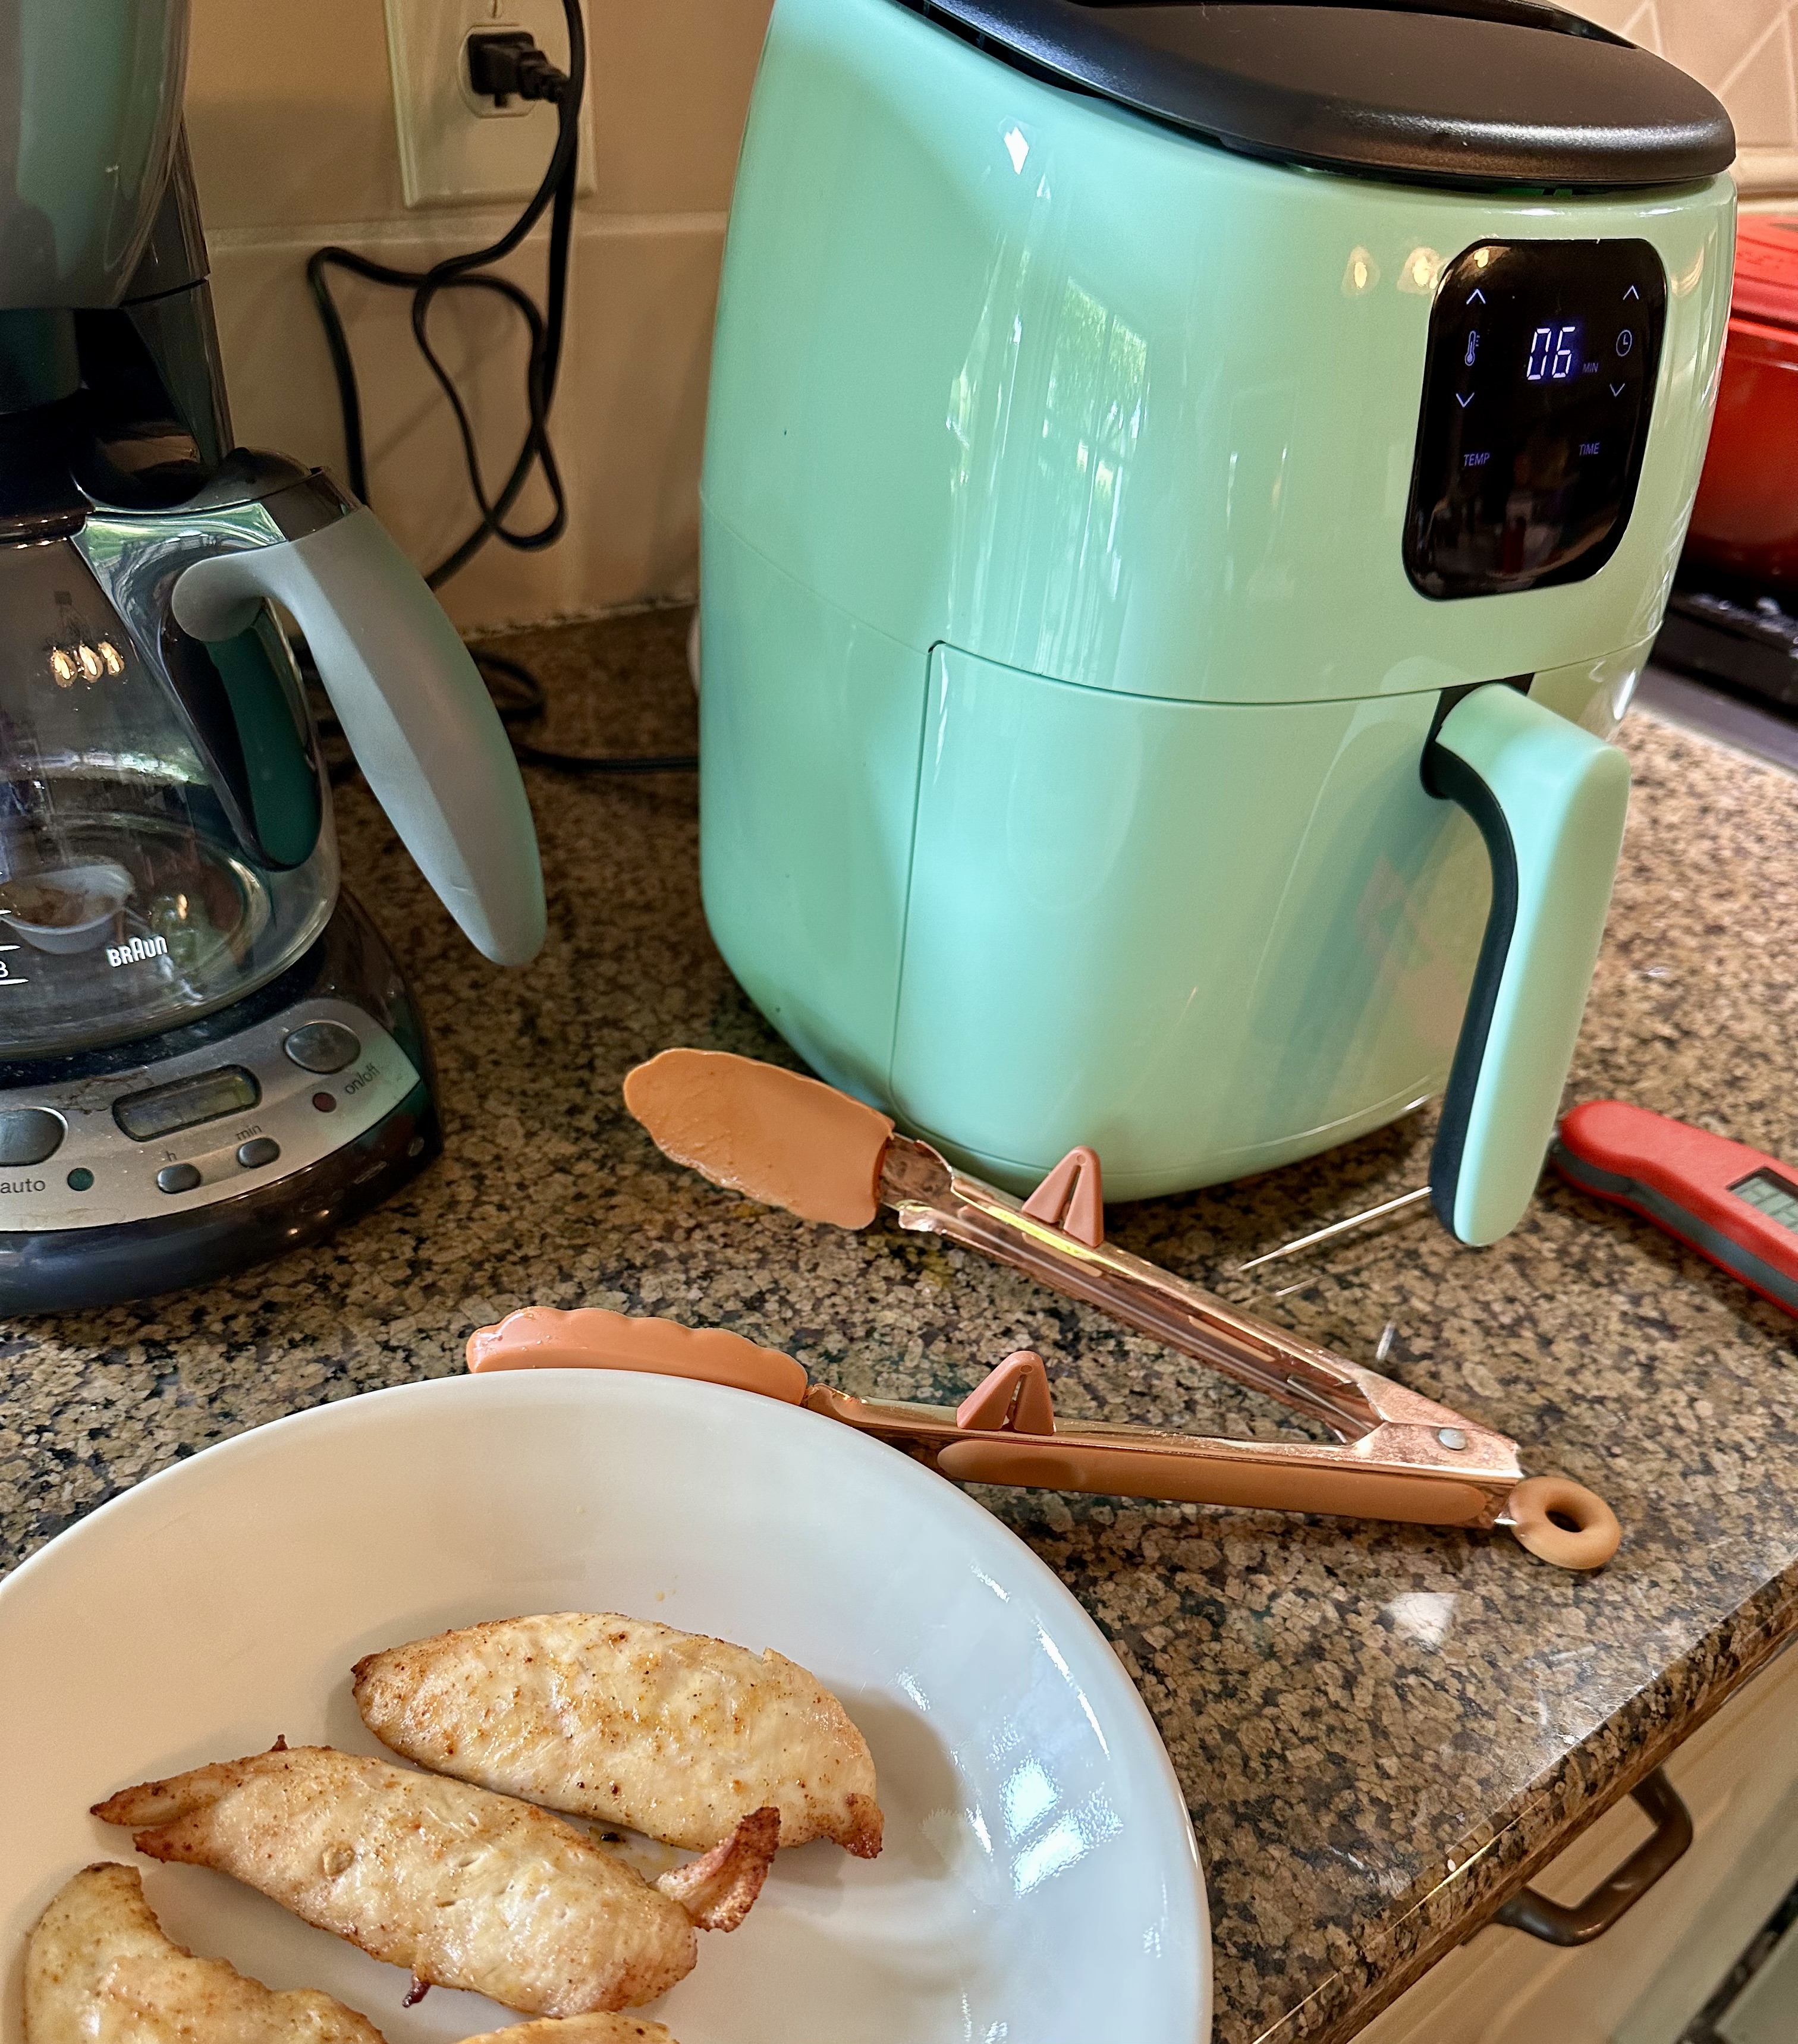
  • I had cooked, cut up chicken breasts in the freezer. I thawed them in the microwave while the pasta was cooking.  
  • I only used one jar of Alfredo and one jar of garlic parmesan Alfredo sauce.
  • The recipe calls for 1 cup of garlic parmesan sauce. Next time I will look for that near the salad dressing and bbq sauces. Evidently it's condiment used for wings.
  • I added 1/2 cup pasta water since I didn't have the extra cup of sauce. 
  • Since I only had 2 cups of chicken, I added some frozen peas. They were okay, but not sure I would had them again. 
  • I only had one cup of mozzarella so I used that and plus one cup of cheddar. 

Because I had cooked chicken in the freezer, this was just a dump it all together and mix recipe. So quick. You could also use rotisserie chicken. Next time I will find the garlic parmesan sauce. An extra cup of sauce would make it nice and creamy. Mine was getting close to being dry. More sauce. Use the foil. Both of those things would have helped.

I think this is a dish my younger grandchildren would like...chicken, pasta, cheesy sauce. Now that you've read how much I changed things up, go try your own variations. If I had found any broccoli in the refrigerator I might have added cooked, chopped broccoli to the dish instead of peas. Like many recipes, it's just a starting place. Make it your own!

We will have family here for the next couple of weeks. Doubt I'll post again for a while. 


UPDATE: When I was at the lake last week, I shopped at a large grocery store nearby. I found the parmesan garlic sauce this recipe actually calls for! It's a sauce for wings. Can't wait to try it again and see if it makes much difference.


Saturday, February 24, 2024

Do The Can Can!


After I shared the easy spiffed up Jiffy cornbread recipe, you were probably expecting some real cooking coming from my kitchen. Well, that hasn't happened yet.  I'm still in quick and simple mode. Too many other fun things to do.

We had family here for several days for the long Presidents Day weekend. Little Sister (who is now 13) sang a solo at our church while they were here visiting. They headed home on Tuesday. And came right back on Thursday to see Itzhak Perlman in concert. He was as good as when we saw him perform 20 years ago. A true master of his instrument. A legend. I'm so glad the granddaughters got to see him.


Daddy-O and I stayed in town for the night and had a wonderful get-away. The morning after the concert we visited the SC Upcountry History Museum. And I finally made it to the music museum located next door to the history museum. Oh my goodness! It was a little treasure box. 


I even got to play the wonderful Steinway grand and the Flemish harpsichord that were on display. 


Why on earth had I waited so long to see this museum? It's not all keyboard instruments. There is quite a collection of world music instruments on another level. We made our way home just as it started to rain. And we stopped at a favorite lunch spot as we got closer to the farm. So much good food at each meal.


While we ate lunch, I announced that dinner was cancelled! We had enjoyed a wonderful pre-concert dinner the evening before, a lovely breakfast at the hotel (complete with white tablecloths and stemmed glassware), plus our delicious lunch. Daddy-O said a bowl of cereal would be fine. Then when it was time to actually do something for dinner at home we remembered that we were out of milk. I had used the last to make a chicken pie for the Lenten luncheon at our church on Wednesday. 
 
We were too tired to want to go out again. Then I remembered an old busy day standby that was a favorite when our girls were school age. I usually made it when Daddy-O was away, so he didn't remember this. But he liked it well enough to choose this again for lunch today! I don't even have a name for the recipe. Suggestions???

Supper was on the table in 15 minutes.

CHILI FLAVORED BEANS  

1 can pinto beans, drained & rinsed
1 can light red kidney beans, drained & rinsed
1 can black beans, drained & rinsed
1 can corn, drained (I like shoepeg corn)
1 can diced tomatoes
*enough red enchilada sauce to reach the consistency you want (I used about 2/3 of the can)
1 teaspoon chili powder

Mix everything in a large pot and brung to a boil. Reduce heat and let simmer for about 10 minutes.


That's it! While that was simmering I heated one of those "ready in 90 seconds" bags of jasmine rice. We spooned the beans over the rice and topped with shredded cheese and sour cream.

*I have never used enchilada sauce to make this but it definitely need more liquid. The canned diced tomatoes have much less liquid than a can of whole tomatoes like I used years ago. I was out of tomato sauce which was the first thing I thought of. Tomato juice would be a reasonable choice. But all I found in the pantry was the enchilada sauce. And it couldn't have been better.

Same thing with the beans. You could use other varieties of beans. I happen to like this combination because of three different shaped and colors. But if I had been out of one of those, I would have used another kind. We are too far from town to make extra trips to the grocery store. You learn to adapt.


Friday, September 15, 2023

Tuscan Garlic Chicken (It's Gluten-Free)

Tuscan Garlic Chicken 


I've been sitting on this recipe longer than I intended. I had the photos all ready to post. Then life happened. All good things...but busy things. I've made this twice in the last few weeks. Once for family. And a week or so later, I wanted to take a meal to a household that I knew was gluten-free.

Often when I take a meal to people it involves pasta or bread or breadcrumbs or cream soups. But this new recipe was perfect. And perfectly delicious. It's a pleasant change of flavors from my usual dishes.

If you are an Instagram user, you can find the original source of the recipe. She is easyfamilyrecipes on IG. I love her posts and have made several her recipes. 


As always, I tweaked it a little. And the second time I was in a hurry and skipped drizzling with the dried tomato oil. I pushed the cheese to the side a little and added it after the fact. It was fine. I like a recipe that can hold up to my mistakes.


The other thing I liked about this recipe is that it isn't drowning in cheese. I like cheese. I like cheese a lot. So it was hard for me not to add more. But this time I stuck to the 1 cup it calls for. And it made for a much lighter dish.

I wasn't sure what to serve as a side dish with this. Jessica was here the first time I made this. She suggested roasted potatoes. If you buy the "ready to cook" bag of little potatoes, that's really easy to make. And it was a good combination with the flavors of the chicken dish.


This is so easy to make. Putting it together only takes a few minutes. I'm happy to have a completely new dish in my recipe box.

TUSCAN GARLIC CHICKEN

2 lb. boneless skinless chicken breasts (4 breast halves)

1 cloves garlic (mine was large)

Salt & pepper

2 oz. fresh baby spinach (I used a big handful)

14-oz can or jar artichoke hearts, drained and chopped

8.5 oz jar sun dried tomatoes, drained (reserving 1 tbsp oil) and chopped

1 cup shredded mozzarella


Preheat oven to 375.º


Lightly spray a 9x13-inch baking dish with cooking spray. Lay the chicken pieces flat in the dish. Season with salt & pepper and press garlic and spread it evenly over the chicken.


Place spinach, artichoke hearts and sun-dried tomatoes over the top. Drizzle the tablespoon of reserved oil over the top. Sprinkle the cheese over all. 


Bake for 45-50 minutes total. Cook the first 20 minutes uncovered, the lay a sheet of foil loosely over the dish and continue baking for the remaining time, 25-30 minutes, or until chicken reaches 165º internal temp.


MY NOTES:  

  • She called for 2 cloves of fresh garlic. I did that the first time and it was really garlicky. One large clove was enough for us. 
  • I only used half a jar of tomatoes. It looked like enough. If you love them, add them all! 
  • The chicken breasts I bought the second time were huge. I cut off the little side piece (you can see the divide) and made chicken tenders, which I baked with a simple seasoning. The family getting this meal included a young child and I thought simple might suit him better. The report was he gobbled the chicken and potatoes!
  • I think this would be a good dish for our book club but four chicken breasts won't work if we are all there. It might have been in the original recipe on her blog where I read that you could also use chunks of chicken. I might use a little more chicken, enough to cover the bottom of the dish.


Friday, June 16, 2023

Experimenting In The Kitchen

Sausage, Potatoes & Green Beans

Wouldn't you know it? The week I decide start learning more about my instant pot I read that the Instant Brands—maker of the Instant Pot—has filed for Chapter 11 bankruptcy.  Hopefully it's one of those things that the powers-that-be figure out and the regular workers keep on going. And now I hope that my own Instant Pot lasts forever.

I've had an Instant Pot for several years now. I have used it from time to time, but I've said more than once that if it died, I probably wouldn't replace it. But for reasons I can't explain I decided it was time to get bold with using it. I started with this Instant Pot recipe for dinner because I had a smoked sausage in the refrigerator. And I needed to start emptying the fridge before family arrives tomorrow and the groceries I stock will change over to groceries more suitable to larger families.

Let me say upfront that this is the kind of recipe that puts "instant" in the instant pot. So many Instant Pot recipes really aren't faster that a stovetop version. But they can cook unattended and that's reason enough for many people to embrace one.

I knew this was a gamble for out supper. I figured my husband might not want this. But I told him we had frozen pizza if supper was a dud. After we finished eating Daddy-O said, "Be sure to tell them that I really liked this. And I wasn't too sure when you told me what we were having for dinner. But this is really good!"  

Here is the recipe. So simple. So quick. So yummy. The green beans were perfectly cooked. I'll try cooking only green beans another time, using this cooking time.


SAUSAGE, POTATOES & GREEN BEANS


1 cup low-sodium chicken broth

24-oz bag small red potatoes, cut into 1-inch chunks

1-1/2 lb fresh green beans, washed & ends trimmed

13-oz package turkey smoked sausage, sliced into 1/4-inch slices

2 teaspoons Montreal Chicken Seasoning, or to taste

4 tablespoons butter, cut into 8 pieces. (That’s a 1/2 stick)


Pour broth into pot. Add the prepared potatoes, beans and sausage and sprinkle with Montreal seasoning. Give it a stir. Put butter pieces on top.


Place lid on pot. Turn valve to “seal” and press Manual button. 

Set timer to 3 minutes. (High pressure) 

When time it up, do a Quick Release. Give it all a gentle stir.


  • To make this super easy, I chose a 24-oz “steam in the bag” package of red potatoes. They are prewashed. I quartered them. 
  • Do not use canned green beans for this. They would be mushy after cooking.
  • I didn’t weigh the green beans. Bought a bag of fresh ones and trimmed ends until it looked like enough.
  • I used a 6-qt pot. 


For as much as Daddy-O liked the main dish, his first words at the supper table were, "This toast is OUTSTANDING!" I won't argue. It was really good. And I used my new little air fryer. 


I have resisted buying one for ages when all around me raved about them. Last week I ordered Dash Mini 2.6-qt. air fryer. I've only had it long enough to try a couple of things. I had resisted an air fryer because I didn't want to have to learn to use another appliance. And I didn't want another big thing sitting on the counter. This one is small, suitable for 1 or 2 servings. And that's fine for our household. 


After looking at a few recipes, I cooked chicken strips. And when I realized I could take the basket out and look at the food. Just like looking at food in the oven to see when it's ready.  I relaxed about figuring out the exact cooking time. 


So tonight I popped a couple of slices of frozen garlic bread in the air fryer set to 400º. I checked in about 3 minutes and it looked nice and brown, but when I picked it up the bottom was soggy. So I turned it over and let it cook for another couple of minutes. And as Daddy-O said....OUTSTANDING! It was golden brown and crunchy. And it was all done in less time that it takes to preheat my oven. 


This little air fryer would only hold 2 slices, but that's all we needed.


Thursday, May 25, 2023

Hay Season, Cabbage Casserole, Fried Cornbread

Cabbage Casserole & Fried Cornbread

Before I got busy doing other things this morning, I did a quick check in the pantry. I've been cleaning out all over the house. I only threw away a couple of things, but I did find some tomato juice with a "best by..." of last week. That reminded me of a recipe I haven't made in ages and it uses tomato juice. 

I've said a million times that the hardest part of cooking supper is deciding what to cook. The tomato juice  decided it for me. And that made for an easy supper. 

This casserole is quick to put together and it's a complete meal in one dish. It makes a lot. If you are a household of two like us, be prepared to enjoy leftovers or find someone to share it with. We will be having leftovers tomorrow. No kitchen duty for me!

Take note that it bakes in the oven for an hour and a half. Be sure to start early enough to have it done at supper time.

CABBAGE CASSEROLE

1/2 head of cabbage (medium-size), finely chopped
salt
1/2 cup uncooked white rice
1/2 cup diced onion
1 lb. lean ground beef, browned
salt & pepper
1-1/2 cups tomato juice

Preheat oven to 350 degrees. Spread half of cabbage in a 9x13-inch baking dish. Sprinkle with salt. (Don't be too skimpy.) Add rice, onion and ground beef in layers over cabbage. Spread remaining cabbage over top. Sprinkle with salt and pepper. Pour tomato juice over all. 
Cover dish with foil. Bake for 1-1/2 hours, or until done. Let stand, covered, a few minutes after you remove it from the oven. 


I usually let that one dish be the entire meal but tonight I tried a new-to-me recipe. It's really an old, old one but I had never made fried cornbread. Man, it was quick and easy. And good enough that Daddy-O had a second piece. He doesn't like cornbread. But he liked this kind. (He liked it best with molasses.) It's crunchy on the outside, tender on the inside. 


Fried Cornbread

I didn't actually measure anything. There isn't any need to. It's that easy. 

FRIED CORNBREAD

self-rising cornmeal
buttermilk
canola oil, for frying. 

I used about a cup of cornmeal because I only wanted to make enough for the two of us. 
Stir in enough buttermilk, a little at a time, to make a fairly thick batter. If it gets too thin, add a little more meal. 

Heat a little oil in a skillet—like you would to cook pancakes. Spoon batter into hot pan. Let it brown and turn the hoecakes over. ("Hoecake" is another name for fried cornbread.) Turn down the heat to be sure that the batter cooks all the way through. 


This supper is about as Southern as it gets. We really like the cabbage casserole, but I've never quite known what to put with it. Cabbage and cornbread. Why didn't I think of this sooner? It was a winning combination. Just right to feed the farmer when he came in from the field.


Daddy-O has been busy on the tractor all week. It's hay season. First, you cut the hay. Next, you tedder the hay. I call that part "fluff and puff." Tossing the freshly cut hay around helps speed up the drying process. Then , you rake the hay into rows. Finally, it's time to bale the hay. And about half the time, the weather will mess up one of the steps. So far, this has been a perfect weather week for "making hay while the sun shines."


Tuesday, May 2, 2023

Vintage Recipe

Chicken Tetrazzini

I had phone in hand to make a photo of this dish just after it came out of the oven. And before I made a picture, the doorbell rang. It was my book club ladies arriving for lunch. You know after that, I totally forgot about photos. But they know me well enough to let me get a quick picture of my plate before we ate lunch. 


I did get this picture as I cleaned up the kitchen later. This chicken tetrazzini recipe is one we've used for over 40 years. It's from the days when condensed "cream of _____" soup was in everything. I don't use much canned soup anymore, but it's works here and I'm not messing with a good thing.


Right after we married, I wrote aunts, uncles and lots of cousins asking for them to send me their favorite recipes. I got recipes from my mom and dad and sister. And I put them together in a family cookbook. This was so long ago that it involved letters with stamps, a typewriter, my secretary at work and a local printer to get this project done. (For those of you too young to remember typewriters, just know that making corrections was a pain in the patootie.) That tells you HOW long ago this was. If I were to to this again that family tree would have many, many more leaves!

]

The recipe was contributed by my sister and over the years, I've made a few adjustments. So this is very version I use now. I had intentions of using fresh mushrooms this time but I was running behind in my prep. The canned mushrooms are acceptable here. I like sliced mushrooms so that if anyone doesn't like mushrooms they are easy to pick out. For years this was the recipe I took to new mothers. And sometimes the little kids in a family could easily avoid the mushrooms. 

Take note...this makes a 2-quart casserole—not a 9x13 dish.

CHICKEN TETRAZZINI


2 tablespoons butter

½ cup grated sharp cheese

1 cup milk

2 tablespoons flour

1 can cream of mushroom soup

1/8 teaspoon oregano

1/8 teaspoon pepper


4-oz. can sliced mushrooms

2 tablespoons chopped green pepper

1 tablespoon chopped pimento

2 cups chopped cooked chicken


8-oz. pkg. spaghetti, cooked (most boxes are 16-oz, so use half)

1 cup buttered bread crumbs


Preheat oven to 350 degrees and spray 2-qt. baking dish with PAM.


Put butter, cheese, flour, milk, soup, oregano and pepper in a large saucepan.  Cook over medium heat until cheese melts, stirring frequently.  Add mushrooms, green pepper, pimentos and chicken.  


Put cooked spaghetti in a 2-qt. baking dish.  Pour sauce over the spaghetti and stir gently.  Sprinkle with bread crumbs.  


Bake for 30 minutes.


You can make this with turkey or ham instead of chicken.


I wasn't sure that the 2-qt recipe was going to be enough for my group so I doubled the recipe this time. FYI, a 9x13-inch dish holds 3 quarts. So a double recipe filled that bigger dish and one smaller one. I put that one in the freezer for later. I did put the bread crumbs in a separate bag and laid it on top of the wrapped dish, then put them both in a zipper freezer bag. 

We actually ate this dish last night. It was just as good as the first time. I took it out of the freezer the day before and moved it to the refrigerator. If I had frozen a larger did, it would need a couple of days to thaw. Bake until internal temp is 165º. If it's not quite thawed it might take a few extra minutes.

~~~~~~~~~~~~~~~~~~~~

And I thought I'd share what spring is looking like here on the farm. Flowers are blooming, brilliant blue skies...and then nearly 6 inches of rain fell in 3-1/2 days. Our farm pasture extends all the way to the river.  Now, watch us have no rain in June and July!


The river has overflowed the banks.


Thursday, January 26, 2023

Can't Get Easier Than This

3 Bean and Sausage Bake


The older I get, the less complicated my cooking becomes. I watch my daughters making wonderful dinners—and they'll say, "but this was easy."—and I know it was, but their recipes will have more steps than I want to take right now.

Last night I made a new recipe that was the epitome of simple. It tasted good. It was the comfort food I needed. And I had all the ingredients on hand—at least with a couple of substitutions, I did. (As far as I'm concerned, canned beans are interchangeable.) I'm keeping this recipe and will do it again.


I had spent a week, thankfully with Daddy-O's help for most of the days, keeping these two little kiddos while their parents had a get-away. I am not the grandmother I was ten years ago when the middle set of grandchildren were this age. (Our grandchildren are in 3 age "sets"—22...12 & 8...3 & 1) Lifting the baby and wrangling two little ones in general kept me on the move. 

I got home late afternoon two days ago and that night we simply had cheese and crackers for supper right before I fell asleep. Last night I figured I should do better.


This printed recipe had been on my kitchen counter for a couple of weeks. I am such a fan of beans and I love sausage, so I knew I was going to try this one. The hardest part of throwing this together was dicing the onion. And I'm speedy with that task. Slice the sausage and open the cans and you're nearly done.


The author of this recipe says it's Weight Watcher friendly. If you don't count the cornbread. I made a couple of less friendly subs because my goal last night was to be super quick. I used 1 tablespoon of olive oil instead of cooking spray to brown the sausage and the onion. And I used shredded cheese from a bag...not reduced fat like she did...because it was easy. 


In her post she said the recipe freezes well. I'm trusting her. We are a household of two, so I divided the recipe into two pan and popped one into the freezer after I covered and labeled it. I know we should have had something green on this plate. But last night it was good just to have food. Check out the original recipe from Recipe Girl here. 

3 BEAN & SAUSAGE BAKE


1 tablespoon olive oil

16-oz turkey kielbasa, sliced

1 medium onion, diced

2 garlic cloves, minced (or 1 tsp from a jar)

1 (15-oz can) great northern beans, drained & rinsed

1 (15-oz can) pinto beans, drained & rinsed (I only had black beans on hand)

1 (15-oz can) light red kidney beans, drained & rinsed

1 cup water

1/2 cup ketchup

1 tablespoon packed brown sugar

1 tablespoon apple cider vinegar

2 tablespoons dijon mustard

1/2 cup shredded cheddar cheese


Preheat oven to 350º. Spray a 3-qt baking dish with cooking spray. 


Heat 1 tablespoon olive oil in skillet. Add kielbasa and cook until brown, stirring occasionally. Add onion and garlic, and cook until onion is tender. Add remaining ingredients and simmer for about 5 minutes to let flavors blend. 


Pour into baking dish and bake, uncovered, for 35-40 minutes until bubbly in the center. Let stand 5 minutes before serving. (Because I divided mine into smaller pans, 30 minutes was enough baking time.)


I made a quick batch of corn muffins from a box of Jiffy mix. I always keep a box on the shelf because it's so easy. Right around New Years, I read a post on Instagram of 24 things to add to Jiffy Mix. And I found the article for you to read here. You can add one more thing to the list. Last night I scraped out the last of the sour cream from a container and added about 1/3 cup to the mix along with the milk and egg that's listed on the box. It was so good. A definite improvement in taste AND texture.