Friday, January 30, 2015

Baby Talk


Okay, I'm being a real grandmother today...Let me show you some baby photos! After I told you about Little Sister's phone calls earlier in the week, I got these photos from Mommy. It looks like Baby Girl wants to call me, too.


On the other hand, she is just as happy chewing on the phone. 


She has watched her sisters enough to know a few phone basics.


See? She even has her thumb ready for texting!

Now we just have to wait until she learns to say a few words 
and until she can spell a little. 
We can hardly wait.

Thursday, January 29, 2015

Chicken Enchiladas

Chicken Enchiladas

Pardon me for taking a bite before the photo! I was starving. This chicken enchilada recipe came from Mommy, I've made it before but not as many times as she has. One reason I like it—besides it tastes very good—is that it makes enough for supper AND the freezer. At least it does if you are a household of two.

 
The last time I made these, I baked them all and then froze the extras. We microwaved to reheat. This time, I put the extras into the freezer before baking. I'm debating whether these will need to be thawed and then baked, or if we can just microwave them like before.


I had cooked and shredded the chicken the night before I made these. A little pre-prep made this a very quick dinner. Still trying to use up what's in the pantry, so I opened a can of Mexican corn for a side. I'm sure I bought the corn age ago for a recipe. No clue what that recipe was!

CHICKEN ENCHILADAS

3 boneless, skinless chicken breasts
1 cup sour cream
1 cup bottled Ranch salad dressing
10 flour tortillas, burrito-style (that's the larger one) (I used whole wheat this time)
jar of salsa
shredded Mexican cheese, about 2 cups (I used Cheddar)

Cover chicken breast with water in a large pot. Bring to a boil, reduce heat and let simmer until tender. Let cool a bit and then remove chicken to a large bowl and shred, using two forks.

Mix sour cream and Ranch dressing in a small bowl. Pour half of sauce mix over shredded chicken and stir to mix well. (The other half of sauce is used to spread over tortillas.)

Preheat oven to 375 degrees. Grease a 9x13-inch pan. Take a tortilla and top with sauce (about 1 tbsp. each) and spread almost to edges. Spoon some of the chicken mixture down center of tortilla. Top with a little salsa and sprinkle with cheese. (Both of these amounts are to your taste.) Roll up tortilla, folding in ends as you go. Place in pan, seam side down. Repeat with remaining tortillas.

Serve with extra salsa and sour cream.


Wednesday, January 28, 2015

Family Newscaster


I love getting family news from Little Sister. She told me last week that her baby sister had gone to the doctor that day. (I already knew that a routine visit was on the schedule.) Little Sister told me, "She went to the doctor because she's sick. Or she has a cavity." 


And on Friday, just as the weekend was starting, her excited voice informed me, "We're having a spend over!" It took me a minute to figure out that "spend over" was a four-year-old mash up of "spend the night" and "sleep over." And I figured it was Big Sister who had friends coming to "spend over." Then a sad little voice said, "I wish I could stay upstairs with them all night." Big Sister and her friends are very good to this four-year-old, but I doubt they would have wanted her for the entire night!


I found later out that Big Sister invited Little Sister upstairs to the bonus room the next night for a very special "spend over" of their own. Little Sister was so excited. Big Sister painted her little sister's nails. They watched a movie and slept on a pallet in front of the TV. Just like the big girls always do. I think this little girl has about the best big sister ever!


Tuesday, January 27, 2015

Sometimes Procrastination Pays


Continuing on with my quest to finish up the "left undone" things around here, I finally picked up a pair of socks that have needed mending for over a year. These were not ignored because I didn't want to bother. They were ignored because I didn't know HOW to mend them. Who darns socks anymore?


But my family seems to think I can fix anything. Well, that's not exactly true, but what I can do exceptionally well is search and find exactly the information I need. So from time to time I would search YouTube for "how to darn a sock." I watched several different ways to do it. I already knew about the old way where you just weave in a patch. But that gives you a woven patch in a knitted sock. Yes, it would eliminate the hole and you could wear it, but it just didn't look good.


My procrastination, along with persistence, paid off. About a year later I found one more video from KNITfreedom. Not sure how I missed this earlier. Liat Gat demonstrated a fairly simple way to basically reknit the missing stitches.


So on a Monday morning, I figured it was time to give it a try. It was awkward, but not the most difficult thing I've done. It took me a little over an hour. Much faster than knitting another sock, which I had actually considered since I had yarn left. Having the leftover yarn let me match the yarn to the spot with the hole.


The verdict? I don't think anyone would notice the repair unless they were looking for it. The video demonstration repaired a "hole" that was perfectly square and nicely situated in the middle of a flat piece of stockinette. They made a hole for demonstration purposes. This was a "real hole" that was right at the heel flap and the picked up stitches of the gusset. Not so easy to follow her method in this particular spot. So I just did the best I could.

It was nice to learn something new and be reasonably successful with it. The big test will be when Jessica wears it again. See all of those yarn pieces sticking out on both sides of the mend? They all had to be worked in on the wrong side. Extra thickness. Extra bumps. Hope she doesn't have overly sensitive feet!


PS...If you are not a knitter, hold on. Recipes coming later this week!

Sunday, January 25, 2015

January Is For Catching Up

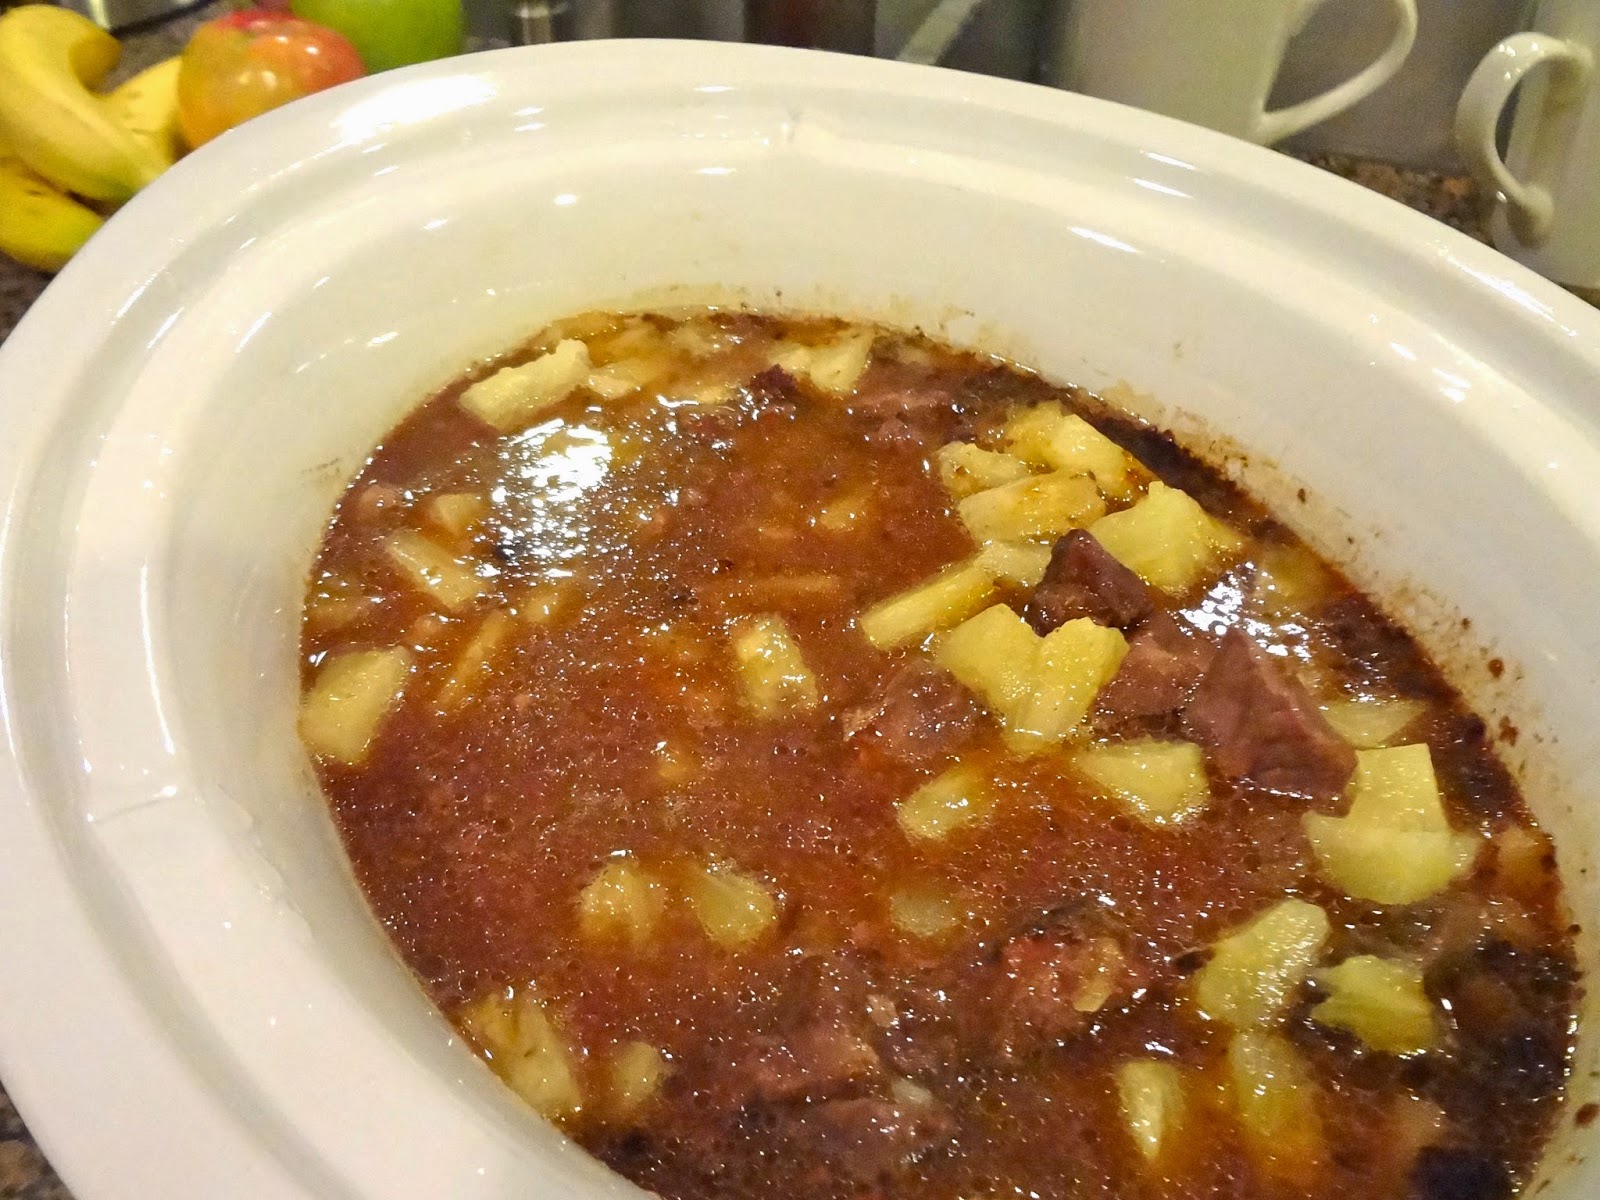
 Teriyaki Beef with Pineapple
 
January is such a good month. The holiday madness is behind us. Not too many things on the calendar right now. For me, January is almost a month of hibernation. A chance to unclutter, to tidy up, to catch up on things left undone. I got to finish a couple of books I started ages ago. Delivered my sister's birhtday present—only three weeks late!

These knitting projects have haunted me by hanging around a long time. The watermelon socks sat unfinished for several months. And the baby socks? They were started over two years ago! It feels so good to have them done now.

Not sure when I will have this much time to stay home most days and knit, cook, read, or just do nothing in particular. Pure pleasure.

 Pattern:  8-Stitches Per Inch Sock by Ann Budd
Yarn: Abi Grasso Watermelon Self-Striping Sock Yarn with Seeds
Needles: size 2

 Pattern: Jeannee Baby/Toddler Socks
Yarn: Katia Mississippi 3-Print
Needles: size 3

I feel better now about starting some new projects. And I'm doing my best to use yarn that I already have here. It's what knitters call "stash." My stash isn't nearly as large as some have. But there is enough here to keep me knitting for quite a while. And while I'm at it, I'm also trying to use up things from the pantry.

During the holidays I tend to buy extras "just in case." Now, I'm choosing recipes to use up those extras. Like this favorite recipe of ours. It is the very easiest recipe to make. It's also very delicious. And the leftovers freezer beautifully for an easy dinner later. What more could you ask?


TERIYAKI BEEF with PINEAPPLE

2—2-1/2 lbs stew beef
15-20 oz. jar Teriyaki sauce (I like Archer Farms Teriyaki grilling sauce)
20-oz. can pineapple tidbits, drained

Put beef in slow cooker. (I used a 3-1/2 qt. size cooker)
Pour sauce over beef and stir.
Cook on LOW for 7-8 hours or HIGH for 5-6 hours.
Add pineapple during last 20-30 minutes of cooking.

Serve over rice.

Wednesday, January 21, 2015

Not-Quite-"Free" Soup

  
Not-Quite-"Free" Soup

There is a vegetable soup that nearly anyone who has ever dieted has encountered. It's often referred to as "free" soup, because if you were counting points, this was made of all "free" foods. As much as I love vegetable soup, I never was fond of this one.

But recently I saw a "free soup" recipe on Southern Plate. Hers was seasoned differently than most (she uses crushed tomatoes and Ranch dressing mix) and it sounded good. Better than that old recipe. Today I needed something quick for lunch. And I wanted something that at least leaned toward healthy.

I had a half head of cabbage left from the Cabbage Casserole that Daddy-O loved a few days ago. There was also a half an onion in the refrigerator. And I had some packs of dry Ranch Dressing mix left from making the 3-Packet Pot Roast last week. I didn't have the frozen beans and okra used in the Southen Plate recipe, so I used what I had here. I had a bag of frozen soup vegetables in the freezer. The biggest difference in those and frozen mixed vegetables is that the soup vegetable mix contains okra. I used that as my starting point, in place of the frozen okra and frozen green beans.

This soup was considered "free" because it traditionally contained no starchy vegetables, like corn, peas, potatoes, lima beans, etc. The frozen soup vegetables do have some of these, but not many. And I didn't add any more of them, like I do with my usual soup. All of the cabbage added to the pot means that you don't have many of the starchy veggies in your bowl. It's certainly healthier than many other lunch choices I could have made.


NOT-QUITE-"FREE" SOUP

1 16- oz bag frozen vegetables for soup
1/2 head cabbage, finely chopped
1 onion, diced (I only had a 1/2 onion)
1 15-oz can cut green beans
1 28-oz can crushed tomatoes
1 pkg dry Ranch Dressing mix
5-6 cups water
freshly ground black pepper, to taste

Put all ingredients into a pot. Bring to a boil. Lower heat and simmer for 45 minutes or longer, until vegetables are as tender as you like them.

I tried to approximate the amounts of vegetables used in the Southern Plate recipe, but I had to stop adding more when my pot was full! The recipe above filled a 4-qt. pot to the brim. As with most soups recipes, there is ample room for adjustments. Make it your own.

The verdict? Definitely better than the watery, cabbage-flavored free soup of yesterday. I'll make this again. The crushed tomatoes make a nice, thick soup base. The dressing mix adds flavor. Southern Plate says this soup will keep in the refrigerator for up to 5 days. Nice to know my lunch is taken care of for the rest of the week. 

Monday, January 19, 2015

Give Of Your Best


Pattern: Honey Cowl
Yarn: Madelinetosh Tosh DK (Madly, Truly, Deeply)
Needles: size 8

This is the sixth Honey Cowl I've made. It's a great project to work on while traveling. Simple to knit, but not boring. I have given most of them away as gifts. But this one was mine.

I was wearing it and when someone admired it—for the second time—I took it off and gave it to her. It even matched her blouse. I really liked this cowl and it wasn't so easy to part with. It's not so hard to give away something you don't love, or to give something that was made for that purpose from the start. This felt different. But it felt right.

My mother was always giving. And, one thing I remember about her was that she gave "of her best." It was not the cast-offs that she passed along. She always said to only give things you would want for yourself. Once, when I was in about 2nd grade, she bought two new dresses for a classmate that desperately needed them. So much better than giving that child old clothes. There wasn't a lot of extra money in our house. Often there was no extra money. But she always could find a way to be generous. Extravagantly generous.

We studied "extravagant generosity" at our church. Reading and talking about it is one thing. But I watched it in action every day when I was growing up. I'm still trying to come close to what my mother did. I've always been fairly generous. Especially when it's easy. This year I want to be extravagantly generous.

The best acts of generosity are done in silence. But I'm writing this here as a challenge to myself. And as a reminder to myself to be aware when opportunities present themselves. By nature, I am deliberate. I act carefully. I like to think things through. In choosing to be generous, sometimes there is ample time to think about what to do and how to do it, but there are other times it's best to take action in the moment. Those are the hard ones.


I know there are people who love the city. 
But, goodness, I love seeing the sunrise 
from my kitchen. 
The view is different every morning. 
Sometime spectacularly colorful. 
Sometimes it's only gray. 
I love them all. 


Thursday, January 15, 2015

Hats Galore


Weeks before Christmas Jessica and I saw a new hat pattern on the Purl Soho website. They also had released a dozen new yarn colors in their Worsted Twist. The website had the most beautiful photo of a dozen hats, each knitted in one of the new colors. I remarked that it would be fun to make one of these for everyone in the family. So Jessica picked out a color for each of us for Christmas. And I started knitting. Youngest to oldest. I used all the sizes since our family includes a baby and a small child.

I learned a new cast-on for this hat that is pretty basic otherwise. It features a fold-up cuff and a huge pompom. I decided from the beginning that I was putting a pompom on all the hats. Guys, too. (I attached theirs so they could be removed easily.) I was thinking even then that a family photo would be fun and the pompoms would look cute in the picture. The plan was to take the hats to our family's annual mountain get-away just before Christmas. I could picture how fabulous this was going to be—all the colorful hats, mountains in the background.

Well, if you've been reading the blog the last few weeks, you know that we never were all together over the holidays. But I still wanted a photo of the ones who were here. So, "all of us in the mountains" turned into "part of us in the back yard."

Then Jessica sent me a text last week while we were in the midwest delivering the big girls back to their house. "Take a photo of Mommy and Baby Girl wearing their hats. Make sure they are standing in front of a plain wall." I took as many photos as I could in the two minutes that the baby was cooperative and emailed them to Jessica.

And days later, bless her talented heart, Jessica sent me a photo with the entire family wearing their hats! This is more fun than the one I imagined. We were together in spirit over the holidays. Now we are together in a photo. Thank you, Jessica!


Pattern:  Classic Cuffed Hat
Yarn:  Purl Soho Worsted Twist
Needles:  sizes 5, 6, & 7

For the record, this is the best hat pattern I've used. It was easy to make and it's the most flattering hat to wear that I've found. When it's loved by a child, a teenager, the young women and the men, you know it's well designed. It even looks good on me!


It was cold here over Christmas and even colder in the midwest the following week. I think these hats will get a lot of use this winter. OH....the pompoms? The men in the family all decided they wanted to keep the pompoms on the hats.  If you've watched much football lately, you've seen all the NFL players keeping warm in their team hats---all with big pompoms! It's the style this year.

Tuesday, January 13, 2015

Easing Back Into Normal

Cabbage Casserole

Well, the holidays have come and gone. Ours came in a way that we could not have imagined. The grandbaby spent her first Christmas in the hospital with Mommy by her side. (Baby is all well, now.) The bigger girls spent Christmas here so that Mommy could focus on Baby Girl. A Christmas divided.

That meant that with driving out partway to get them and then a couple of weeks later driving them back home, we drove about 3,000 miles this holiday! All in all, those were good miles. The girls are good travelers. We enjoyed the extra time with them. And the weather was never as bad as predicted. We got lucky.

Mommy waited to open her Christmas and birthday gifts until we got out there, so we had a second celebration — a mini-Christmas!  Our best gift was seeing the happy, healthy baby zooming around the floor on hands and knees. She is a crawling pro now.

We got back home this weekend, ready to settle down a bit, even though it's taking some time to adjust to the quiet. Daddy-O had fences to mend. (A driver missed a turn and ran through a pasture fence while we were gone.) I had a million loads of laundry to do. Well, more like eight loads, but it's been enough to keep me busy. 

I really had to get back in the kitchen. It had been so long since I just did "regular cooking" that I couldn't think of a thing to make that interested me. Yesterday morning I saw a simple recipe on Facebook that sounded like it would be good. Simple ingredients. Easy to put together. Pretty much the whole meal in one dish.
 

I added those ingredients to my shopping list. And late yesterday afternoon I made myself walk in the kitchen and cook. No more hotel dining rooms to feed us! Daddy-O took his first bite and was like, "This isn't bad. Not bad at all." Then the next bite, "Wait. This is good!." And by his fourth helping, "This is really, really good."  I suggested he stop at that point so we would have enough left for tonight.


If you like cabbage—and we love it—and you like a comfort food type of meal, give this a try. It reminds me of stuffed cabbage rolls, but this is much easier to make. I am happy to have a good new recipe to add to to my collection. 

CABBAGE CASSEROLE

1/2 head of cabbage (medium-size), finely chopped
salt*
1/2 cup uncooked rice
1/2 cup diced onion
1 lb. lean ground beef, browned
salt & pepper*
1-1/2 cups tomato juice

Preheat oven to 350 degrees. Spread half of cabbage in a 9x13-inch baking dish. Sprinkle with salt. Add rice, onion and ground beef in layers over cabbage. Spread remaining cabbage over top. Sprinkle with salt and pepper. Pour tomato juice over all. 

Cover dish with foil. Bake for 1-1/2 hours, or until done. Let stand, covered, a few minutes after you remove it from the oven. 

*I used House Seasoning instead of salt and pepper.