

Attention all Mimis! Or anyone who needs a fun project for kids. We made these friendship bracelets at Mimi Camp and both girls loved making them. The four year old could do this by herself...after I got the yarns set up in the little loom. (And she taught Daddy-O how while I was taking a shower one night.) And the seven year old actually got out of the wading pool one afternoon to go work on her bracelet.
There are so many ways to make friendship bracelets. Some have beautiful complicated patterns. But this method using the cardboard loom is by far the easiest I've ever seen. It's perfect for young children. But the adults who have done this have also found it strangely addictive.

You can find instructions, both written and video, online by googling "friendship bracelet cardboard loom." But I'll show you what we did. First I cut cardboard circles from a shoebox. I traced the top of a Tervis tumbler to get my circle pattern.
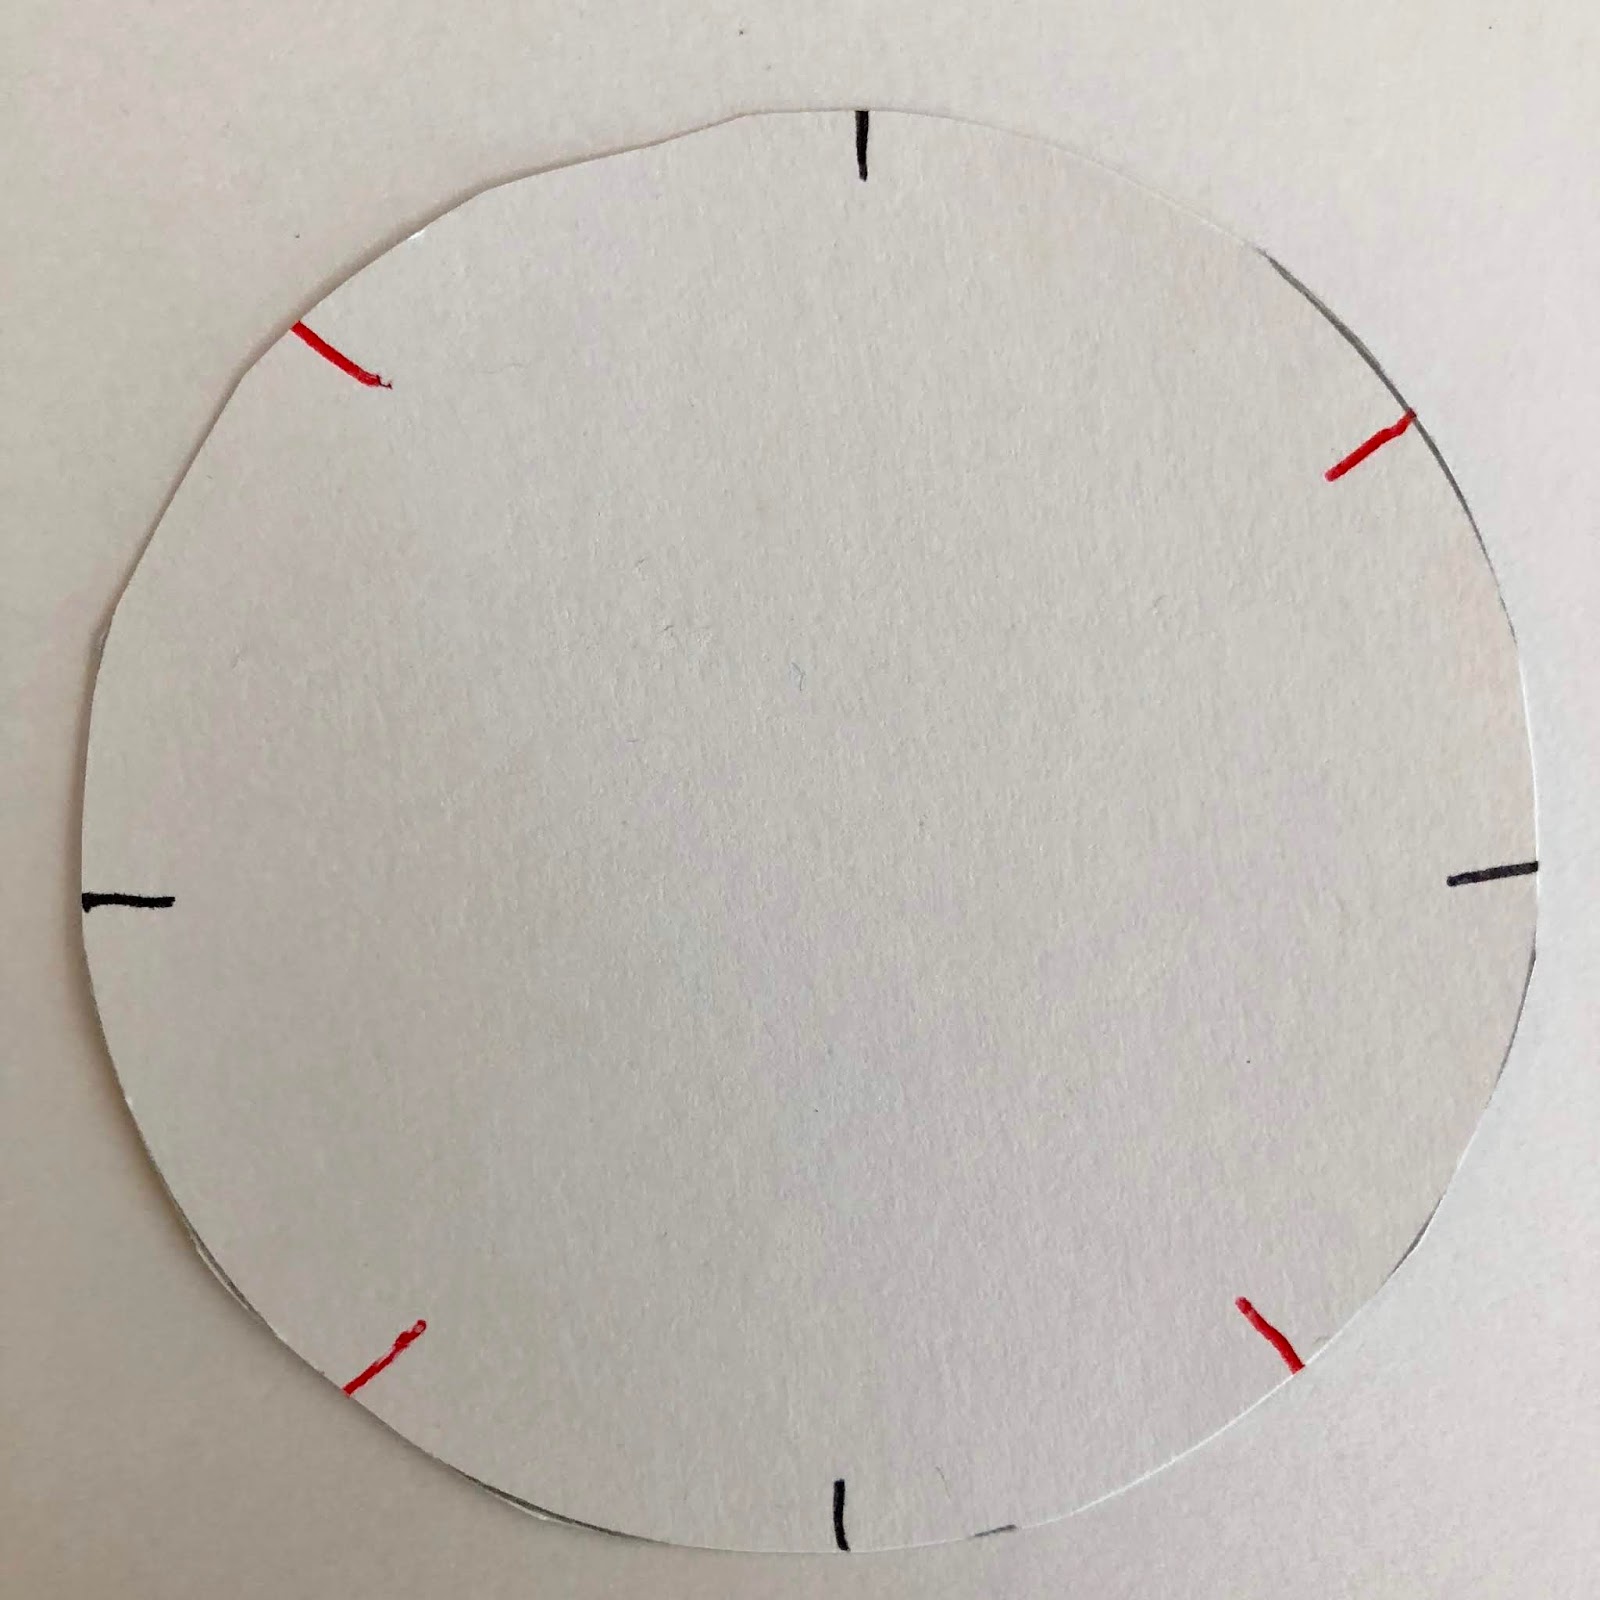
Then you mark 8 spot around the circle. You don't need to measure anything. Just mark top and bottom. Then halfway between those marks, use your pencil to mark the sides. Then make the last marks halfway between the four "north-south-east-west" marks. If you are a little off with your spacing, it won't matter. I measured nothing!

Cut 7 strands of yarn or craft cord or embroidery floss (don't separate the strands) about 20-22 inches long for a child's bracelet. Make longer strands if you want an ankle bracelet. Or, a grownup bracelet. We used leftover sock yarn for one bracelet and embroidery floss for the other. You can buy a package of craft cord or embroidery floss for under $4 at a craft/hobby store if you don't have leftover yarn at home.

Poke all seven strands of yarn through the hole and tie a knot on the underside (so the yarn doesn't pull through) about an inch or so from the end. Yes. Tie all the strands together. I used a pencil to push the yarn through.

Then drape the yarn strands over the top and tuck one strand of yarn into seven of the slots. Leave one slot empty and turn that one "toward your tummy." That's how I explained it to the girls. Always keep the empty slot "toward your tummy."

Starting with the yarn to the right of the empty slot, count three yarns to the right. (You can also work to the left if that feels more comfortable. But only go in one direction.)

And move yarn #3 to the empty slot. Rotate the circle so that the empty slot is "toward your tummy" and do that again. (You can also work to the left if that feels more natural. Just make sure you always go in the same direction.)


As you continue moving yarn #3 to the empty slot, the braid will begin to grow on the underside of the circle. Give it a tug every now and then to pull it down. The girls got so excited when they could see their bracelets growing.

We also figured out that every few moves, we needed to run our fingers down through the strands of yarn to keep them untangled. Just like you would run your fingers through hair to untangle it.

When the bracelet is long enough—for these little girls, we made the braid 5-1/2 inches long—take the seven yarns loose from the loom, pull the bracelet down through the loom and cut the yarn a couple of inches above the end of the braid. Trim off the ends (or not) to suit you.

We used the simplest of joins. I untied the original knot and then tied the two ends together. You can check this video for other ways to make a join. Make sure you don't tie it too tightly. I also measured generously and had extra yarn at both ends. That was trimmed off later. I found it was easier to tie and untie knots when there was enough to work with.

Little Sister and Baby Girl wore their bracelets home and asked for me to start another one for each of them so they could work on them in the long car ride home "so we won't be bored." That was a grand idea, but Baby Girl was asleep before we were very far down the interstate. But they have their looms set up and ready to go at home.
that's wonderful and you are so good at creating, figuring out a way.
ReplyDeleteI was happily surprised that the four year old did this so easily. When she taught her grandaddy how, I knew this craft was a really good one!
Delete