Showing posts with label camp mimi. Show all posts

Monday, June 17, 2019

Mimi Camp Wrap-Up


Another Mimi Camp is in the books. "It was the best one ever!" declared both little campers. (I think we say that every year.)  Every morning at breakfast, they opened "the box" to see what the day's activity would be. That let me decide day by day—based on weather, how tired this Mimi was, etc—what we would do. They loved opening that box. It was almost like Christmas every day.

Here is a quick recap of the second half of our camp week.


Wednesday was a scavenger hunt. They hunted inside and out. This turned out to be more fun and lasted much longer than I anticipated. When I plan these things I never know what they will enjoy.


Let me say right up front...the secret of a good scavenger hunt is clipboards. (A clipboard at Walmart is $1.88. Buy them!) It makes it easier to mark off items as they found them. And they look so official.


A quick google search for "kid scavenger hunt" will provide plenty of ready-made pages to print. I looked for ones that matched what could be found around our house and ones with pictures so the 5-year-old could work on her own. We had two pages for outside hunting and two pages for inside. They loved all of it.


Finding a pinecone turned out to be the hard one. There are pine trees way over on the edge of our yard that required tromping through tall grass to get there. It's good to have a Daddy-O to help.


They found a beading kit in Thursday's box. I bought a kit ($20 at Target) and added a box of alphabet beads and some stretchy beading cord to the terrific assortment of beads and cords in the kit. Oh, and beading mats...or a towel...is needed to keep the bead from rolling off the table.


They made jewelry for everyone. (I wore mine to church yesterday.) And they came back to this day after day. If you do a camp like this, it's good to leave the craft makings out for days if you can.


By Friday we finally left the farm. For one whole week these girls did not get in a car. I have friends who do similar weeks with grandchildren and plan outings for them. But for these little girls, the bigger treat is to stay in one place. We met a dear cousin for lunch and then visited at her house where they got to feed the fish. 


Then it was back to the farm for the final activity. Water balloons! This was so much fun. To be honest the biggest fun was filling the balloons. (This pump, which included the balloons, was from Walmart, $6.)


The pump to fill the balloons worked great. But enough balloons popped off the nozzle as they filled them to soak all of us. They loved it. 


Filling the balloons took about an hour. Tossing them took less than 10 minutes. They made targets in the driveway with sidewalk chalk. And there might have been some "use your sister as a target," too. Keep in mind that all of those bits of broken balloons have to be picked up. When this fun was over, they got on their low riding toys—big wheel and plasma car—and rode around picking up the pieces. I hope you are equally lucky.


Yes. Mimi Camp 2019 was a complete success, even though we had rainy days. What good memories we made.

INDOOR S'MORES

Place a Hershey's chocolate square on a graham cracker and top with a marshmallow. Microwave for 8-15 seconds. Watch it closely. When the marshmallow starts to puff up, they are ready. Top with another graham cracker.


On Friday night as dinner was ending, Little Sister said, "Let's toast!" She raised her glass of milk and said, "To the best Mimi Camp ever!" We all clinked our glasses and declared Mimi Camp officially ended. 


Although "camp" was over the girls were here for a couple of more days. We let them do what they wanted. Bike riding, digging for rocks, swinging. drawing, making more jewelry. It was great to have some winding down time.


And Sunday night when it was only me and Daddy-O here in a very quiet house, we collapsed and gave thanks. Thanks for grandchildren. Thanks for good health so that we can enjoy them. Thanks for cool weather. Thanks for this spacious farm with room to play. Thanks for family. 


Wednesday, June 12, 2019

Midway Through Mimi Camp

We are at the midway point of camp. I'm up early enough—before they wake up—to share a few things here that have kept us busy. I know if I don't post this now, I'll forget part of what we've been doing. I was worried that I wouldn't have enough planned for us to do. Now I'm worried we won't get it all done!


Sunday night they surprised me by making dinner. Daddy-O was the kitchen supervisor. They made party sandwiches, fruit kabobs and the big surprise was fancy pretzels. They dipped them into melted chocolate and white chocolate and covered the chocolate with sprinkles. Daddy-O melted the chocolates and they dipped and sprinkled. These pretzels were a major treat. We will do this again for sure.


Monday we had a friend come and show us how to weave a basket. She's taught many people over the years how to do this, including entire classes of third graders. (She was a third grade teacher.) I can't imagine how she does this en masse.


In the afternoon, the girls made fluffy cloud dough. This turned out to be great fun—if very messy fun. They stayed at it for over an hour. Here's the recipe for this crazy easy, inexpensive activity. Making two batches (one for each child) cost less than $5.


FLUFFY CLOUD DOUGH

2 heaping cups cornstarch
1 cup hair conditioner

Mix together in a large bowl with a spatula until you need to switch to squishing with your hands.


 And on Tuesday we finished the baskets with Mrs. Joanne's help. These are seriously gorgeous baskets!


Although we've had some rain each day, we've also had lovely cool, low humidity time for outdoor fun. We could not have ordered more perfect weather. So there has been lots of outside play.


It's been a camp tradition to open "the box" each morning at breakfast. The box contains something that will be one of our day's activities. Tuesday's box contained loopy yarn. And it was just before bedtime before we got a chance to work on this. You can google "loopy yarn" for videos that show how to do this easy finger knitting. You can find the loopy yarn at most craft/hobby stores.


Oh....and I nearly forgot! The girls made blueberry banana smoothies for their afternoon snack. They were delicious!

BLUEBERRY BANANA SMOOTHIE

3/4 cup frozen blueberries (or other berries)
1 banana, sliced in 1-inch pieces
1 cup blueberry yogurt
1 cup milk
whipped cream, optional

Put all ingredients into a blender and blend until smooth. 


If you will be having your grandchildren for a day, a week or even longer, I hope this will give you a few ideas of keeping the kiddos busy. Little Sister brought one of her cookbooks. That's where we found the recipes for the chocolate covered pretzels and the berry smoothie. So many kid-friendly recipes in it. 


Check back here later for the second half of Mimi Camp. 


Sunday, June 9, 2019

Mimi Camp Has Begun

There might not be another post here until after Mimi Camp. I'll see how time goes. Things stay busy here for this special week. But I'll be sure to share some of the things we will be doing. It might give you some ideas for your own grandkid camp.


Mimi Camp is in full swing. Because I've been away for most of the last month, I've said that this year will be a "freestyle camp." But it's coming together better than I expected. We have lots of room for riding anything with wheels and they would be happy to stay outside most of the day. So there's always that.

There will be camp surprises for them as the week progresses. Our "camp box" tradition will start tomorrow. They get to open a box to see what the day's activity will be. They have already asked about it.  (I need to make a mad dash to the craft store today!) I told them it starts on Monday.


But yesterday when the rains came they moved inside for some Magic School Bus. (After 25 dry days, so we aren't complaining.) See the rocking chairs? Daddy-O dug them out of the barn and cleaned them up for this new generation of little girls. Glad I didn't give them away years ago when our own little girls outgrew them.


Outdoor adventures just before dark are fun at camp. Daddy-O and Baby Girl went on a whang doodle hunt last night. Thankfully they didn't find one! But they did see "a couple of bunnies and some birds." Baby Girl was happy with that.


Sunday breakfast was on the porch. It's still raining outside. And Daddy-O made his famous French toast for the girls. According to them, he is the "king of treats." You're welcome, Mommy.


My own cooking last night was less exciting, but delicious nonetheless. It's the most kid friendly meal I know. I've made this recipe for hundreds of kids over the years. Our own two little ones like it as much as everyone else always did. The oven fries are also easy. And it's a "real food" side, unlike frozen fries which have a longer list of ingredients.

SLOPPY JOES

1-1/2 lbs lean ground beef or turkey (I've also made it with a 1 lb pkg)
1 cup ketchup
1 tablespoon sugar
1 tablespoon vinegar
1 tablespoon Worcestershire sauce
1 tablespoon yellow mustard

Brown meat and drain. Stir in remaining ingredients and simmer over low heat for about 20 minutes. Spoon over toasted hamburger buns.


If I use ground turkey, which comes in one-pound packages,  I will add some chopped onion when I brown the meat to help bulk it up. It also helps flavor the milder turkey.


OVEN FRIES

4 baking potatoes
1 teaspoon cooking oil

Preheat oven to 450 degrees.
Spray baking sheet with PAM. Scrub potatoes, pat dry and slice each potato lengthwise into 8 wedges.
Put potatoes in mixing bowl and drizzle with 1 teaspoon of oil. Toss to coat.
Bake on sheet for 15 minutes. Turn and bake 15 minutes more, or until they begin to brown.

(This time I cut my wedges thinner and they cooked much quicker.  Just go by the color.)

If you ever find one of these wire baking sheets, grab one! I bought this one about 25 years ago at Walmart for $5. Because the hot air comes from the bottom, too, it will brown both sides without turning. Is this like the original air fryer?


Thursday, August 9, 2018

Bracelet Making The Easy Way


Attention all Mimis! Or anyone who needs a fun project for kids. We made these friendship bracelets at Mimi Camp and both girls loved making them. The four year old could do this by herself...after I got the yarns set up in the little loom. (And she taught Daddy-O how while I was taking a shower one night.) And the seven year old actually got out of the wading pool one afternoon to go work on her bracelet.

There are so many ways to make friendship bracelets. Some have beautiful complicated patterns. But this method using the cardboard loom is by far the easiest I've ever seen. It's perfect for young children. But the adults who have done this have also found it strangely addictive.


You can find instructions, both written and video, online by googling "friendship bracelet cardboard loom." But I'll show you what we did. First I cut cardboard circles from a shoebox. I traced the top of a Tervis tumbler to get my circle pattern.


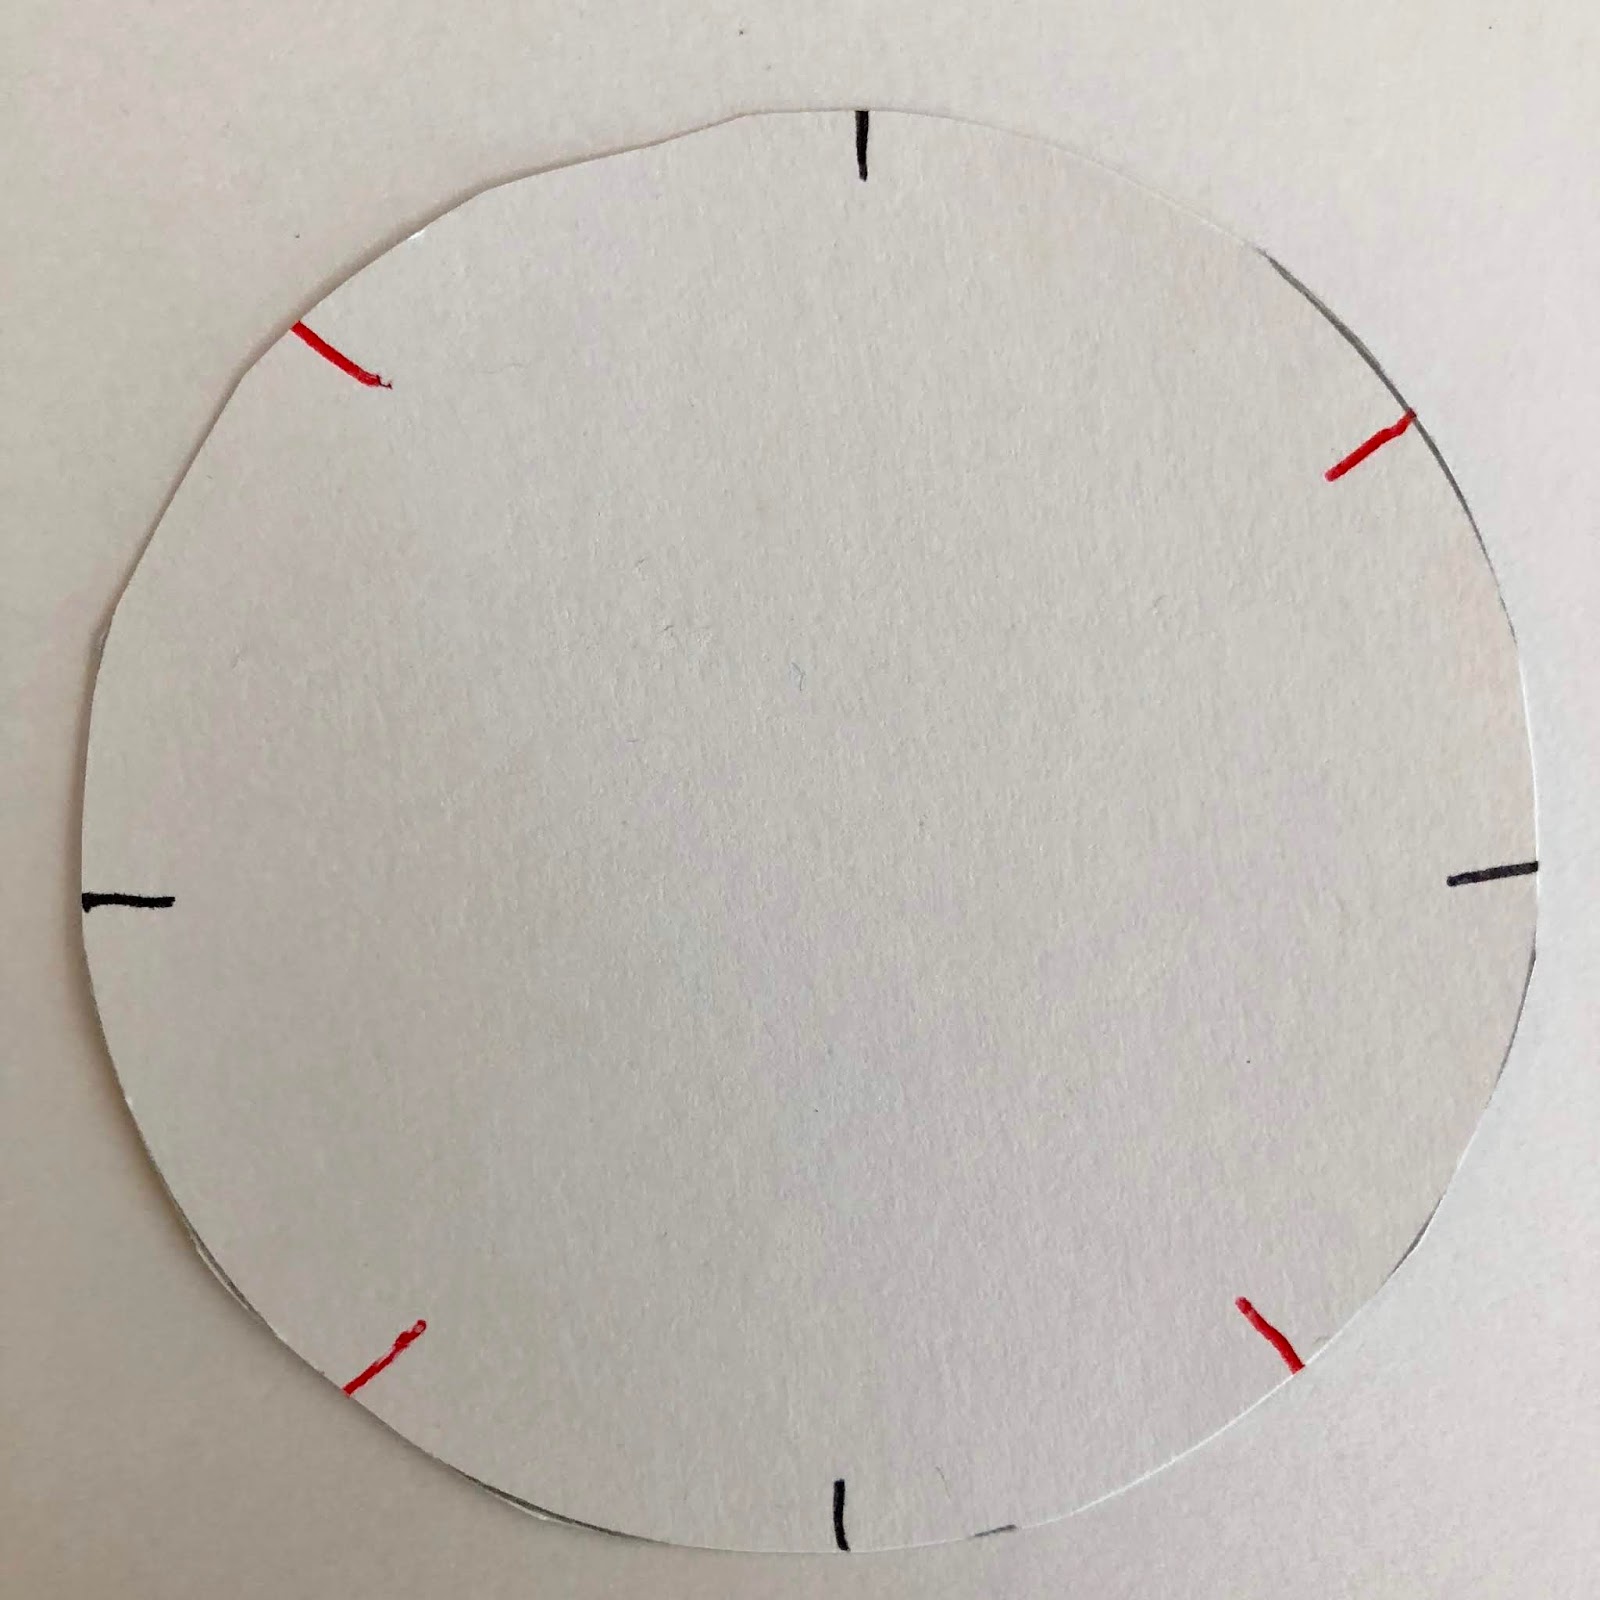
Then you mark 8 spot around the circle. You don't need to measure anything. Just mark top and bottom. Then halfway between those marks, use your pencil to mark the sides. Then make the last marks halfway between the four "north-south-east-west" marks. If you are a little off with your spacing, it won't matter. I measured nothing!

Cut a little slit at each mark, about 1/4 inch. Then poke a hole in the center. I used a nail to make the hole. Then I used a pencil to enlarge the hole enough to get the yarn through it. You can use scissors, a pencil, or anything you can poke through the cardboard.


Cut 7 strands of yarn or craft cord or embroidery floss (don't separate the strands) about 20-22 inches long for a child's bracelet. Make longer strands if you want an ankle bracelet. Or, a grownup bracelet. We used leftover sock yarn for one bracelet and embroidery floss for the other. You can buy a package of craft cord or embroidery floss for under $4 at a craft/hobby store if you don't have leftover yarn at home.


Poke all seven strands of yarn through the hole and tie a knot on the underside (so the yarn doesn't pull through) about an inch or so from the end. Yes. Tie all the strands together. I used a pencil to push the yarn through.


Then drape the yarn strands over the top and tuck one strand of yarn into seven of the slots. Leave one slot empty and turn that one "toward your tummy." That's how I explained it to the girls. Always keep the empty slot "toward your tummy."


Starting with the yarn to the right of the empty slot, count three yarns to the right. (You can also work to the left if that feels more comfortable. But only go in one direction.)


And move yarn #3 to the empty slot. Rotate the circle so that the empty slot is "toward your tummy" and do that again. (You can also work to the left if that feels more natural. Just make sure you always go in the same direction.)


As you continue moving yarn #3 to the empty slot, the braid will begin to grow on the underside of the circle. Give it a tug every now and then to pull it down. The girls got so excited when they could see their bracelets growing.


We also figured out that every few moves, we needed to run our fingers down through the strands of yarn to keep them untangled. Just like you would run your fingers through hair to untangle it.


When the bracelet is long enough—for these little girls, we made the braid 5-1/2 inches long—take the seven yarns loose from the loom, pull the bracelet down through the loom and cut the yarn a couple of inches above the end of the braid. Trim off the ends (or not) to suit you.


We used the simplest of joins. I untied the original knot and then tied the two ends together. You can check this video for other ways to make a join. Make sure you don't tie it too tightly. I also measured generously and had extra yarn at both ends. That was trimmed off later. I found it was easier to tie and untie knots when there was enough to work with.


Little Sister and Baby Girl wore their bracelets home and asked for me to start another one for each of them so they could work on them in the long car ride home "so we won't be bored." That was a grand idea, but Baby Girl was asleep before we were very far down the interstate. But they have their looms set up and ready to go at home.