Showing posts with label instant pot. Show all posts

Friday, June 16, 2023

Experimenting In The Kitchen

Sausage, Potatoes & Green Beans

Wouldn't you know it? The week I decide start learning more about my instant pot I read that the Instant Brands—maker of the Instant Pot—has filed for Chapter 11 bankruptcy.  Hopefully it's one of those things that the powers-that-be figure out and the regular workers keep on going. And now I hope that my own Instant Pot lasts forever.

I've had an Instant Pot for several years now. I have used it from time to time, but I've said more than once that if it died, I probably wouldn't replace it. But for reasons I can't explain I decided it was time to get bold with using it. I started with this Instant Pot recipe for dinner because I had a smoked sausage in the refrigerator. And I needed to start emptying the fridge before family arrives tomorrow and the groceries I stock will change over to groceries more suitable to larger families.

Let me say upfront that this is the kind of recipe that puts "instant" in the instant pot. So many Instant Pot recipes really aren't faster that a stovetop version. But they can cook unattended and that's reason enough for many people to embrace one.

I knew this was a gamble for out supper. I figured my husband might not want this. But I told him we had frozen pizza if supper was a dud. After we finished eating Daddy-O said, "Be sure to tell them that I really liked this. And I wasn't too sure when you told me what we were having for dinner. But this is really good!"  

Here is the recipe. So simple. So quick. So yummy. The green beans were perfectly cooked. I'll try cooking only green beans another time, using this cooking time.


SAUSAGE, POTATOES & GREEN BEANS


1 cup low-sodium chicken broth

24-oz bag small red potatoes, cut into 1-inch chunks

1-1/2 lb fresh green beans, washed & ends trimmed

13-oz package turkey smoked sausage, sliced into 1/4-inch slices

2 teaspoons Montreal Chicken Seasoning, or to taste

4 tablespoons butter, cut into 8 pieces. (That’s a 1/2 stick)


Pour broth into pot. Add the prepared potatoes, beans and sausage and sprinkle with Montreal seasoning. Give it a stir. Put butter pieces on top.


Place lid on pot. Turn valve to “seal” and press Manual button. 

Set timer to 3 minutes. (High pressure) 

When time it up, do a Quick Release. Give it all a gentle stir.


  • To make this super easy, I chose a 24-oz “steam in the bag” package of red potatoes. They are prewashed. I quartered them. 
  • Do not use canned green beans for this. They would be mushy after cooking.
  • I didn’t weigh the green beans. Bought a bag of fresh ones and trimmed ends until it looked like enough.
  • I used a 6-qt pot. 


For as much as Daddy-O liked the main dish, his first words at the supper table were, "This toast is OUTSTANDING!" I won't argue. It was really good. And I used my new little air fryer. 


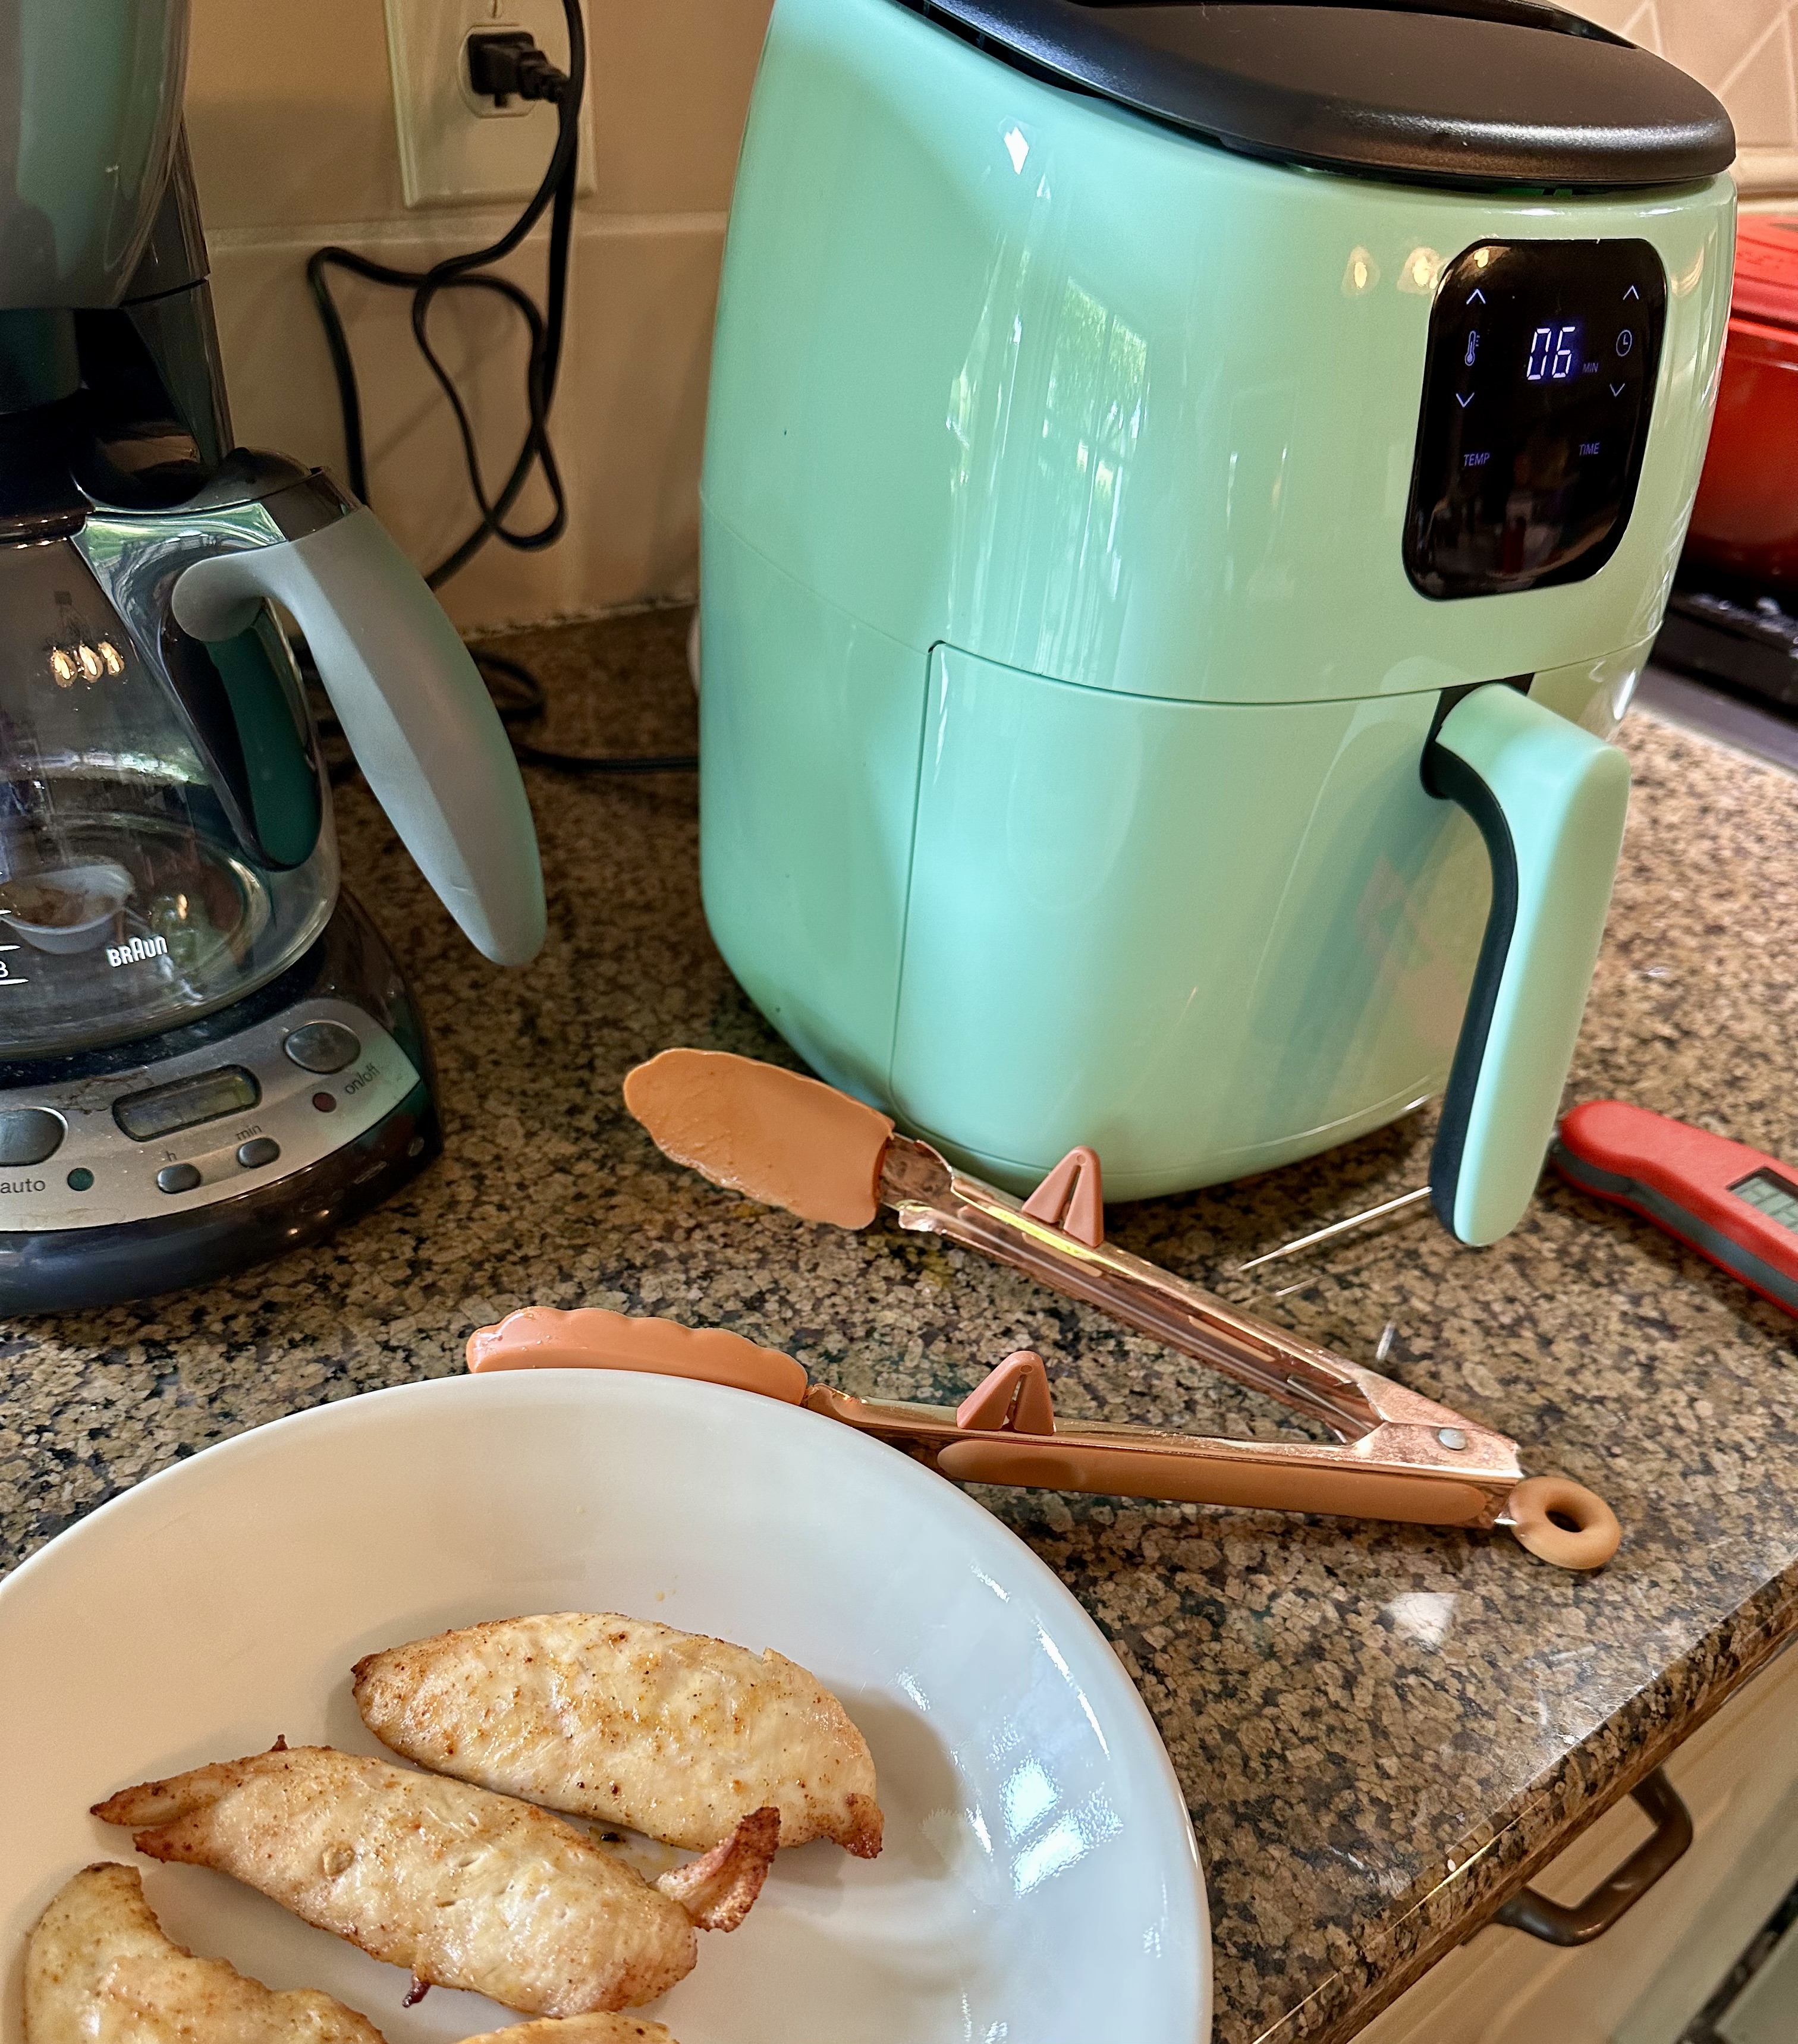
I have resisted buying one for ages when all around me raved about them. Last week I ordered Dash Mini 2.6-qt. air fryer. I've only had it long enough to try a couple of things. I had resisted an air fryer because I didn't want to have to learn to use another appliance. And I didn't want another big thing sitting on the counter. This one is small, suitable for 1 or 2 servings. And that's fine for our household. 


After looking at a few recipes, I cooked chicken strips. And when I realized I could take the basket out and look at the food. Just like looking at food in the oven to see when it's ready.  I relaxed about figuring out the exact cooking time. 
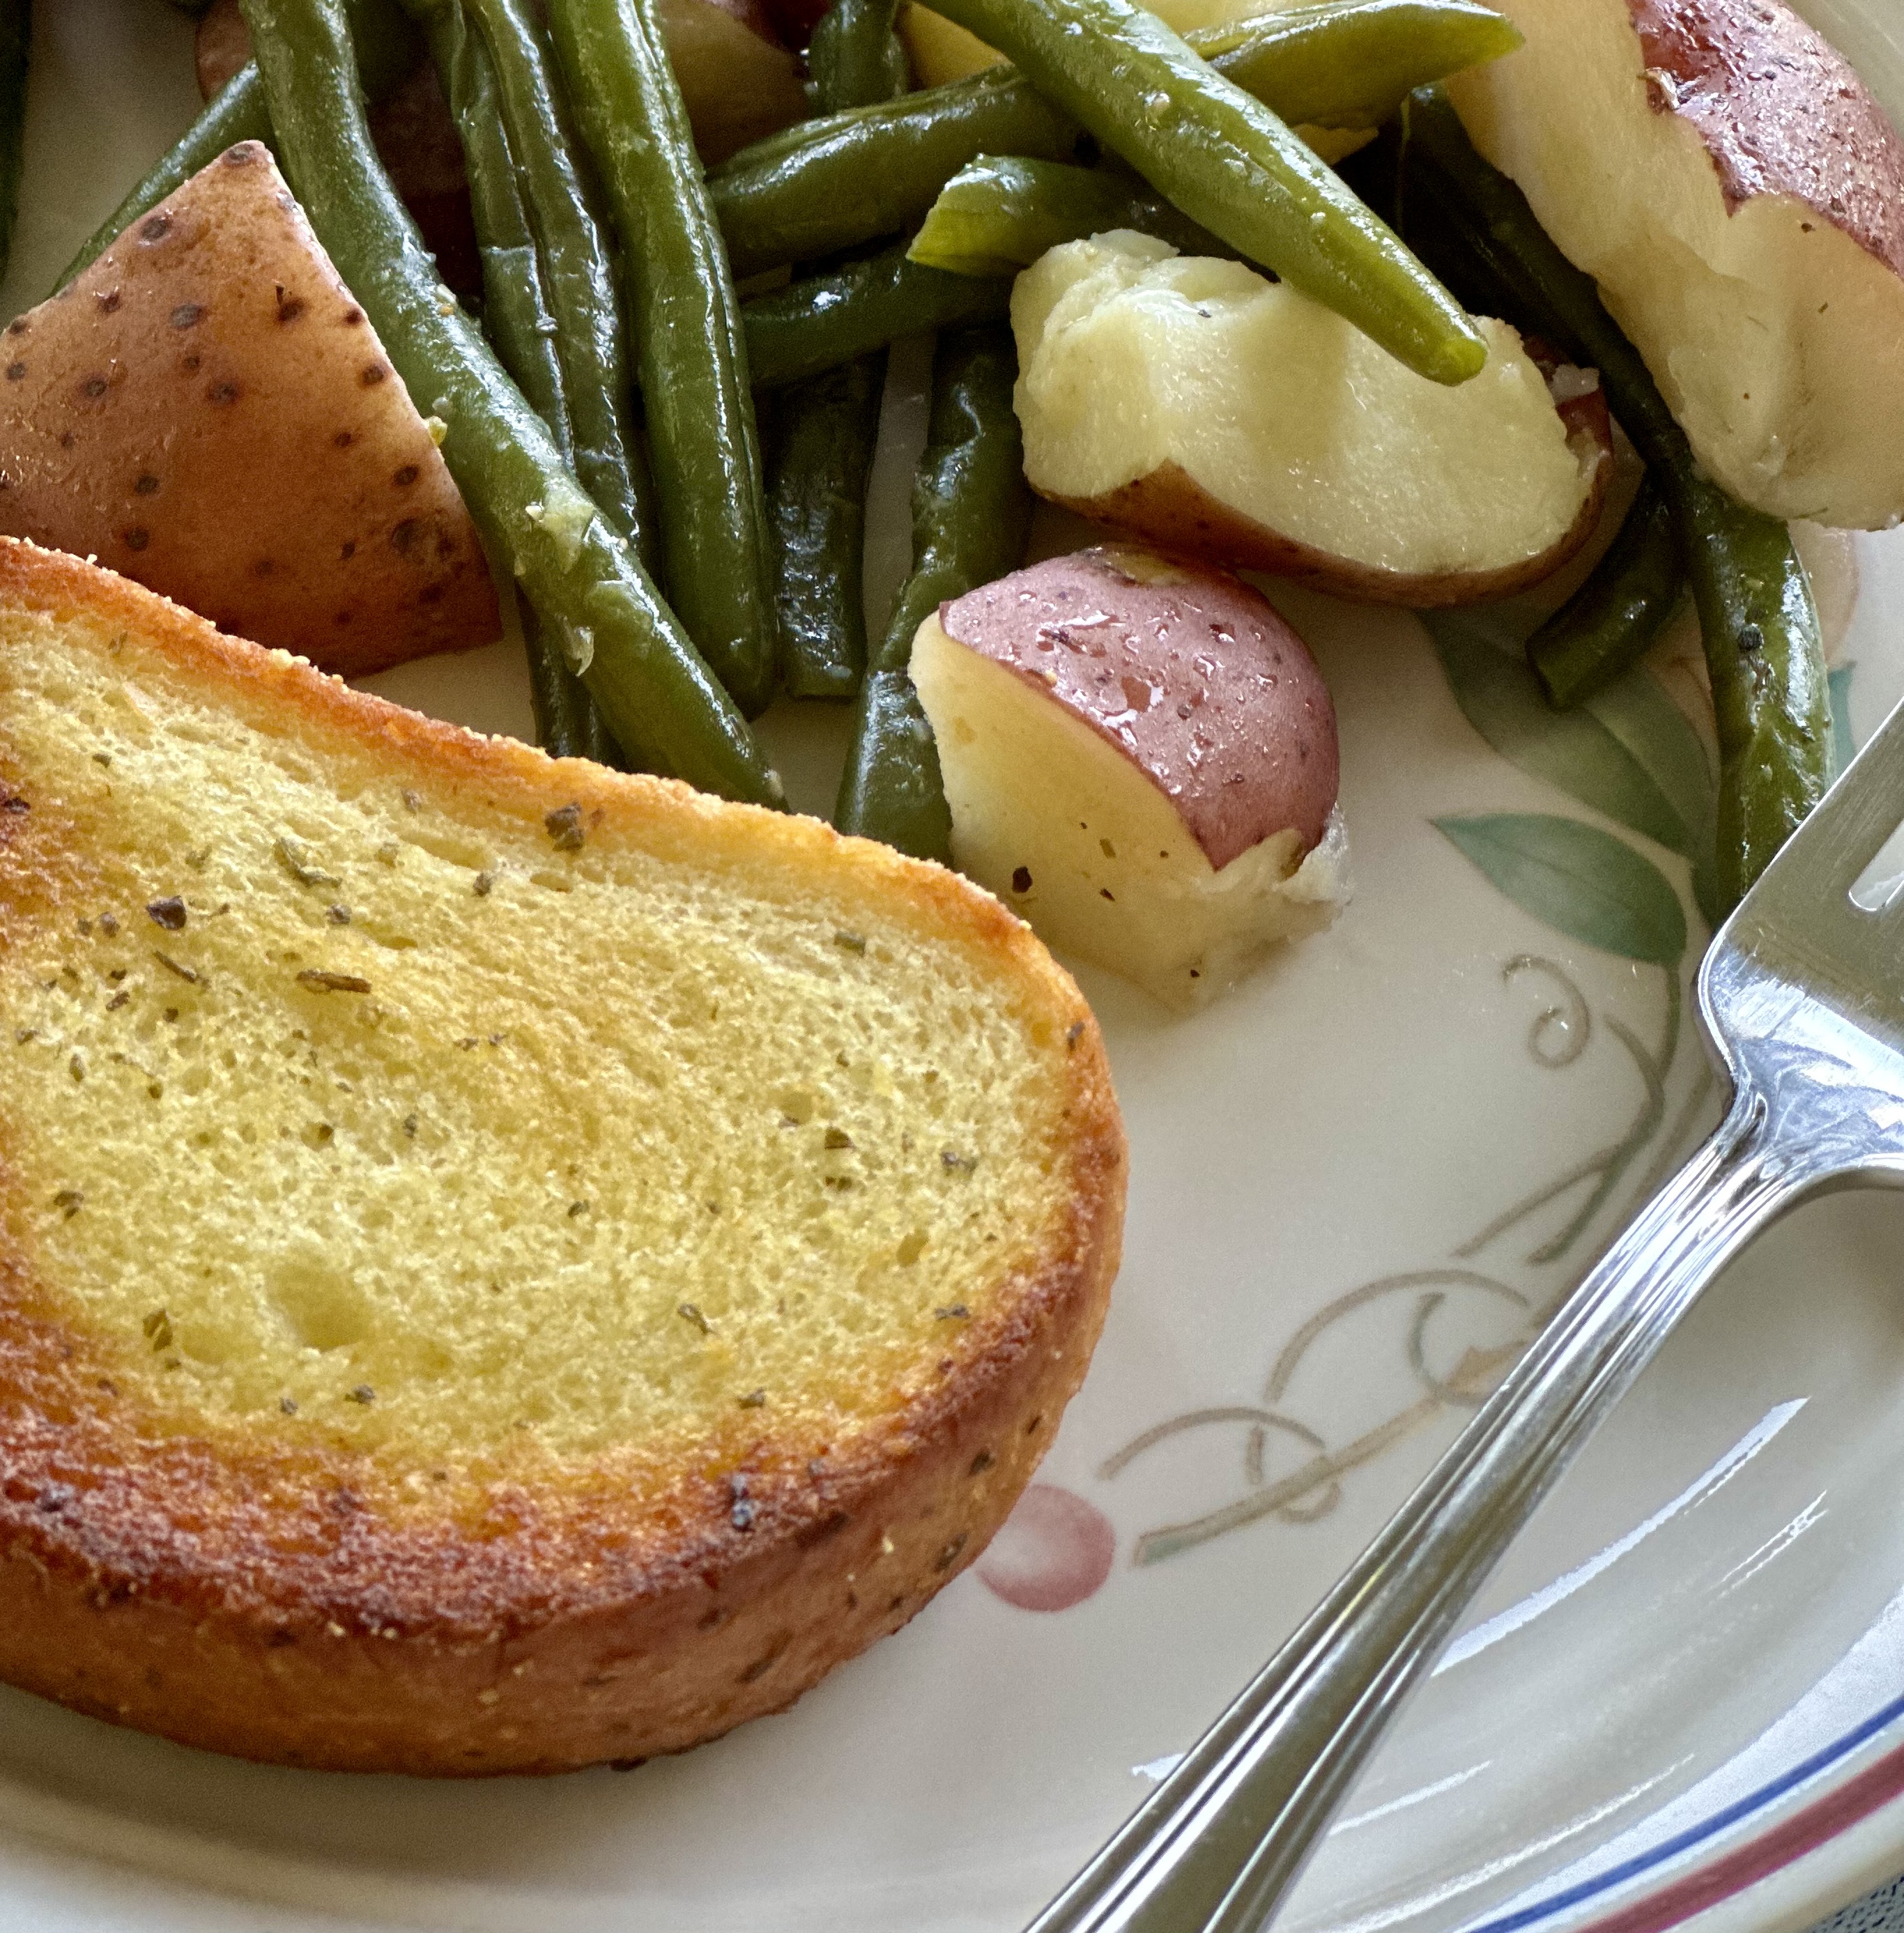


So tonight I popped a couple of slices of frozen garlic bread in the air fryer set to 400º. I checked in about 3 minutes and it looked nice and brown, but when I picked it up the bottom was soggy. So I turned it over and let it cook for another couple of minutes. And as Daddy-O said....OUTSTANDING! It was golden brown and crunchy. And it was all done in less time that it takes to preheat my oven. 


This little air fryer would only hold 2 slices, but that's all we needed.


Monday, February 1, 2021

The Best Vegetarian Chili


I have a thing about naming recipes "The Best...." or "The Ultimate..." That is always a subjective call. Today's recipe was named "The Best Instant Pot Vegetarian Chili" and I will say that this recipe might be worthy of the title. I have been making similar vegetable chilis or bean chilis for years and years. Everything from the simplest "open the cans, dump and heat" to others that called for more seasonings, sometimes using packets of ranch dressing mix or chili mix." But this combination of seasonings is a winner. I had all the spices on my shelf—except coriander. I have never owned a bottle of coriander in my life. So I just left that out. And I was totally happy with the result.

This looks like the longest list of ingredients. But it's actually a very simple recipe if you don't mind dicing several peppers and an onion. I've said this before but I'm going to tell you again. With a long list like this, here's what I like to do:
  • Gather all ingredients before you start. Make sure you have what you need.
  • Measure the spices into a small cup before you start cooking. I move a spice bottle from the left side of the recipe to the right as I measure so I know what I've done should I get interrupted. It happens.
  • Make the long recipe easier to read. Divide the recipe ingredients into groups—if you print the recipe out, draw a line between the groups.  I divided this one up as I typed.
See? There is nothing special there. But trust me, these steps make everything easier. 


VEGETARIAN CHILI (for Instant Pot)

1 tablespoon olive oil
1 red bell pepper, diced
1 green bell pepper, diced
1 yellow or orange bell pepper, diced
1 red onion, diced
5 cloves garlic, minced

1 cup chicken or vegetable broth (I used 1 tsp of Knorr Chicken bouillon in 1 cup hot water)
15-oz can kidney beans, drained & rinsed
15-oz can black beans, drained & rinsed
15-oz can pinto beans, drained & rinsed 
1 cup corn kernels, frozen or canned (I like Green Giant Steam Crisp corn)
28-oz can crushed tomatoes

1 heaping tablespoon chili powder
1 teaspoon ground cumin 
1 teaspoon unsweetened cocoa powder
1/2 teaspoon garlic powder
1/2 teaspoon paprika
1/2 teaspoon smoked paprika
1/8 teaspoon red pepper flakes (or to taste)
couple of splashes of low-sodium soy sauce

Turn your Instant Pot to Sauté and give it a couple of minutes to heat. Add olive oil, bell peppers, onion and garlic. Sauté for 3-4 minutes, stirring a few times as it cooks, until vegetables are slightly softened. Stir in remaining ingredients.

Close Instant Pot and cook on High pressure for 4 minutes. Once the cooking is done, let the pot natural release for 5 minutes, then quick release the remaining pressure.

Serve the chili with your favorite chili toppings, such as shredded cheese, sour cream or tortilla chips.

IF YOU DON'T HAVE AN INSTANT POT, make this on the stovetop. Sauté the peppers, onion and garlic. Then add the remaining ingredients, stirring to combine. Bring to a boil. Reduce heat and simmer for 30-60 minutes, stirring occasionally. 


You can go back and check the original post and see the recipe with the two ingredients I left out—coriander and salt. Plus, she has other tips. She says if your Instant Pot has a tendency to show the "Burn" warning, you can stir in the broth, then add the remaining ingredients without stirring. You can stir after it has cooked.

We topped our chili with tortilla chips, so neither of us missed the salt. And it was plenty good without the coriander. I have cooked for 50+ years without using that. So I'm pretty sure if I buy a bottle, it won't get used much. But then, maybe I will try adding it to see what I've been missing all these years.

This chili had a more complex flavor than most I've vegetable chilis I've made. The smoked paprika and the cocoa gave it a depth of flavor that my less complicated versions lacked. It's loaded with peppers, but when you taste it, the amount does not overwhelm. The flavors are balanced. The textures of the soft beans and the crisp corn are just right. The crushed tomatoes made this a thick hearty chili. So. You tell me. Is this the "best" vegetable chili ever? By golly, I think it might be!

You know I always ask my cattle farming husband for his opinion. "Well, it's not hamburger steak smothered in onions." Then he went back for more. I interpreted that as, "Yes. This is really good." We had a freezer incident last week. Everything thawed out, so we ended up cooking 5 beautiful filet mignons that night. A couple of those were grilled rare and frozen again for another time. (Not sure how that will work out.) But Daddy-O had plenty of red meat that week. I do like to mix in some meatless meals along the way. First, because I really like meatless meals. And second, because it is a good choice from a health standpoint. 


Saturday, August 24, 2019

A Southern Snack—Boiled Peanuts


There has been much to write about in the last week. But not so much time to write it. We had our annual summer knitting retreat last weekend. And we had houseguests at the lake. The knitter wife, Bev, went to the retreat with me. The husbands entertained themselves. We had such a good time, both knitting and visiting.


The knitting retreat was fun as always. I'm zooming through the retreat project. Since it's a cotton knit, I'd love to wear it while the weather is still hot. I had an entire day yesterday home alone. Daddy-O is busy this weekend with the Youth  Livestock Show, so I've had the house to myself. I'll be close to the end of the shawl by the time the livestock show is over.

When he got home late last night he headed straight to the kitchen to find a snack. He was happy to find a bag of boiled peanuts in the refrigerator. It's a Southern thing. We love boiled peanuts. If you live in other places, you might not even know what I'm talking about. Here, where we live, boiled peanuts are often sold from stands on the roadside. Everyone has their favorite peanut stand and sometimes will drive for miles and miles to get the "best" ones.

Now, let's talk peanuts. We think the best boiled peanuts are made using green peanuts. Green peanuts are ones freshly pulled out of the ground. They are only available at harvest time, because the fresh ones won't keep long. It's a short season to enjoy those. Raw peanuts in the shell—more readily available—have been dried so that they have a long shelf life.

Our local meat market also has wonderful produce and I was happy to find green peanuts there a few days ago, already bagged in 2 lb packs. It's not unusual for them to be loose with a scoop in the bin. A quick Google search turned up directions for cooking the in the Instant Pot. If you only have access to RAW peanuts in the shell, you google for cooking times for them. It's a much, much longer cooking time. 


INSTANT POT BOILED PEANUTS

2 lbs green peanuts
1/2 cup salt (more or less, to taste)
water to cover the peanuts

Wash peanuts. Put peanuts, salt and water in IP. Do not add water past the maximum fill line. Because the peanuts float, put the trivet on top of peanuts and weight it down with a pyrex dish. I used the lid of a pyrex dish.
Use MANUAL and set time to 45 minutes. Then do a "natural pressure release" (NPR), which means let the IP sit after the time is up and the cooker turns off until the pressure pin drops. Pour up peanuts. Store in refrigerator—if you don't eat them all right now.


If you have never eaten boiled peanuts, let me tell you how. Pop the shell open and eat the peanuts. If you slurp them out of the shell, you'll get a little of the salty juice, too. You do not eat the shell. (People have asked.) The nuts are soft— more like cooked dried beans—rather than crunchy like a roasted nut.

We have also cooked boiled peanuts on the stovetop (or huge pot on a gas cooker outside) and in the slow cooker. And Jo, another knitter friend, told me yesterday that her husband has done them in the microwave. You can google all the ways to do it.

All of this peanut talk remind me of an experience Jessica and I had years ago. We went to a well known seafood restaurant in Charleston. A place where they bring you a basket of boiled peanuts as soon as you are seated. Like you get chips and salsa at a Mexican restaurant. We dove into the peanuts immediately. And we were nearly done when we realized that we were the only ones eating them. The other dining patrons were either ignoring them or examining them as they wonder what to do with them. We decided we may have been the only Southerners in the place!


Friday, July 19, 2019

Weekend Bonus Recipe

I don't usually post on the weekends, but tonight's dinner turned out really well and I want to get it here in the blog so I don't lose the recipe. That has been known to happen. If I post it here, there's not much chance that I can't find it next time.

Instant Pot Chicken & Potatoes
I had a dinner plan for tonight. But then I sat here all afternoon and knitted the same three rows over and over. And over. Note to self: do not watch intense drama at the point where I'm establishing the pattern repeat. And when episode 2 ended and I FINALLY got the pattern repeat right, I looked at the clock and I knew I needed to change my plan.

A quick Google search for "instant pot chicken & potatoes" led me to this recipe from Creme de la Crumb. This is a new-to-me site. I'll explore later when I have more time.

As usual, I didn't quite follow the recipe. But the basic directions were spot on. I only had two chicken breasts. I didn't have any thyme. And there was no parmesan cheese here. It was one of the most "instant" recipes I've made in the Instant Pot. I typically say the the word "instant" is a misnomer. It takes quite some time for the food to heat up and reach pressure even though the cooking time might be shorter.

Maybe it's because I was only cooking two pieces of chicken and fewer potatoes, it didn't take too long to reach the pressure point. When it was done, I sliced the larger breast and we shared it. It was actually easier to eat it after it was sliced. And that was plenty for us tonight. I made a plate with the smaller piece of chicken and the rest of the potatoes for Daddy-O to have tomorrow. I'm hitting the road early in the morning for a couple of days of Mimi duty.


INSTANT POT CHICKEN & POTATOES

4 boneless skinless chicken breasts (I only used 2)
2 lbs. red baby potatoes (I tossed in about 3/4 lb)
3 tablespoons olive oil
1 teaspoon salt (or to taste)
1/2 teaspoon pepper
1 teaspoon garlic powder
1 teaspoon dried thyme (I didn't have any)
1/2 teaspoon dried basil
1/2 teaspoon dried oregano
2 tablespoons dry Ranch seasoning mix
1 cup chicken broth (I did use the whole cup)
chopped parsley, optional

Toss chicken breasts and potatoes in oil. Mix seasonings and sprinkle over chicken and potatoes and toss to coat. (I used about half the seasoning mix for my smaller amount of chicken & potatoes.) 
Pour chicken broth in IP. Put chicken pieces into broth and put potatoes on top of chicken. Fasten lid and close valve to seal. Set timer to MANUAL for 15 minutes.
When cooking time is up, do a quick release. Remove chicken and potatoes from broth. Garnish with chopped parsley if desired.


This was ridiculously good for the effort that went into it. The potatoes were perfect. The chicken was moist and tender.  And I only had the one pot and one bowl to wash. You could certainly use different seasonings. It's the cooking directions that I was looking for.

Take a few minutes and go to the original recipe and then read the comments. Lots of other good ideas there.

Now I might better go throw a few things in a weekend bag. I'm leaving early-early tomorrow.


Wednesday, April 10, 2019

Creeping Back To Normal

Instant Pot Spaghetti

After a couple of weeks of passing germs around, being the caregiver, being the patient, I'm beginning to see daylight. Still not back to full speed, but I'm getting there. I did cook the easiest supper last night (after I woke up from a nap) and I'll share the recipe down below.


On Monday night I got together with my friends again to see the end—they all lived happily ever after—of the TV series we've been watching. We've taken turns providing supper. This week was a surprise. Açaí bowls!


Joanne brought a blender and frozen packets of the super berries and bowls she had stashed in the freezer. And the others brought assorted toppings. It was fun to have a make-your-own session. Thinking maybe all the fruit and super food helped me kick the last of the icky stuff I've had.

And now to the spaghetti recipe. I knew I had to do something for supper last night. If there had been a reasonable something to pick up in the city and bring home I would have done it. Daddy-O said we could go out if I didn't want to cook. But he had a meeting right at supper time. So I figured spaghetti was the easiest thing I could make at home. By the time I got home, I had used up my energy for the day, so I looked for a one-pot way to make spaghetti so I wouldn't have to dirty up so many pots. I wanted a streamlined dinner.

The recipe that looked the most promising was done in the Instant Pot. I've done pasta in it before with so-so results. These directions...not the ingredients...were enough different that I wanted to try again. Please, please, PLEASE go to the A Pinch of Healthy blog and read her post about how she makes it. She has lots of photos, answers questions and tells you exactly how to do it.

But I'm putting the basic directions here so that I can find this recipe. I've said before this blog is like my own recipe box. This was like comfort food spaghetti. I think it would be very kid friendly. Using the Instant Pot made for really easy clean up. Another big plus.

INSTANT POT SPAGHETTI

1 lb. box spaghetti, uncooked (regular spaghetti, not angel hair)
1 lb. extra lean ground beef
1/2 teaspoon House Seasoning (or salt & pepper)
4-1/3 cups water
24-oz jar marinara sauce (I used Rao's)
parmesan, for topping

Turn Instant Pot on to Sauté. When pot is hot, add ground beef and House Seasoning and brown meat. When brown, remove meat and drain. Pour any excess liquid out of pot. Set meat aside.

Pour water into pot. (No need to clean anything out.) Break spaghetti in half and lay crisscross into pot. (Do this in 3 handfuls, alternating direction you put spaghetti in pot.) Use spoon and press noodles into water to make sure they all get wet. Don't stir. If some float, that's okay,

Put cooked beef on top of noodles. Don't stir. Pour jar of sauce over meat. Don't stir.

Put lid on. Use Manual and set to High Pressure for 4 minutes, closing vent. When time is up, NPR (natural pressure release) for 5 minutes. Then release remaining pressure. Remove lid and use tongs to stir noodles and sauce. Pick apart any stuck noodles. Let sit for a few minutes to thicken sauce. Serve with a little parmesan sprinkled on top.


Again, go see the whole process on A Pinch Of Healthy. I found that so helpful. NOW...let me tell you my one change from her recipe. I only had thin spaghetti here. I had two brands, so I looked to see if maybe one cooked longer than the other. And yes, the Ronzi took a little longer to cook than the Barilla. I figured that was a closer match to regular spaghetti. So I used that one and shortened the NPR time. When I do this again I might even shave another minute off the NPR. This was definitely acceptable, but it was more done than I usually cook pasta. And I will take the inner pot out of the cooker when it's done, so it won't keep cooking.

Using the Instant Pot just takes practice. And having the confidence to make some common sense adjustments. And then just do it. I'm getting better at it!

~~~~~~~~~~~~~~~~~~~~~

I always keep a jar of house seasoning on the shelf. Sometimes I make a big batch. Most times I make it in this smaller proportion.

 *House Seasoning:  
1/4 cup salt 
1 tbsp. black pepper
1 tbsp. garlic powder

Mix well. Store in an air-tight container, such as an empty spice bottle or small jar. 


This morning's sunrise.


Wednesday, February 6, 2019

Embracing My Instant Pot

Not-Quite-Free Vegetable Soup

Now, I do not regret tasting every single homemade goodie on the snack table at the knitting retreat last weekend. And several of the packaged snack foods as well. It was all good. But you know that kind of "vacation" eating cannot continue at home.

So this morning I made soup. The "nearly free" of WW points recipe I make after I've over indulged. It will be my lunch for days. And this time I made it in my Instant Pot. I've had several questions lately about how much I use mine. How much I like mine. And I have decided that since I do have one sitting on a counter, I need to use it more.

Suellen, our retreat hostess, brought soup on the set up day for those of us who came early to help her get things ready. It was so good. She had made it in her Instant Pot. I've asked her before about using the Instant Pot because I've heard her say that she uses hers all the time. She also said that she grew up in a household where pressure cooking was a regular way to get dinner on the table.

It dawned on me (I think I must be a really slow learner) that what was holding me back from using my Instant Pot more was the thought, "What if I mess this up?" And this morning I had a better thought—that happens occasionally—that in almost no other venture would I expect perfection as I'm learning

So I will make it a point to cook regular foods at least a couple of times a week in my IP and see what happens. If I waste a bag of dried beans, so be it. I've got to be willing to learn. And I've got to be willing to fail.

BIG, BIG thing I already know about IP cooking....write down what you do. Make notes!!! I cooked dried beans last week after another Suellen coaching session. And by this morning I wasn't a hundred per cent sure what I did. Fortunately I found the directions I used and scribbled some notes this morning about how I adapted it.

And the other big thing I've already learned is that because all of us have different tastes and different expectations, there is a range of cooking directions/times that will work. You just have to find the one that works for you.

Here are a few "recipes" that I have used. Easy things to get you started if you are shy about using your IP.


HARD COOKED EGGS

Place eggs on a rack (or use the trivet that comes with the pot) and add 1 cup water.
Fasten lid and turn lever to SEAL.
Set on MANUAL for 6 minutes.
When timer goes off, quick release the pressure.
Immediately remove eggs from IP and place in a bowl of ice water.
Let cool for 5 minutes.
Then remove from cold water.
Store, covered, in refrigerator if not using immediately.

This set of cooking and cooling times gives us eggs the way we like them. If you do a Google search, you'll find time variations. Try until you find the time that you like. These are surely easy to peel. I keep extras, unpeeled, in a ziplock bag in the refrigerator for a super quick breakfast, salad topping, or snack. Egg salad is easy to make when these are waiting.

You can cook as many eggs as fit into your rack. You would cook 2 eggs or 12 eggs the same way.


DRIED BEANS–WITHOUT SOAKING

You can Google ways to cook dried beans in your Instant Pot. I read them all. And I asked Suellen how she did hers. And then I combined some of the methods. Again, you will have to find what suits you. But this is a good place to experiment. Dried beans are cheap.

1-lb bag of dried beans
1/2 onion, optional (for seasoning)
6-8 cups water
1 tablespoon cooking oil (to prevent foaming)
1-2 teaspoons salt

Pick through beans, removing any pebbles and broken beans. Rinse them and add to IP. Add remaining ingredients. Fasten lid and turn lever to seal. Set MANUAL and cook for 30 minutes. Let NPR (natural pressure release). If you run out of time after 20 minutes, release remaining pressure.

NOTE: Suellen cooks hers for 50 minutes. Much longer than I did. It all depends on how you like your beans. If you try 30 minutes and decide they are not as soft as you like them, put the lid back on the pot and cook under pressure a little longer. This time you can do a quick pressure release. 


Because we are a household of two, I froze my butterbeans in pint containers for later. Suellen cooks hers considerable longer. Next time I might set my timer for 31-32 minutes. But these were really close to perfect for us. Tender but still firm. Go to this "how to cook dried beans" for more information. She says black beans cook faster, chick peas slower.

NOTE: We ate these beans out of the freezer last night, along side my Fried Cabbage with Smoked Sausage. The beans were perfect. And I loved that combination.

Just needs  cornbread

"NOT QUITE FREE" VEGETABLE SOUP

1 16- oz bag frozen vegetables for soup
1/2 head cabbage, finely chopped
1 onion, diced (I only had a 1/2 onion)
1 15-oz can cut green beans 
1 28-oz can crushed tomatoes
1 pkg dry Ranch Dressing mix
5-6 cups water
freshly ground black pepper, to taste 


Add everything to IP. Fasten lid and set to seal. Set MANUL for 13 minutes. Let NPR.


This took quite some time to come up to pressure and then to release (I let the pressure out after 30 minutes.) But once everything was in the pot and the time set, I didn't look at it or touch it until it was done. The hands-off part of IP cooking is part of what I like. 

I've made this soup many times on the stovetop. I really think the flavors are blended better cooked this way. And the veggies were more tender. Next time I might set it to cook for 11 minutes. I think the vegetables will still be tender. I can always cook it bit more if I want to.


SUELLEN'S VEGGIE INSTANT POT SOUP
This was the soup that we enjoyed after doing the set up chores. I really liked the rice in this soup.

1 small can tomato paste
1 (15-oz) can diced tomatoes (plain, not flavored)
1 (15-oz) can kidney beans, drained and rinsed
1 (15-oz) can corn, drained
1/2 bag frozen peas
1 large onion, diced
1 small yellow potatoes, diced
32-oz box low-sodium chicken broth
1 cup long-grain white rice, uncooked

Add all ingredients to IP. Fasten lid and seal. Set MANUAL for 13 minutes. Let NPR.


If you go to the Recipe Index tab at the top of the page, you'll find a category for other Instant Pot recipes. All are recipes I've made and we liked. Thankfully, there haven't been many disasters.


Monday, January 28, 2019

Kitchen's Open Again

New bull in our pasture

You probably think I've quit cooking. Daddy-O would likely agree with you. But on Saturday night I made supper while Daddy-O was out in the pasture. There's a new bull out there, hopefully getting acquainted with the cows.

I cooked a big pot of stew beef for my cattle ranching husband. Enough for him to have next weekend while I'm away knitting. And I tried a new Instant Pot recipe I saw on Instagram this week. A savory rice and vegetable dish. 

The recipe called for basmati rice. Now, I live in the country. A rural area. Our nearest store is small town store. So I crossed my fingers when I shopped and hoped I could find this  exotic sounding rice. Well, the store did sell it but that bit of shelf was empty. (Who are these gourmet cooks that grocery shop in my little town?) They were restocking that aisle but when I asked if they were about to unpack the basmati, they checked and told me the truck they were unloading was huge. And the rice was likely in the middle of it. So the next morning we made a second trip to Food Lion and bought basmati rice.

On the way out of the store, Daddy-O asked me why basmati was any different from our regular long-grain rice. And I couldn't tell him. I knew that jasmine rice was sticky. And I knew that risottos call for arborio rice. But other than remembering basmati is a fragrant rice, I could not answer him. When I grew up, the only rice we knew was Comet long-grain white rice. My, how times have changed.

But basmati is what the recipe called for. And the first time around I wasn't about to tinker with the basic ingredient. As we were turning into our driveway, I had a terrible thought. I should have checked the box of mushrooms in my refrigerator. They had been there a while. This rice recipe called for fresh mushrooms, too. Sadly, those mushrooms ended up going in the trash instead of the rice dish. I thought about making a THIRD trip to the store. But we live a long way from town. So this time I made the rice without mushrooms. And it was delicious. Mushrooms would only make it better.

Savory Instant Pot Rice & Veggies

SAVORY INSTANT POT RICE & VEGGIES (for 6-qt. pot)
     ~from Meal Plan Addict

2 cups uncooked basmati rice
3 cups water
3 tbsp Better than Bouillon, beef flavor (or 3 c. beef broth)
1 cup chopped fresh green beans (1 inch pieces)
1 cup sliced fresh mushrooms
1 cup frozen peas

Select the SAUTÉ button and pour the water and beef-flavor Better Than Bouillon into the liner. This will allow it to dissolve and make a broth. (If you choose to use beef broth instead. You don't need the sauté step.)

Add the remaining ingredients and stir the mixture. Secure the lid to the Instant Pot, set to sealing, and press the RICE button. This will auto set to 12 minutes of low pressure. 

When the pressure cycle is complete, quick release the pressure. Fluff the rice with a fork, and enjoy!


If you haven't used Better Than Boullion, it's worth seeking it out. The flavor is richer and more complex than a bullion cube. My small town store stocks it so you shouldn't have any trouble finding it. It's with the soups and broths. At my store, it's on the top shelf. And it comes in a crazy array of flavors. I have only tried the beef, so if you try the others. you're on your own!

Someone asked me last week if I liked my Instant Pot. I think my answer was something to the effect that if mine broke, I didn't think I'd buy a replacement. (I have enjoyed using it and found some good recipes, but don't consider it essential to my kitchen.) But this rice recipe may have changed my mind. It was really good.

Please go to the original source and read more about cooking this rice recipe in the instant pot. I can't wait to make it again. WITH the mushrooms!


Wednesday, October 3, 2018

Dinner & TV

Quick Cheese & Herb Flatbread

It wasn't supposed to be a forever thing. It was just our entertainment at the "beach girls" getaway last winter. One friend brought her computer and hooked it to the TV in the house (after a couple of phone calls to her son for tech support) so that we could all watch A Place To Call Home*, an Australian television production, that the rest of us had not seen. She said she knew we'd enjoy it.

Oh, was she ever right. We watched a few episodes each day. And on the last morning—the day we were leaving—the ladies were up and dressed and ready to watch a little more. At SEVEN in the morning! It's the kind of show where it's hard to find a stopping place.

On the way home, someone asked, "How are we supposed to know how this ends up?" And that's how the Monday night "dinner and TV" was born. The friend who brought the computer didn't know she would have us at her house weekly (more or less.) But she does. She provides her house and the TV connection. The rest of us take turns bringing dinner. And we watch three or four episodes while we eat.

This week I took dinner. After all of the wonderful vacation food I'd enjoyed last week, I needed something a little more Weight Watchers friendly. I made chicken taco soup, which I've made many times. And I needed something to put with it.

I found a recipe in a new WW Soups & Stews recipe magazine. Violating one of the rules I live by—always try a recipe before you serve it to guests—I forged ahead. And in my typical fashion, I failed to read the part that said "dough at room temperature." But it all worked out in the end. I think it would have been easier and faster if I had pulled the dough out of the refrigerator an hour before I needed to make the recipe. Learn from me. Plan ahead.

But the recipe was delicious. I made two of the flatbreads. Sixteen pieces all together. I brought home four pieces last night. The five of us nearly finished it all. That tells me it's a good recipe. Here is how I did it.

QUICK CHEESE & HERB FLATBREAD

1 teaspoon olive oil
8 oz. fresh pizza dough (from the grocery store bakery) AT ROOM TEMP!
1 tablespoon chopped fresh rosemary
1 tablespoon chopped fresh parsley
1/2 cup shredded part-skim mozzarella
1/2 crumbled feta cheese

Preheat oven to 400 degrees. Use fingertips to spread oil over bottom of pan.
Pat or roll dough out into a rectangle just smaller than the pan. Place dough into pan, and with lightly oiled fingers, press dough to fit a 7x11-inch (or 9x9-inch pan,) going slightly up the sides. Sprinkle with rosemary, parsley, mozzarella and feta.

Bake for 20-25 minutes, until golden brown. Let cool in pan a few minutes. Remove and cut into 8 slices. Serve warm, or cool completely.

MY NOTES:
~Because my dough was too cold, I couldn't stretch it out to fit the pan. It kept shrinking back. I didn't have time to wait longer, so I went with what I could do. Instead of a neat rectangle, I got a lovely rustic oval. It looked nice that way.
~The recipe called for more oil. I ended up wiping out a good bit with a paper towel. The oily pan made it even harder to get that dough to stretch to the sides of the pan. I don't think I'll ever use the whole tablespoon it called for. 
~The recipe says you can serve it warm or cooled completely. Because I was taking this from my farm to their farm 20 miles away, serving it cooled worked well. But I did taste it while it was warm. Of course warm was better! The crust was crispy. But room temp was totally acceptable. 

OH...and I forgot the important part if you are counting WW points. (Sometimes I do, sometimes I don't.) Each slice is 4 SmartPoints.

And although I've posted this recipe before, I'm putting it here again because the soup and this bread was such a nice combination.


ZERO POINT CHICKEN TACO SOUP (Instant Pot) 
        ...recipe from SlapDashMom.com (check her site for other good recipes)

1 small onion, chopped
1 (15-oz) can black beans, drained
1 (15-oz) can light red kidney beans, drained
1 (8-oz) can tomato sauce
10-oz bag frozen corn
2 (10-oz) cans Rotel tomatoes (I used Mild)
1 packet taco seasoning (I used mild, low-sodium)
1 teaspoon cumin
1 teaspoon chili powder
2 boneless, skinless chicken breasts (fresh or frozen)
1/2 cup water

Place all ingredients into pot. Put lid on, close and set vent to "seal." Use manual button and set to 8 minutes. Let it "natural release" for at least 10 minutes. (Longer is fine.) Then release remaining pressure, if there is any. Remove chicken and shred with two forks. Add shredded chicken back into soup. Serve. 

This is more like a chili than a true soup, but it's yummy. It's gluten-free. And it freezes beautifully. You can certainly cook this in something besides an Instant Pot. I used my IP last night and carried it to the dinner in the pot because the lid fastens securely and I could plug it in when I got there to keep it warm.


*We are into the 6th and final season of this show, A Place To Call Home. You can find it on Acorn TV, a subscription service which is also available through Amazon. It's on iTunes. And one of our local PBS stations is airing it now. According to Wikipedia, the show..."has been described as a "compelling melodrama about love and loss set against the social change of the 1950s"


Thursday, March 8, 2018

Cook, Little Pot, Cook

Peach Salsa Chicken with Jasmine Rice

When I was a child, I never got tired of hearing about the magic pot, a fairy tale from the Brothers Grimm. If you knew the magic words, you would never be hungry. But it was equally important to remember the words to make it stop cooking. Too much porridge was as bad as too little.

If you don't have an Instant Pot, please bare with me while I share another IP recipe. (Adapt it for your slow cooker instead.) This is not a push to go order this "magic pot"—because as much as some IP users gush over the life-changing wonders of the small appliance, it's not a necessity in your kitchen. But if you will actually use it, it can be handy. I have enjoyed using mine. As I learn more about it, I'm liking it better.

I think having the word "instant" in the appliance name can give people unrealistic expectations. (FYI, it's a pressure cooker.) It still takes time to cook things. Over the weekend, I read a recipe for cooking oatmeal in the IP. The writer said it was one of her favorite things to do. She added that it saved no time, but it was the hands free part that she loved. She put the ingredients into the pot, set it cook and then headed to shower and dress for the day. When the oatmeal is done, the pot automatically switches to "keep warm" so that she can eat whenever she is ready. That's what appealed to her. You have to figure out what works for you.

I'm still on the lookout for tasty reliable recipes. This peach salsa chicken recipe is one of those. It came from my knitting friend Betsy who says it's one of their favorites. She has used her Instant Pot much more than I have, so I've been happy to get a few of her tried and true recipes. This one that cooks the chicken and the rice separately but in the same pot is pretty close to magic. (That's called pot-in-pot cooking.) Five minutes of prep and then in about 45 minutes, dinner is ready.

Yep, the recipe says cook for 15 minutes. But you need to allow time for the pot to come up to pressure and then more time for the pressure to go down so that you can take the lid off. So the actual time is much longer than 15 minutes. So it's truthfully more like 45 minutes. The good part is that you do nothing after you close the lid until it's done. This almost hands-free cooking method makes it another easy meal for another knitting day.

Here is Betsy's delicious recipe...with a little of my own tweaking.

PEACH SALSA CHICKEN with JASMINE RICE

4 thin-cut chicken cutlets
1 jar of peach salsa (or something similar)
1/2 cup water
1 small can pineapple tidbits in juice, drained

For the pot-in-pot rice:
1 cup jasmine rice
1 cup water

Pour about half the salsa into the pot. Add chicken cutlets on top, then pour the remaining salsa over the chicken. Put a cup of water in the jar and swish it around and pour that into the pot. Put rice and 1 cup water into a small oven-safe bowl (I've used pyrex and metal) and set bowl on top of chicken.

Place lid on Instant Pot, close and set it to SEAL. Set to MANUAL for 15 minutes. "Natural release" the pressure. Carefully take out the bowl of rice and set aside. Shred the chicken in the pot. Stir in the pineapple tidbits. Serve the chicken and sauce over the rice.


Betsy didn't add the pineapple, but after we had it the first time, I kept thinking that more fruit would be nice. I just stirred it in after cooking and that was fine. Next time I might even use the drained juice as part of the 1 cup of water.


Last time all I could find was a pineapple/peach salsa. This time my store only had peach/mango salsa. The slightly sweet fruity salsa is a pleasant change from the also-good taco flavored salsa chicken that I've made in the slow cooker many times. (If you don't have an IP, you can do this chicken and salsa in your slow cooker and then cook the rice separately. You don't need to mix extra water with the salsa if you cook it that way.)

This was my first "pot-in-pot" cooking. The first time I made this, I dug deep into my cabinets and found a 1-qt pyrex bowl that was the perfect size for pot-in-pot cooking. I set a trivet over the chicken (a trivet comes with the IP) and put the bowl on the it. Perfect rice. Then I got nervous about using pyrex under pressure although it worked fine. So I ordered a metal 1.5 qt bowl. It also worked well. But it was too tall when I set it on the trivet, so I did it like Betsy told me and set the bowl directly onto the chicken and salsa. Perfect rice again. Just be aware the when you do it this way, the bottom is sauce covered. I set mine on a paper plate when I took it out of the IP.

It's kind of amazing that you can cook the rice and the chicken at the same time in the SAME POT. But they cook separately. Now, that is close to magic. Jasmine rice is a nice sticky rice and it was perfectly cooked. I need to try more of Betsy's recipes.


Wednesday, October 11, 2017

Dinner In An Instant—Instant Pot, That Is


I have been "missing in action" in the kitchen lately. We have tried the couple of new restaurants in town. We've eaten sandwiches because it was easy. Two nights ago it was pizza from town. By yesterday I felt a little guilty. I didn't want to drive to the grocery store, so I wanted a supper that I could make from what was here. I had a pack of chicken breasts thawing (without a plan for cooking) in the refrigerator. It was 4:00 PM when the wave of guilt hit me, so I searched the web for Instant Pot chicken recipes. I usually keep frozen broccoli on hand, which isn't as good as fresh, but it's better than no vegetable. Brown rice—the cook-in-the-bag-kind—is another good pantry staple. That was enough to make a dinner.

Before I was ready to cook, I put the chicken under cool running water for a few minutes. After that, it was about half thawed. I have read that one advantage of using an Instant Pot is that you can use frozen chicken. So I didn't bother to thaw it any more. Yep. It worked fine.

If I understand it correctly, you do not have to add more cooking time to a recipe when cooking from frozen. It will just take longer for the pot to come up to pressure. That's where the extra cooking takes place. BUT should you decide your chicken or meat needs to be cooked longer after it's "done," then put the lid back on and cook it more This whole Instant Pot thing is not an exact science. Use your common sense cooking skills. I think if you had large pieces of frozen chicken or your three pieces were frozen together in a lump, then you might need extra minutes added to the pressure time. It's a judgement call and that gets better with practice. I'm still learning.

Just so you know...it took longer to write this blog post than it did to get supper on the table. The meal was really quick. Here is the recipe for chicken teriyaki that I found on my search. I made some minor adjustments. Here's what I did:

GINGER TERIYAKI CHICKEN

3 boneless, skinless chicken breasts, halved lengthwise (package was 1.36 lbs)  
1/2 medium onion, chopped
1/4 cup honey
1/4 cup rice vinegar (mine was seasoned rice vinegar)
1 teaspoon ground ginger
1 tablespoon minced garlic (I used the kind from a jar)
1/4 teaspoon black pepper
1 tablespoon olive oil

1/2 tablespoon cornstarch
1 tablespoon water

In a cup, whisk together honey, vinegar, ginger, garlic, black pepper and olive oil. Add chicken to Instant Pot. Put onion on top of chicken. Pour the honey/vinegar mix over chicken.

Place lid on pot and seal valve. Set to Manual for 5 minutes. Use a Quick Release. (Chicken should have reached temp of 165º.) Using two forks, shred chicken in the pot. Mix cornstarch and water and pour into chicken mixture. Cook on Sauté setting until sauce has thickened a little.


Delicious! I served it over brown rice with broccoli on the side. I only had one issue. It wasn't with the recipe. It was with my chicken. It was a tough old bird! It was truly done after 5 minutes of cooking, but it was not easy to shred. I put the lid back on and set it to cook 1 minute under pressure. And it still wasn't as tender as usual. I really think it was the chicken. Nothing to do with how I cooked it.

This was the easiest and the fastest of the Instant Pot recipes I've made. I mixed the sauce ingredients up before I was ready to cook. That took less than 5 minutes. And then when it was close to dinner time, I chopped the onion and split the chicken. Put it all in the pot and set it for 5 minutes. Actual time, from coming to pressure and doing a quick release, was less than 20 minutes, I think. I forgot to time it. During that hands-off cooking time, I made the rice and the broccoli and stuck all the dirty utensils in the dishwasher.

I'm still not going to say the Instant Pot has "changed my life." (Yes, I read that all the time from other IP users.) And I don't feel the need to cook in it every day. Nor do I want to cook every kind of food in it. But this recipe that makes me happy I have an Instant Pot.