I got home last weekend after staying with the middle grandchildren while the parents traveled. At ages 9 and 13, they are easy to care for. The hardest part is all of the chauffeuring that age requires. I had forgotten at that stage of mothering how much of the day is spent in the car.
But on the weekend we stayed put. Before I left home I saw a craft I wanted to try with the girls, The first morning while they were at school I made a trip to buy supplies—one pack of kids socks, some cinnamon sticks, heavy duty thread and long tapestry needles. I brought a small bag of fiberfill from home.
All of the adorable pumpkins in the bowl were made from the same size socks. The amount of stuffing and the length of cuff you cut off makes the difference. The girls kept making them bigger and bigger.
It's all done with a tiny bit of hand sewing. The girls had learned some basic sewing stitches this summer during Mimi Camp, so they were ready. The hardest part of sewing during Mimi Camp was making the knot in the end of the thread. This is one time a big lumpy knot is what you need to keep the thread from pulling through. We used our thread doubled, too.
If you google "sock pumpkins" you'll find many links to directions. As you'd expect, they are all slightly different. But you only need the basics. I saw a quick how-to reel on Instagram and that was all I needed. I'd share the link but I can't find the one I watched. Trust me, it's really easy.
Remember the lavash crackers I told you about in the last blog post? Baby Girl asked if we could make some with cinnamon sugar. Man, was she on to something. These little crackers are super crispy and slightly sweet. Then I discovered this pumpkin pie spice hummus at their grocery store. As a life long pumpkin pie lover, let me say this was awesome! A perfect dip for these little crackers.
Miss that recipe? Here is is again. Yes, this one is good enough to share two times in a row.
LAVASH CRACKERS
1 package Joseph's Lavash Bread
Pam olive oil spray
Seasoning of your choice, such as cinnamon sugar, Everything but the Bagel or Ranch
Preheat oven to 375º.
Put one sheet of lavash onto a sheet of parchment paper. Use pizza cutter to cut into cracker size pieces. Spray with olive oil spray. Sprinkle with seasoning. Carefully slide parchment paper onto a baking sheet. Bake for 5 to 6 minutes until lightly browned.
Watch closely because they can burn easily! I rotate the sheet while baking.
Anthology Throw, by Curious Handmade
And I finally finished this circular blanket! I took the giant basket holding this work-in-progress with me to babysit. I was happy to get some extra knitting time while the girls were in school.
I started it last November so it was nearly a year from beginning to end. I will confess that it spent a good while in time out as my interest lagged. For you knitters out there, this is made of fingering weight yarn, nearly 500g. It's 5 ft. in diameter. So very glad to be finished. So very happy with the finished blanket.
Years ago I attended a community Christmas dinner at Mommy's church and I remember walking into their gym and seeing the many tables beautifully decorated with angels. So many angels. When I looked closer, I saw that each angel was simply cut from a single sheet of heavy white paper, like card stock or cover stock.
I did not take one of the angels from the table when the meal was over. My mother taught me not to take without asking. But later thanks to heroic efforts by Mommy and one of the associate ministers at that church, they tracked down a paper angel for me. And they shared a website that showed how to fold these adorable angels. The directions were in some slavic language, but the pictures were useful.
Jessica and I made stacks of these angels for a cattlemen's dinner the following year. And yay for me, I saved the angels and added them to my accumulation of Christmas table decorations. (I decorated for the cattlemen's association for years.) So when a friend asked this week if I remembered how to make the angels, I told her we could use one of mine to trace some for her. I thought it would be good for Joanne to see the original link but I cannot find that original site. I thought it might be wise to make a new set of instructions right here. In English.
These are so easy to make. And they are extremely economical. It just takes time. The tracing was the hardest part. This morning I realized that as I was making a new, more permanent pattern, I could print the cutting lines and eliminate the tracing.
This is what the printed pattern looks like.
Fold it in half to cut.
If you trace by hand, you would fold the paper first and place your template on the fold.
YOU CUT THIS OUT FOLDED!
When I first saw the pattern I thought that cutting out the interior around the head was going to be impossible without tiny sharp scissors. But then realized that if you cut the line above the head (see blue arrow) first, you just keep cutting around the arms and head. Then it was pretty simple.
I cut this one with my not-so-sharp scissors I use for gift wrap.
It's possible that you might need to smooth out the printed/traced lines as you cut. And when I printed the pattern, the lines didn't quite reach the edge of the paper. You crafty people can extend it to the edge. Try to cut so that the pencil/printer line is cut off. My goal was to have a pure white angel. I didn't always achieve my goal.
Open the paper enough to make the angel stand, arms straight up.
Fold the arms and trumpet forward, giving a little pinch at the shoulders.
And then fold the arms down, pinching the "hands" at the trumpet.
You can download the PDF for the angel pattern here: Paper Angel Template I hope. I've never attached a PDF to the blog. If you are the artsy type, you could freehand the pattern onto folded paper and make a template.
Friend Joanne is going to put an angel on a charger plate with greenery and votive candles. I honestly don't remember exactly how I used them on the tables years ago. I do remember that the air from the heat vents would blow them over. They are only paper. So I taped them to the table on the back side.
The Christmas crunch is fully upon us. We drove down last week to watch the little girls perform in their school variety show. So much fun to see them, dressed in poodle skirts, sing and dance with three friends to Rocking Around The Christmas Tree! They were so good that they were the opening act. Makes a grandmother proud.
Because Baby Girl told me she lost her little knitting tool, I took them new ones when we visited. Little Sister got one this time, too. She had never used one. But after the show and after dinner at their house, they were not going to let us leave until we knitted something. It was getting late and we still had a drive to Jessica's house ahead of us. But I gave them a super quick lesson.
I'm an experienced grandmother who has been down this craft road before. I had a plan and came prepared. The Wonder Knitter only makes a knitted tube. (Knitters call that "I-cord.") I had the brilliant idea that they could make little wreaths for Christmas. I made a bag for each child that contained a skein of yarn already set up on the Wonder Knitter. When I handed them the bags, we were ready to go. I showed them how to make the stitches and in a very few minutes, Little Sister had made two green wreaths. I did the finishing since we were short on time. Before we left, Baby Girl had finished one, too, for her kindergarten teacher.
When you finish knitting (6 inches, more or less—we had several sizes of wreaths), you'll have a long yarn tail on each end. Tie them together, making several knots so it isn't going to come undone. Clip the ends and tie a red ribbon bow over the join. Voilà! A perfect teacher gift. The girls each took one to their homeroom teachers the next morning and other teachers asked, "Will you make me one, too?"
Wonder Knitter: How to start, how to knit, and how to finish
This happy project took a not-so-happy turn just hours after we got back to the farm. I had a tearful FaceTime session with Little Sister, who tried to make another teacher gift by herself. When she took the knitting off the spool, something went wrong and she ended up unraveling her precious work. Baby Girl explained, "It just kept shrinking, Mimi!" We'd only had time for a 30-second explanation of how to end the knitting. And that wasn't enough.
I told them both that it takes time to learn anything new and that there are always some boo-boos along the way until you master a new skill. You start over and try again. And again. I will see them again next week and we can have a better lesson than the very quick session on the busy night of the variety show. But in the meantime, this video will help. It might explain it better than I did, anyway.
I found the Wonder Knitter at Hobby Lobby. They cost about $9. If you have a 40% off coupon, the cost is closer to $5. Those coupons are available most weeks online or on their app. If you are shopping at Hobby Lobby, they also sell small skeins of yarn in many colors. I think they are priced around $1.00. (I should have looked closer at the label before I threw them away.) Then I bought a spool of red grosgrain ribbon to finish the wreaths. I like grosgrain because both sides are the same. Makes it easier to tie the bows. (Grosgrain ribbon has a ribbed finish as opposed to satin ribbon that is shiny on one side and dull on the other.)
This is a terrific project for kids. Our two little ones are ages 5 and 9. The youngest needs a little help getting started and maybe ending it. But the knitting part is well within her ability. And I'll be honest—when I was showing them how to make the stitches, I didn't want to hand the knitting spool back to them. The process is very relaxing. I have only done the very simplest projects, but I saw on Google that you can make beaded jewelry, too. I am not ready for that yet.
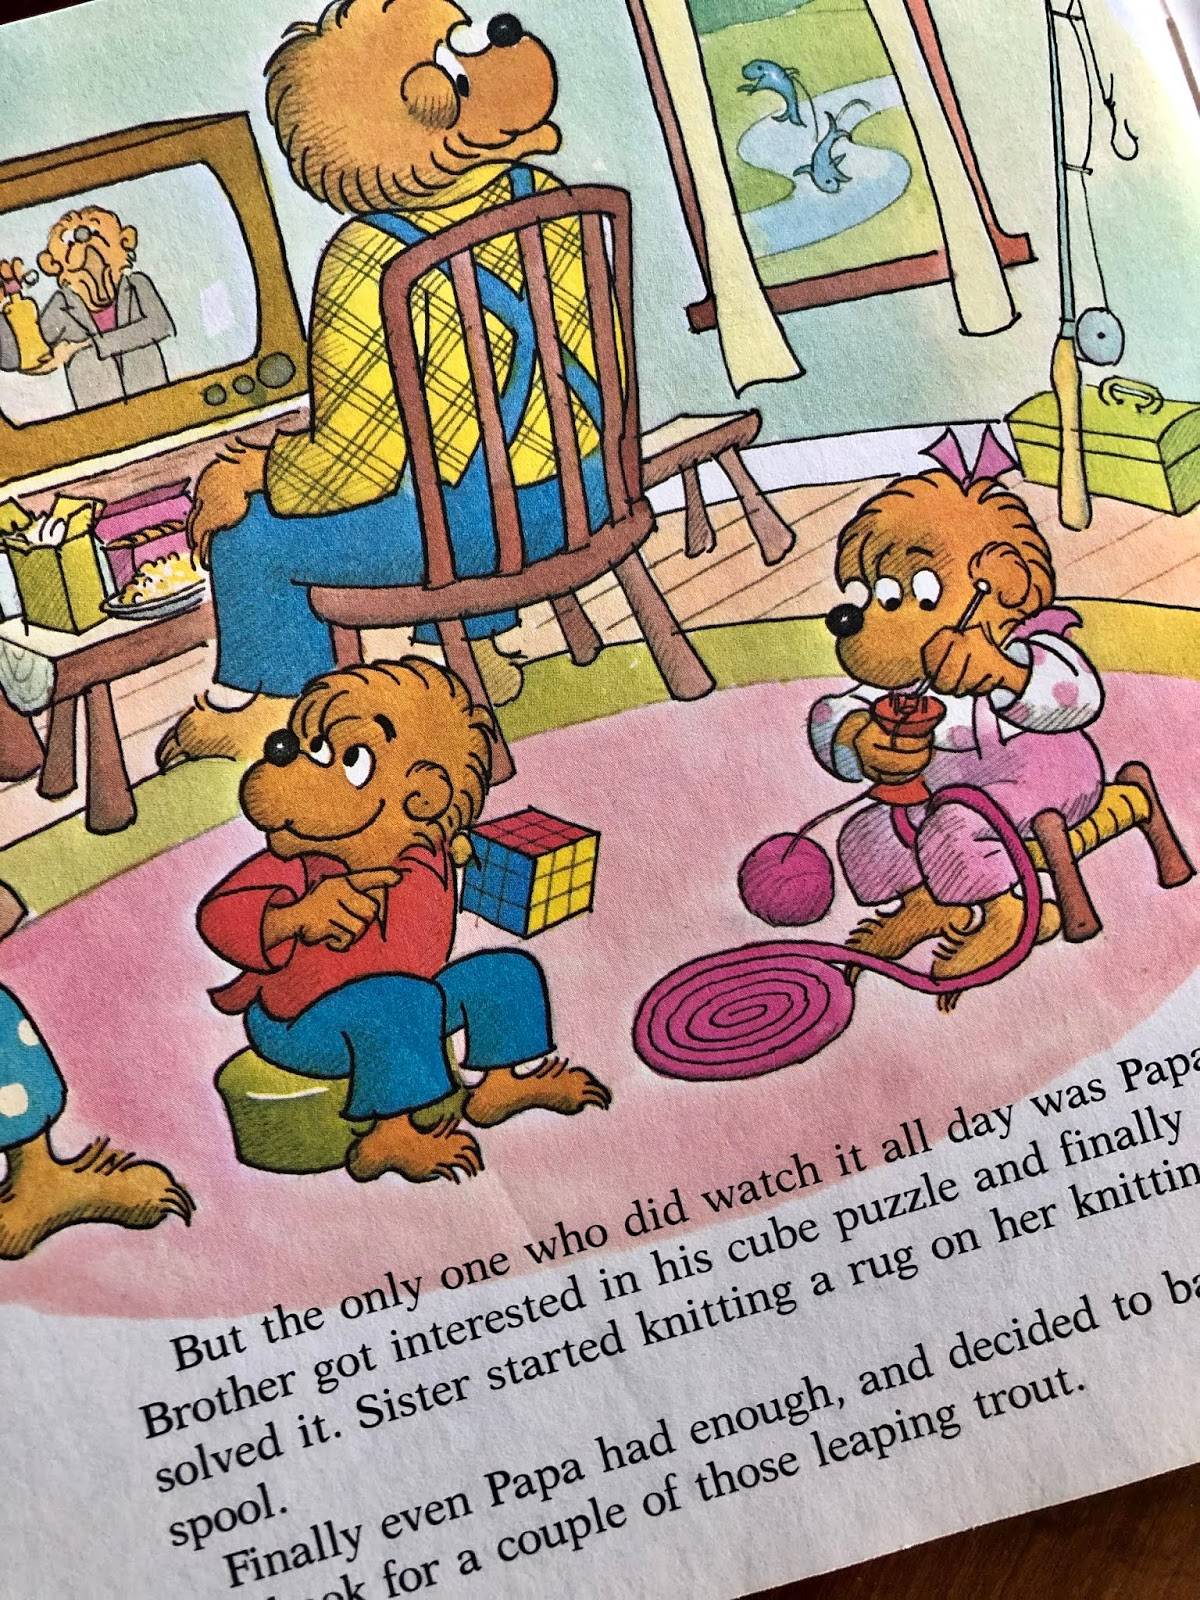
From the book, Too Much TV, by Stan & Jan Berenstain.
If you have never heard of spool knitting, know that it has been around for a very long time. I had one as a child and knitted a rug for my dollhouse like Sister Bear is doing here. (Wind the knitted tube in to a coil and stitch it together on the back.) I used a wooden spool with four nails in the top. (Link shows how to make one.) Not fancy but it worked. The Wonder Knitter, however, is much more user friendly. If you are an Amazon shopper the Wonder Knitter can be ordered from there, too.
You may think this is too much during this busy time. Or, you may be the opposite and need something to keep the kids occupied during the holidays. But it's a great craft when the time is right. Baby Girl used hers back in the spring and made bracelets and necklaces for herself and her dolls. Just a knitted tubes, long and short, tied together. She was thrilled with her "designs." It's a great way to help little ones become makers.
Attention all Mimis! Or anyone who needs a fun project for kids. We made these friendship bracelets at Mimi Camp and both girls loved making them. The four year old could do this by herself...after I got the yarns set up in the little loom. (And she taught Daddy-O how while I was taking a shower one night.) And the seven year old actually got out of the wading pool one afternoon to go work on her bracelet.
There are so many ways to make friendship bracelets. Some have beautiful complicated patterns. But this method using the cardboard loom is by far the easiest I've ever seen. It's perfect for young children. But the adults who have done this have also found it strangely addictive.
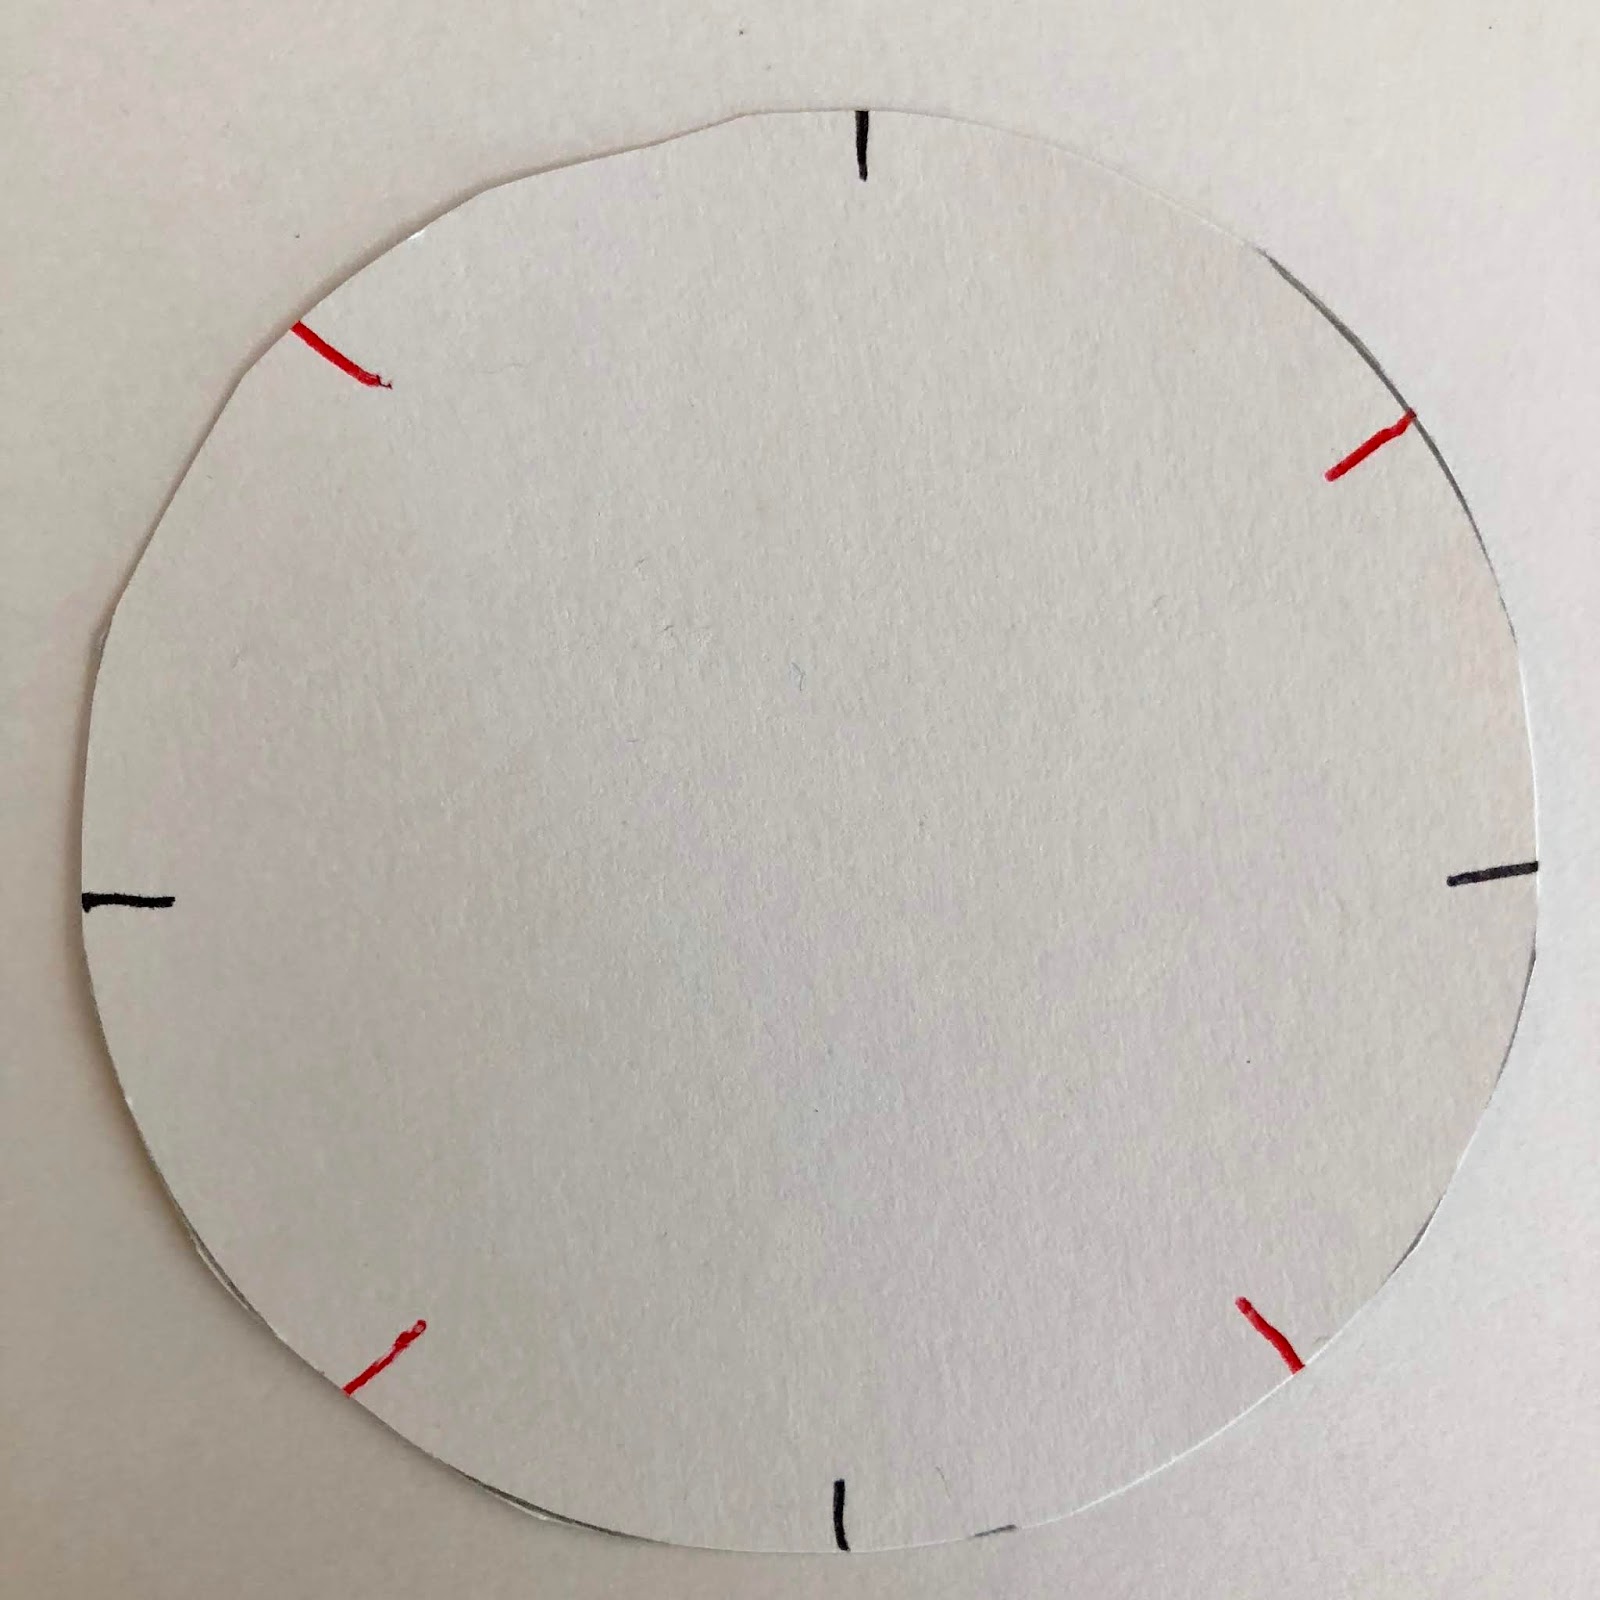
You can find instructions, both written and video, online by googling "friendship bracelet cardboard loom." But I'll show you what we did. First I cut cardboard circles from a shoebox. I traced the top of a Tervis tumbler to get my circle pattern.
Then you mark 8 spot around the circle. You don't need to measure anything. Just mark top and bottom. Then halfway between those marks, use your pencil to mark the sides. Then make the last marks halfway between the four "north-south-east-west" marks. If you are a little off with your spacing, it won't matter. I measured nothing!
Cut a little slit at each mark, about 1/4 inch. Then poke a hole in the center. I used a nail to make the hole. Then I used a pencil to enlarge the hole enough to get the yarn through it. You can use scissors, a pencil, or anything you can poke through the cardboard.
Cut 7 strands of yarn or craft cord or embroidery floss (don't separate the strands) about 20-22 inches long for a child's bracelet. Make longer strands if you want an ankle bracelet. Or, a grownup bracelet. We used leftover sock yarn for one bracelet and embroidery floss for the other. You can buy a package of craft cord or embroidery floss for under $4 at a craft/hobby store if you don't have leftover yarn at home.
Poke all seven strands of yarn through the hole and tie a knot on the underside (so the yarn doesn't pull through) about an inch or so from the end. Yes. Tie all the strands together. I used a pencil to push the yarn through.
Then drape the yarn strands over the top and tuck one strand of yarn into seven of the slots. Leave one slot empty and turn that one "toward your tummy." That's how I explained it to the girls. Always keep the empty slot "toward your tummy."
Starting with the yarn to the right of the empty slot, count three yarns to the right. (You can also work to the left if that feels more comfortable. But only go in one direction.)
And move yarn #3 to the empty slot. Rotate the circle so that the empty slot is "toward your tummy" and do that again. (You can also work to the left if that feels more natural. Just make sure you always go in the same direction.)
As you continue moving yarn #3 to the empty slot, the braid will begin to grow on the underside of the circle. Give it a tug every now and then to pull it down. The girls got so excited when they could see their bracelets growing.
We also figured out that every few moves, we needed to run our fingers down through the strands of yarn to keep them untangled. Just like you would run your fingers through hair to untangle it.
When the bracelet is long enough—for these little girls, we made the braid 5-1/2 inches long—take the seven yarns loose from the loom, pull the bracelet down through the loom and cut the yarn a couple of inches above the end of the braid. Trim off the ends (or not) to suit you.
We used the simplest of joins. I untied the original knot and then tied the two ends together. You can check this video for other ways to make a join. Make sure you don't tie it too tightly. I also measured generously and had extra yarn at both ends. That was trimmed off later. I found it was easier to tie and untie knots when there was enough to work with.
Little Sister and Baby Girl wore their bracelets home and asked for me to start another one for each of them so they could work on them in the long car ride home "so we won't be bored." That was a grand idea, but Baby Girl was asleep before we were very far down the interstate. But they have their looms set up and ready to go at home.