Showing posts with label Appetizer. Show all posts

Friday, November 17, 2023

Happy Thanksgiving!


This is as far as I've gotten with my Thanksgiving prep. We will have a full house next week—a toddler, a preschooler, a 4th grader, a teenager, the recent college graduate and the parents of these children. I should have menus planned for the entire week by now. But I don't. There's still tomorrow.

But I decided today that on Wednesday night we should have a snacky kind of supper. The little kids eat really early. The rest of us eat later. And I'm not even sure who will be on hand that night. Appetizer foods should give us a lot of flexibility. And hopefully keep the kitchen relatively free for Thursday's cooking. 

Here are some of our favorite finger foods. The links will take you to the blog post that includes the recipe. Sometimes the recipe is way down in the post, but it's there. I wish I had a "print" button for the recipes, but this blog is a low-tech as they come.


Chicken Dip. — a substantial food that easy to put together. It's done in a slow cooker. Serve with crackers.

Ham Delights — this edges into "real food." Also good made with turkey. Can be made ahead and refrigerated or frozen.

Lavash Crackers — a new recipe! Easy to make crackers. This time I'll season with cinnamon sugar and serve with Boars Head Pumpkin Pie Hummus.

Easy Smoked Salmon Herb Appetizers — easy enough for a 3-year-old to make. (But she ate them as fast as she made them!)

Pumpkin-Shaped Baked Brie En Croûte — seriously, this is made for a Thanksgiving table. Ridiculously easy and ridiculously delicious. Serve with crackers and apple slices.


We can decide which ones we want to make in a day or two. I anticipate a trip to the grocery store every day anyway. We can add a veggie tray and maybe some chicken nuggets for the kids. The little ones and the big ones.

There is much to be thankful for this year although sometimes it seems the world is falling apart. After a peek at the morning news, I turn it off for the rest of the day and let my thoughts be aware of the wonder and the joy to be found in our surroundings. Find your joy.

Happy Thanksgiving!


Tuesday, October 10, 2023

Busy Fall Days

Pumpkin Baked Brie En Croûte


The older I get, the faster my days are flying by! I have so many things I want to do—and I do a lot of them—and there isn't time to ever get to the end of my list. I was happy that I got back here before I hit the one month mark since my last post. 


In the last month, we have had houseguests and spent some time at the beach with family. One houseguest brought me a car load of yarn. His wife was a dear friend whom I met at my first knitting retreat years ago. We attended several retreats together over the years. Now I have become the "executor" of her yarn estate. Trying to figure out what to do with her substantial stash has not been easy...for many reasons. But I am happy to honor her memory by doing so. Other knitting friends are helping. This coming weekend we are getting together to finish some of her unfinished projects and sort the yarn into some kind of order. And think of ways to best disperse it.

This process has made me take a hard look at my own stash and pile of unfinished projects. Since this "yarn estate" arrived at my house, I have finished two almost-done projects of my own and a third one is nearly done.


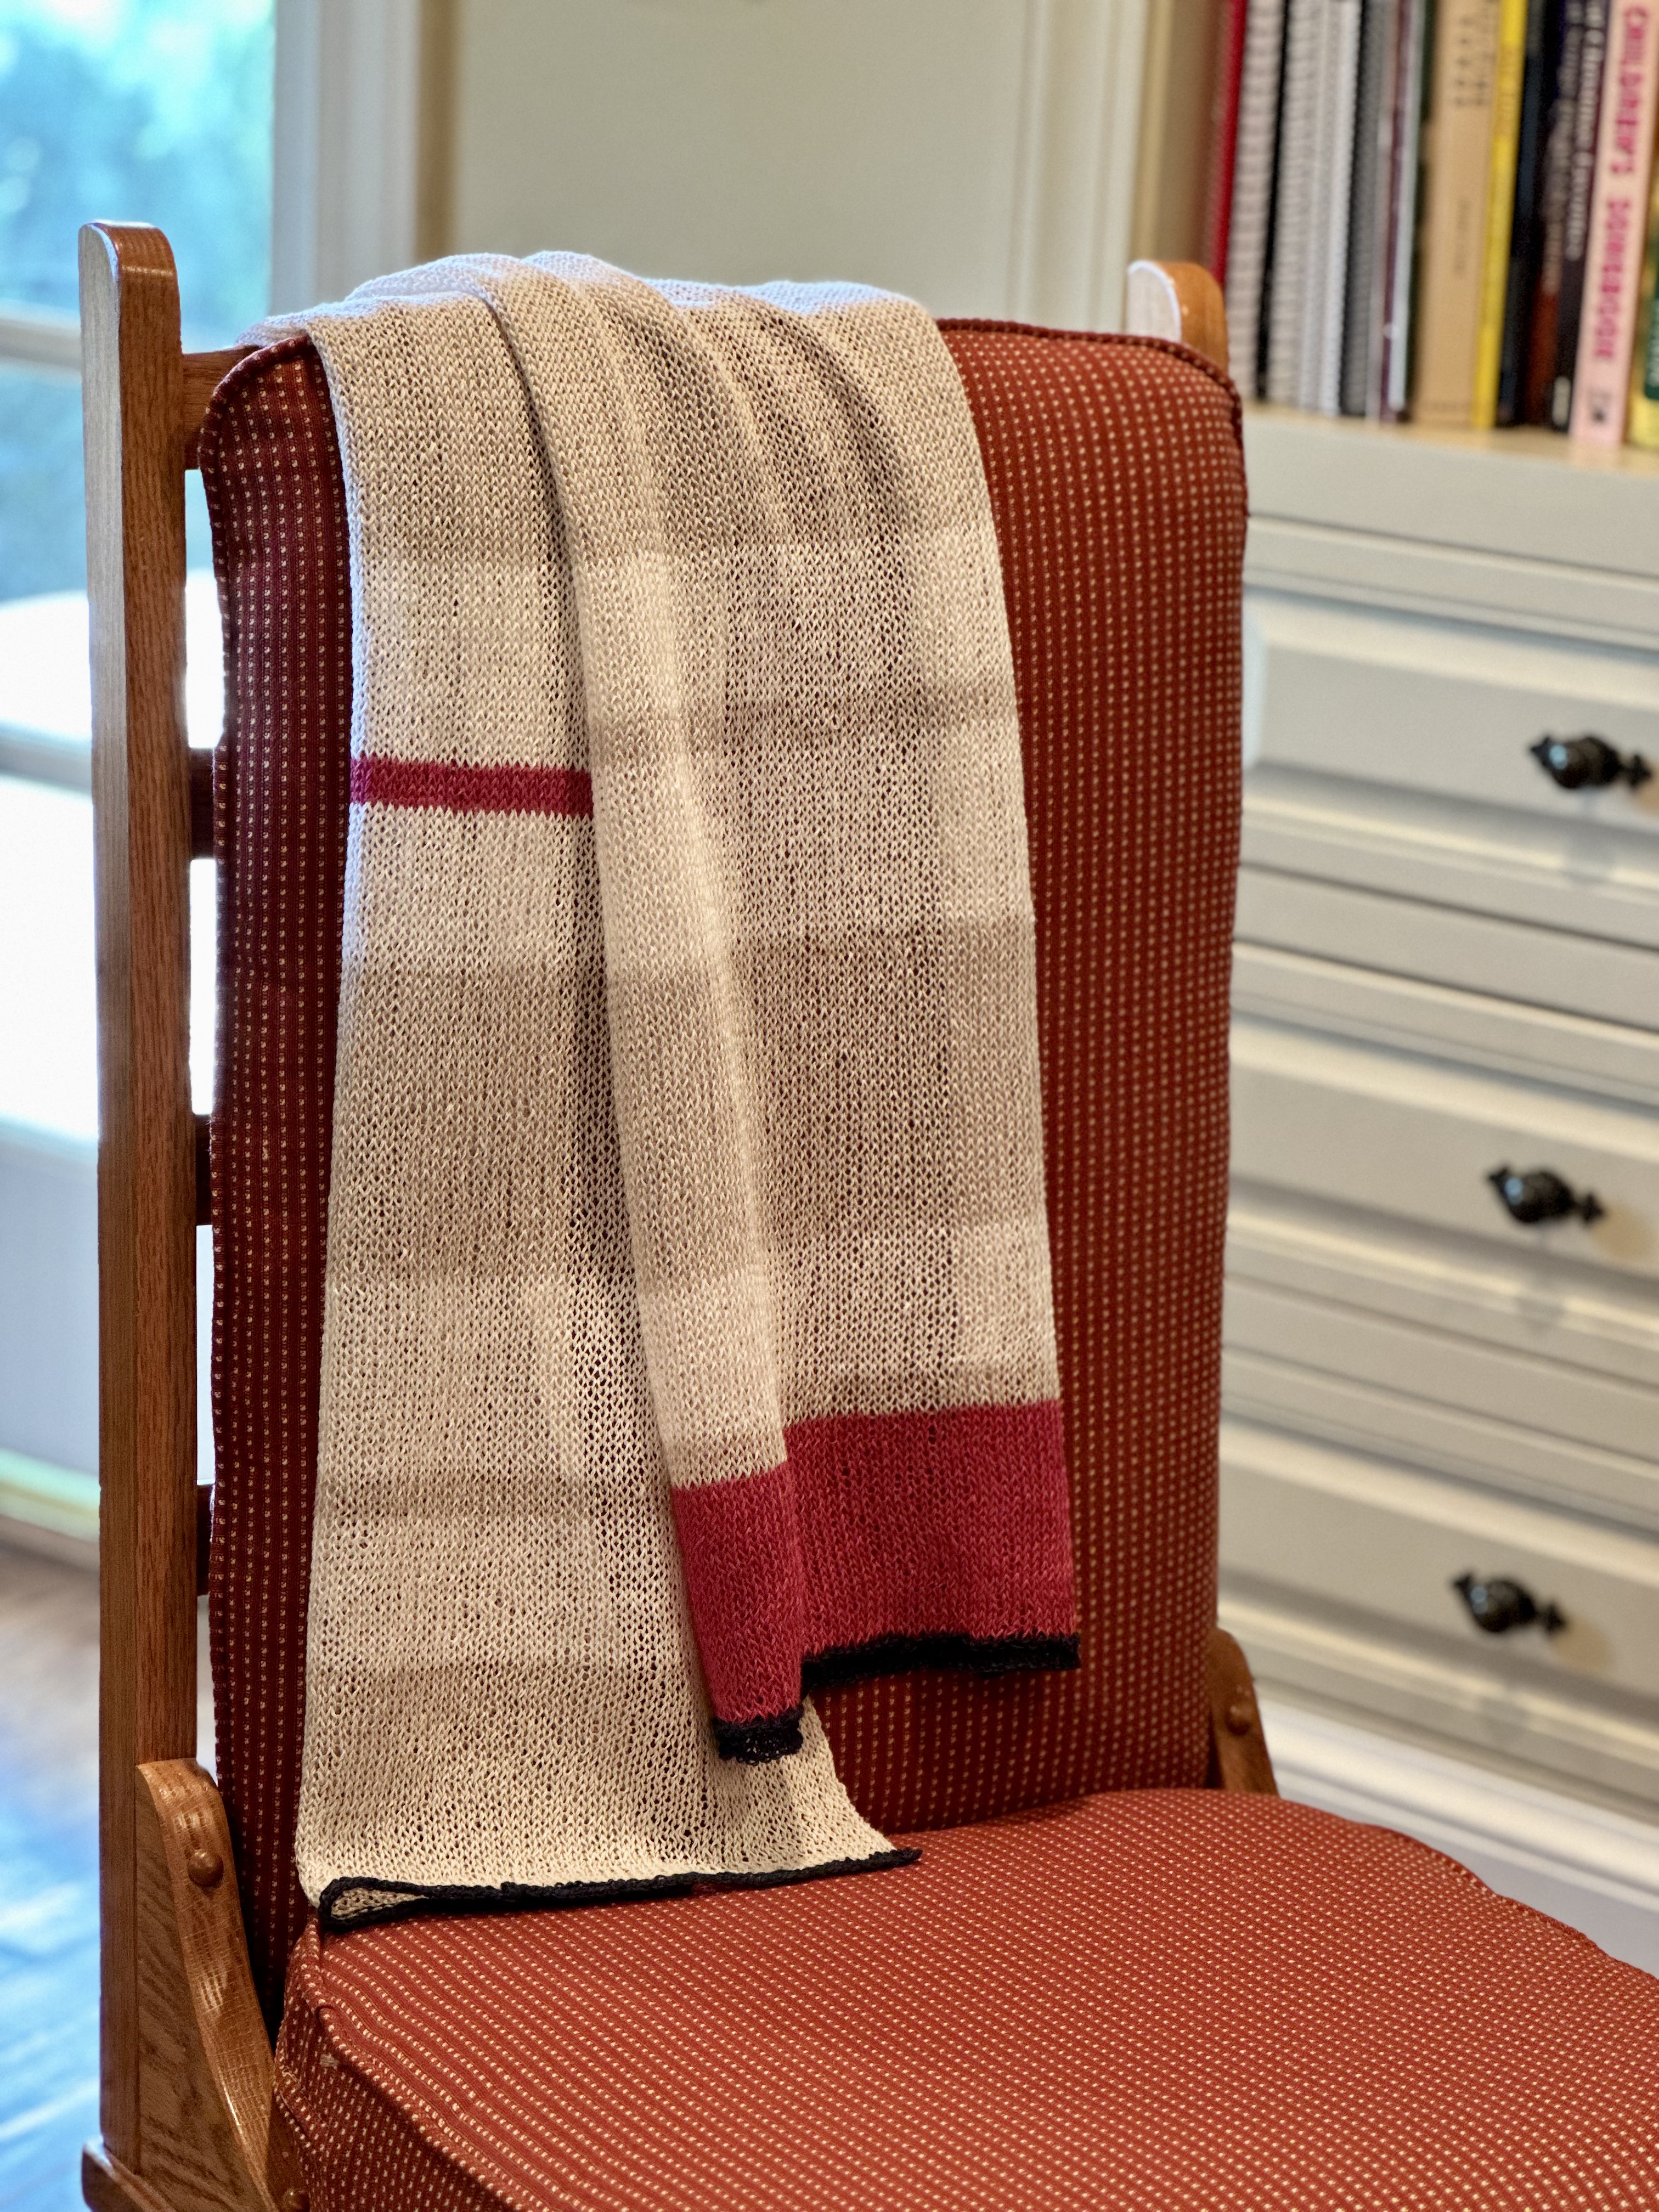
This linen and silk wrap lacked FOUR rows (it's 94 inches long) when I set it down a year ago. I don't even remember why I stopped working on it. But it is now ready to wear. 


Last night my book club (one friend properly calls it a "bookless club") met my house. Our rule is to keep things simple. And as fancy as this appetizer looks, it's about the easiest thing I've ever made. If you are on Facebook or Instagram you likely have seen videos of the how to process. There are many. Slight variations but similar. It's easier to watch a video but I'm going to write down how I did it.

PUMPKIN-SHAPED BAKED BRIE EN CROÛTE

1 sheet puff pastry, thawed
3 tablespoon apple butter
1 round brie cheese
1 egg, beaten
1 bell pepper stem

Preheat oven to 400º. Lay out puff pastry and spread the apple butter in the center in a circle the same size as the brie. Place the unwrapped Brie on top of the apple butter and fold the pastry up around the cheese. (You can cut off corners if necessary to make it easier to wrap.)

Lay out 4 pieces of kitchen twine. Cut twine long enough to tie around the pastry-wrapped brie. Lay first two pieces out crosswise. 
Lay it out like this... +  
Then the next two pieces go across so that it ends up like this....  ✳︎

Tie the twine around the pastry-wrapped brie. This is what makes the pumpkin shape. Place the brie on a baking sheet, smooth side up and brush with the beaten egg. (I used parchment under it.)
Bake for 20-25 minutes or until golden brown. Cut the twine and carefully pull the twine out from underneath. Use a toothpick to attach a green pepper stem to your "pumpkin." Serve while hot.


Now go find a video if you want to watch the process! It's all over the internet. Search for "pumpkin shaped baked brie."

Fall is here.


Sunday, August 13, 2023

Summer Round-Up (Part 3) plus Recipe Round-Up

No Knead Market Style Cheese & Herb Bread

By the time I am at part 3 of what's happened at the farm as summer winds down, the photos are few and far between. We have loved seeing these kiddos that we don't so often during the school year. But just as summer is winding down, so is Mimi. Might be running out of steam.

But I need to share a few recipes before I lose the printed copy or totally forget where I saw it on the internet. The bread you see above is a variation of the no knead bread I've been making for a long time. A good variation. In addition adding the cheese and herb layers, the recipe directions are slightly different. And for once, I did it just as written. The recipe is at the end of the post.  And there are a couple of other super easy recipes mixed in between.


"Pretend" knitting—but the concentration is real.
(Fortunately the tattoo is not.)


Chatting man to man.


The kids (all ages) made juice popsicles all summer.
Then I made some grownup popsicles.

WHITE WINE SANGRIA POPS

1/4 cup thinly sliced strawberries (I used cherry plums)
1/4 cup raspberries
1/4 cup blackberries (cut in half if large)
1 cup moscato wine
1/4 cup orange juice

Divide fruit between popsicle molds. (My set made four.)
Mix wine and orange juice and pour over fruit, leaving room at top
for popsicles to expand. Add handles and freeze.

(1 WW point if your mold set makes 6 pops, 2 WW points if you made 4 pops.)


Time will tell if his love of music lasts.


She graduated to training wheels!


Zero WW point dip.

Mix 1/2 cup of fat-free cottage cheese and 1-1/2 tsp
Everything But the Bagel seasoning. 


A 13th birthday celebration for "Middle Sister."
I cannot in good conscience call her Little Sister any longer.


This is ridiculously good. 

NO KNEAD MARKET STYLE CHEESE & HERB BREAD

3 cups all-purpose flour (I stick to the Kind Arthur brand.)
1 teaspoon salt
1/2 teaspoon instant yeast 
1-1/2 cup warm water (95º to 105º)
1-1/2 cups shredded sharp cheddar cheese
1/4 cup - 1/3 cup fresh chives, thinly cut
1 teaspoon dried thyme, or to taste

In a large bowl, whisk together flour, salt, and yeast. (Use the scoop-and-level measure method.) Pour in warm water and mix thoroughly. Dough will be sticky. Cover bowl with plastic wrap and set in a warm place to rise for 3 to 18 hours. 

When you are ready to bake, preheat oven to 450º. Place a dutch oven in the hot oven to preheat the pot. Let the dutch oven preheat for about 30 minutes while you continue with the dough prep. Use extra flour to flour your work surface and your hands. Use a spatula to slide dough out onto floured surface. Flatten dough, then fold dough over on itself 4 times. Layer the cheese and herbs into each fold.

Form dough into a tight ball and place on the center of a parchment baking sheet. Use the parchment to move the dough back into the mixing bowl. Cover and let rest for 20 minutes.

Take your pot from the oven and carefully remove lid. Use the parchment corners to put dough into hot Dutch oven. Use a very sharp knife and slice the top of dough to release steam. Replace cover on Dutch oven and bake for 30 minutes. 

After 30 minutes, remove top of the Dutch oven and bake for another 15 minutes, or until the bread is golden brown.

Remove from oven and remove bread from pot. Let cool for at least 10 minutes before slicing. 


I still have a few more recipes to share, so check back later. We really didn't cook a lot this summer, but we did try several new recipes that we liked. 


Thursday, June 2, 2022

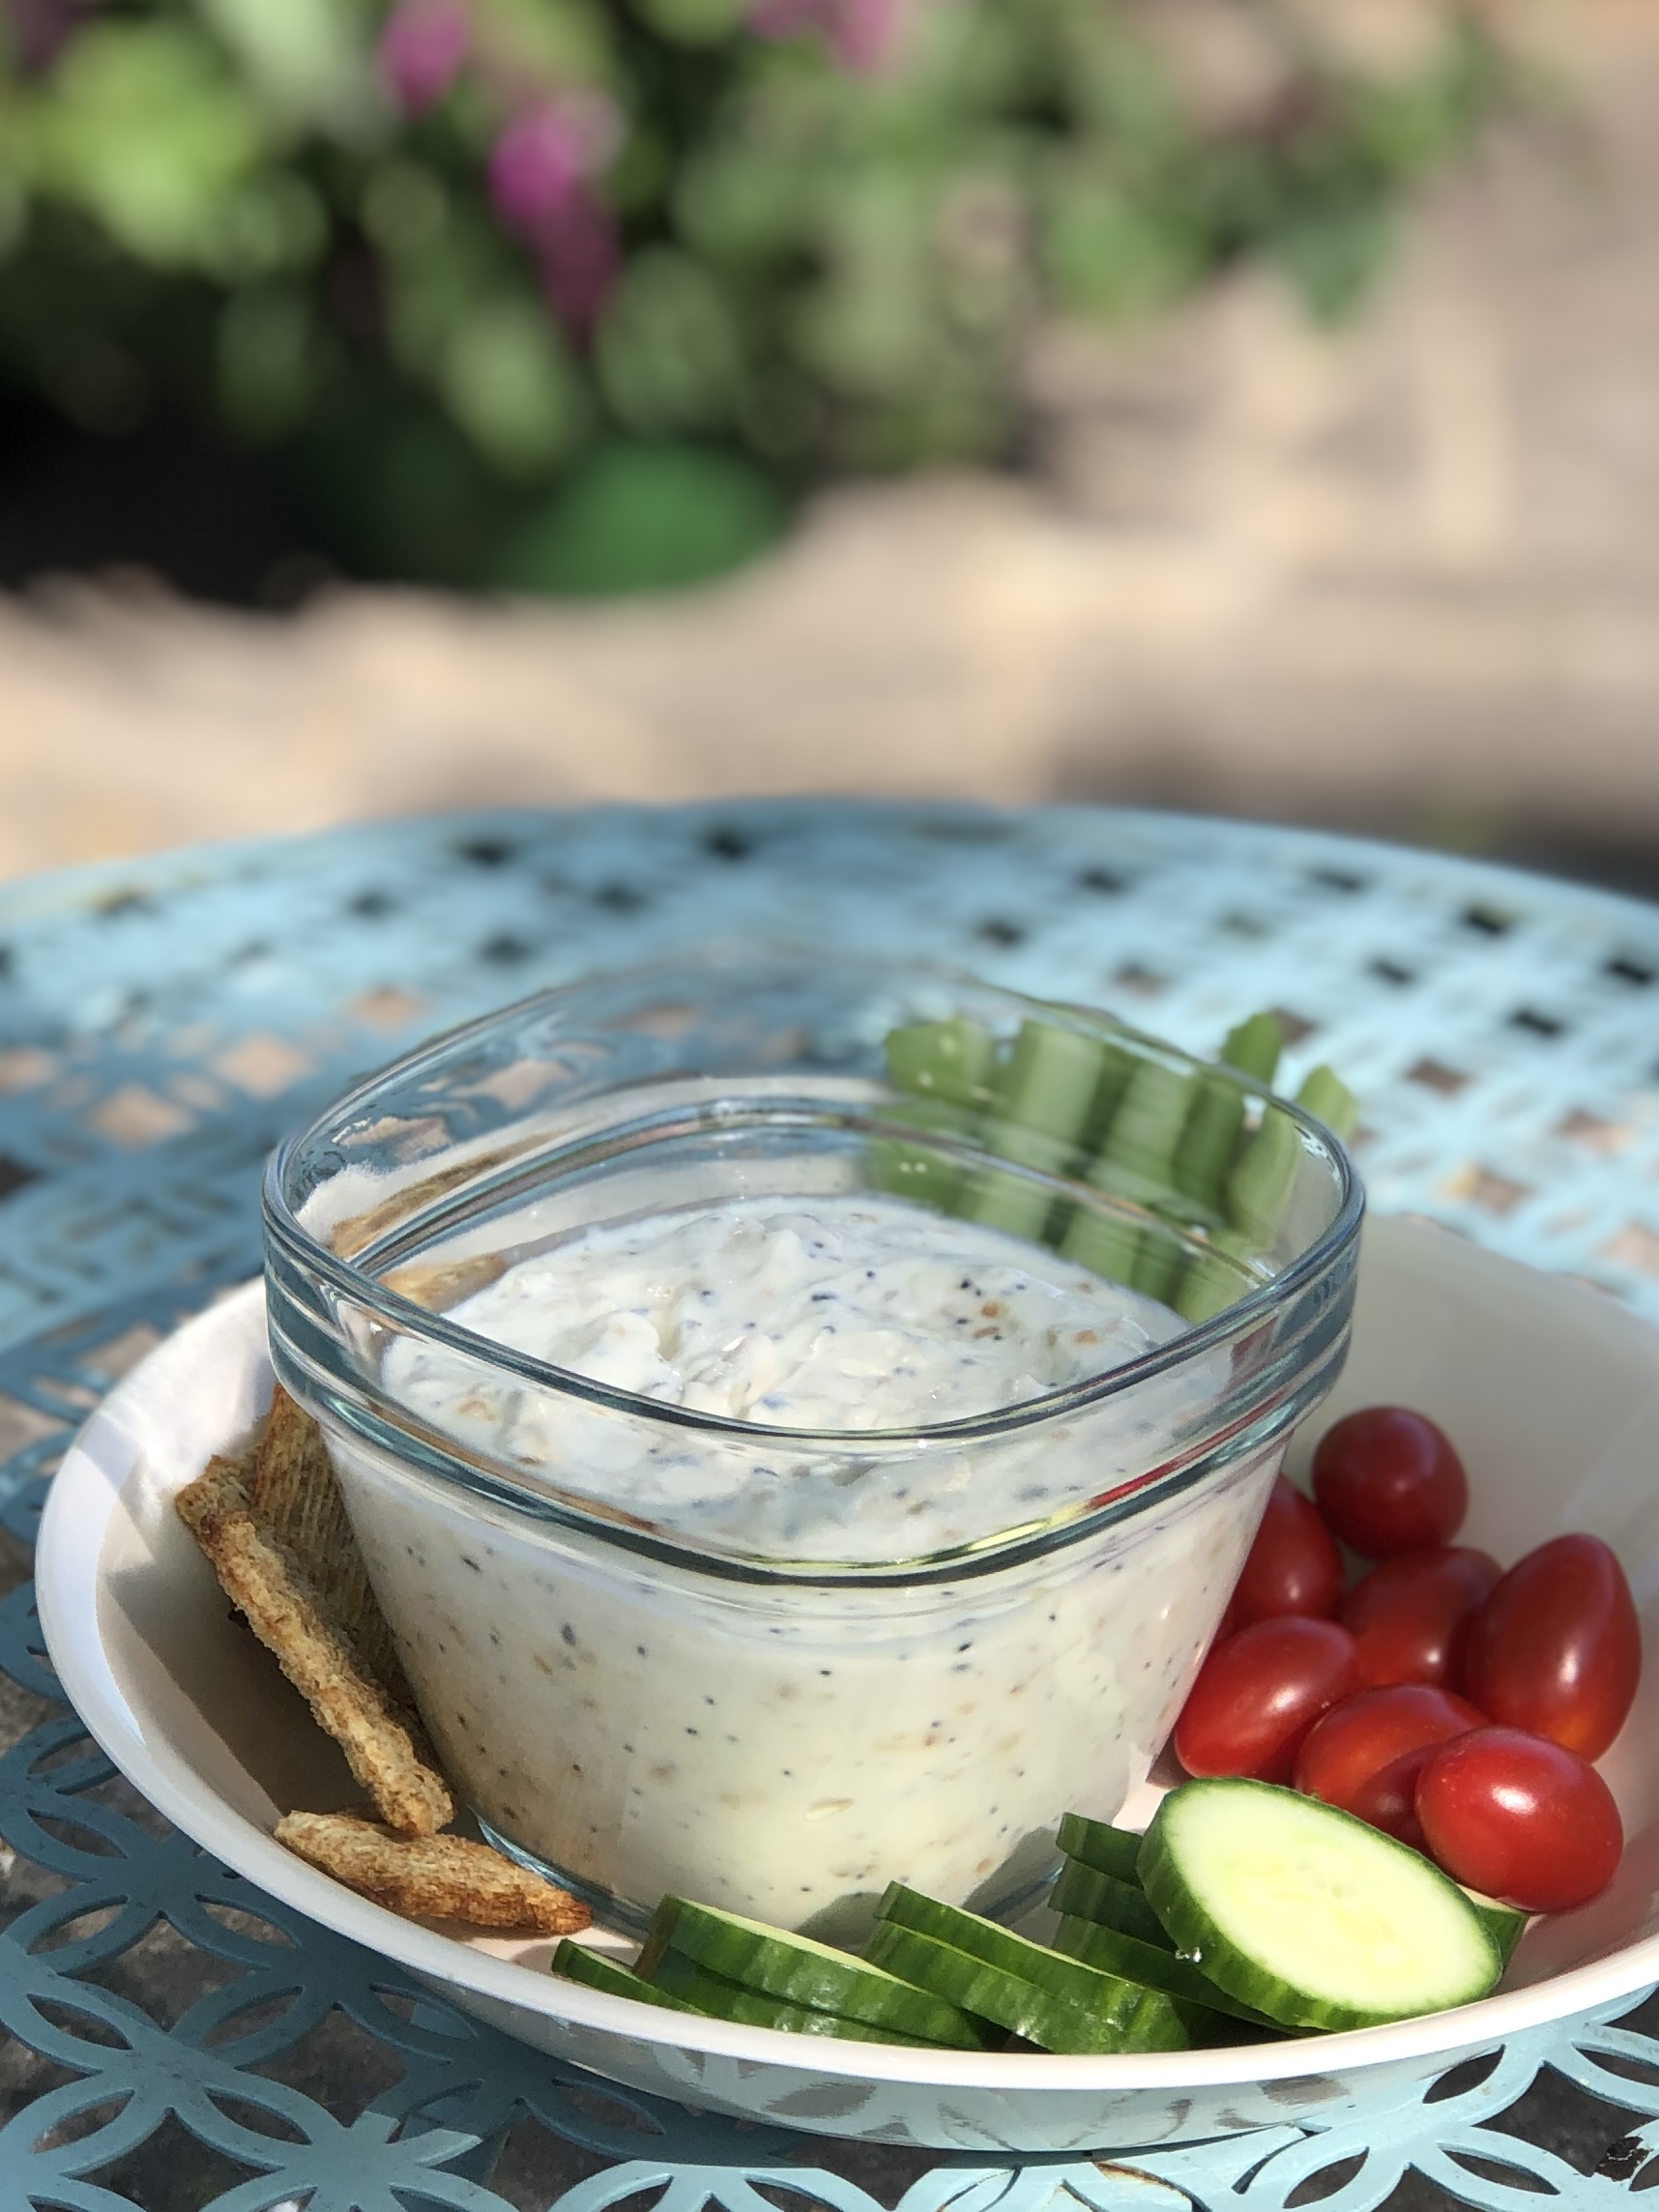
Everything Bagel Dip

Everything Bagel Dip

About 5:00 most afternoons, I am hit with a bad case of the munchies. And I'm tempted to grab the first thing my eye lands on. And then 30 minutes later, I seriously regret that decision. We don't keep a lot of junky snack foods here, but there is always something, even if it's only peanut butter and crackers. 

My only hope is to keep something like this dip and veggies at the front of the fridge. This dip is really, really good. And it takes minutes to make. I made some last night AND sliced a cucumber in less time than it took Daddy-O to pour us a beverage. 

In full disclosure, last night I mixed up a new batch and didn't slow down to look up the recipe. So of course, my measurements were off. I should have added more Dijon and more seasoning. And it was fine just like I made it. I think you could add "or to taste" after every ingredient. 

I also discovered last week that it makes a great topping for a baked potato. We were out of sour cream so I tried this instead. Definitely will do it again.

EVERYTHING BAGEL DIP


1/4 cup light/reduced-fat cream cheese (vegetable flavor or plain)

1 cup fat-free plain Greek yogurt

1 1/2 tbsp. everything bagel seasoning blend (like the kind by Trader Joe’s), plus more for topping

1 1/2 tsp. Dijon mustard


Place cream cheese in a medium bowl, and stir until smooth.
Add all remaining ingredients. Mix until uniform.


Still not much time to post here. We have family at the farm. That's always fun. But as you grandparents know, it keeps you busy! And FYI, the granddaughter in the white t-shirt (Little Sister) is the preteen version of the baby you see on the blog title banner. And Baby Girl (in the blue shirt) is a baby no longer. Goodness, how time flies!


Monday, March 28, 2022

Cool As A Cucumber

Open Face Cucumber Sandwiches

I thought I was the only one. The only one who had never made these. When Joanne asked me to make open face cucumber sandwiches for a funeral reception, I told her I would be happy to...if she would tell me how. I had never made any. Or even eaten any. What!?! She was astounded that I had never had a cucumber sandwich. She told me what she mixed together, but like many excellent cooks, she didn't have any measurements to share.

I googled and found as many variations as there are cucumber sandwich makers. But it did give me a starting place. Of course, I called had to call Joanne back and ask what kind of bread she used. I was pretty sure it wasn't the pumpernickel that many recipes called for. She told me to buy the cheapest white bread I saw at the store. The bread is just a base—this sandwich is all about the good stuff on top.

So I bought a gosh awful amount of cream cheese and loads of fresh dill, too many cucumbers and four loaves of bread and then did what Joanne told me to do in the beginning—mix the spread until it tasted right. I did start with one of the google recipes that used 8-oz cream cheese and 1/3 cup of mayonnaise. (I had mixed 3 blocks of cream cheese and 1 cup mayo.) Too much mayo for me. So I added another block of cream cheese to my big bowl. That changed the proportion to 1/4 cup mayo per block of cream cheese. Much better. Daddy-O tasted it after I finished and said a little more garlic would help. In went another pinch. I thought it needed a little more dill and chives. Just a little. And then I stopped. 

I had not planned on posting this recipe because I figured everyone else had been making them for years. (How had I missed these?) But so many people helping in the kitchen that day said, "You are going to post this recipe, aren't you?" "Please put this recipe on your blog." And several asked the same questions I had asked. "What kind of bread did you use?" "How much cream cheese do I need for one loaf of bread?" "Can you make these ahead?"


I'm writing down how I made these for all of us who need guidance. Tweak away.

OPEN FACED CUCUMBER SANDWICHES

1 large loaf sliced white sandwich bread

8-oz block cream cheese, softened

1/4 cup mayonnaise

2 teaspoons chopped fresh dill

1 teaspoon chopped fresh chives

Pinch of garlic powder

Pinch of salt

1 long English cucumber (also called seedless—these are usually shrink wrapped in plastic)

With a hand mixer, thoroughly blend cream cheese and mayo. Stir in herbs and seasonings. Taste and adjust the herbs and garlic to suit you. This can be done the day before.

Slice the cucumber very thin. (I used a mandolin...very carefully!) Spread the slices on paper towels and let the towels absorb excess moisture while you cut the bread.

With a 2-inch cookie or biscuit cutter, cut circles (2 per slice) from the bread. Spread each round with the cream cheese mixture. Top each round with a cucumber slice. Garnish with a sprig of dill.  

Yield: about 40 rounds


Helpful hints:

*Reminder:  3 teaspoons = 1 tablespoon. So basically you use one tablespoon of fresh herbs per 8-oz cream cheese. You might rather use all dill. And maybe add a little grated onion.

*Yes, you do need to taste and adjust after mixing. I added a little more dill and chives and another pinch of garlic powder to my giant bowl of cream cheese mix.

*One flat plastic pack of fresh dill from the produce section is enough to mix in and to garnish with. I bought too much.

*The plastic top from a can of Bakers Joy or PAM is about the right size and can be used as a cutter if you don't have a 2-inch one.

*I picked out the largest cucumbers so that the slices were about the same size as the bread rounds.

*The skin on these cucumbers is very thin so peeling isn't necessary. If you used other cucumbers with waxed skin, you might want to peel them.

*This could also be made on round water crackers. We did that with the leftover cream cheese spread. Delicious.

*Store these appetizers covered in the refrigerator until serving time.

*Two 8-oz blocks of cream cheese mixed should be enough spread for 3 loaves of bread, maybe 4. We used rounds from 4 loaves. I mixed one block per loaf and have lots of spread left over. Which we have enjoyed snacking on.

*Save the crusts left from cutting and let them dry out. Whirl them in a food processor to make bread crumbs for later.

*I bought home 4 little rounds that were left when it was all over. We ate them the next night and they were still pretty good. I wouldn't make them too far ahead, but they hold up better than I thought.

~~~~~~~~~~~~~~~

This funeral service for a dear friend was truly a celebration of a long life well-lived. So many friends came to honor his memory. The church was full. After the service, the church hall was crowded with people coming together to remember this fine man. 

Here in the South we tend to show our love for the family with food, whether it is delivered to the house or served at church. So on a Saturday afternoon we kept the food trays filled as we listened to shared stories and laughter. We saw lots of hugs and smiles mingled with tears. And I thought how good it is to be in a community that knows how to care for each other. 


Wednesday, June 16, 2021

Guest Blogger: Little Sister

Today's Grandmother Gig is written by guest blogger, Little Sister. She and her family are spending the week at the lake with us. We have been swimming, kayaking, tubing behind the boat, and enjoying night boat rides. The food has been excellent. I'm hoping I can also talk my son-in-law into sharing some of the recipes he has made this week. The whole family knows how to cook! Little Sister doesn't use a recipe for this, so she had to write the ingredients, the instructions and give her recipe a name.


 ~~~~~~~~~~~~~~~~~~~

In Little Sister's own words....


I am 10 and a half years old. I love to cook for my family. I have always admired cooking for years. Mimi calls me Little Sister on her blog. I started learning to cook when I was 3. First, in my play kitchen. But I really learned to cook real foods at age 6. 


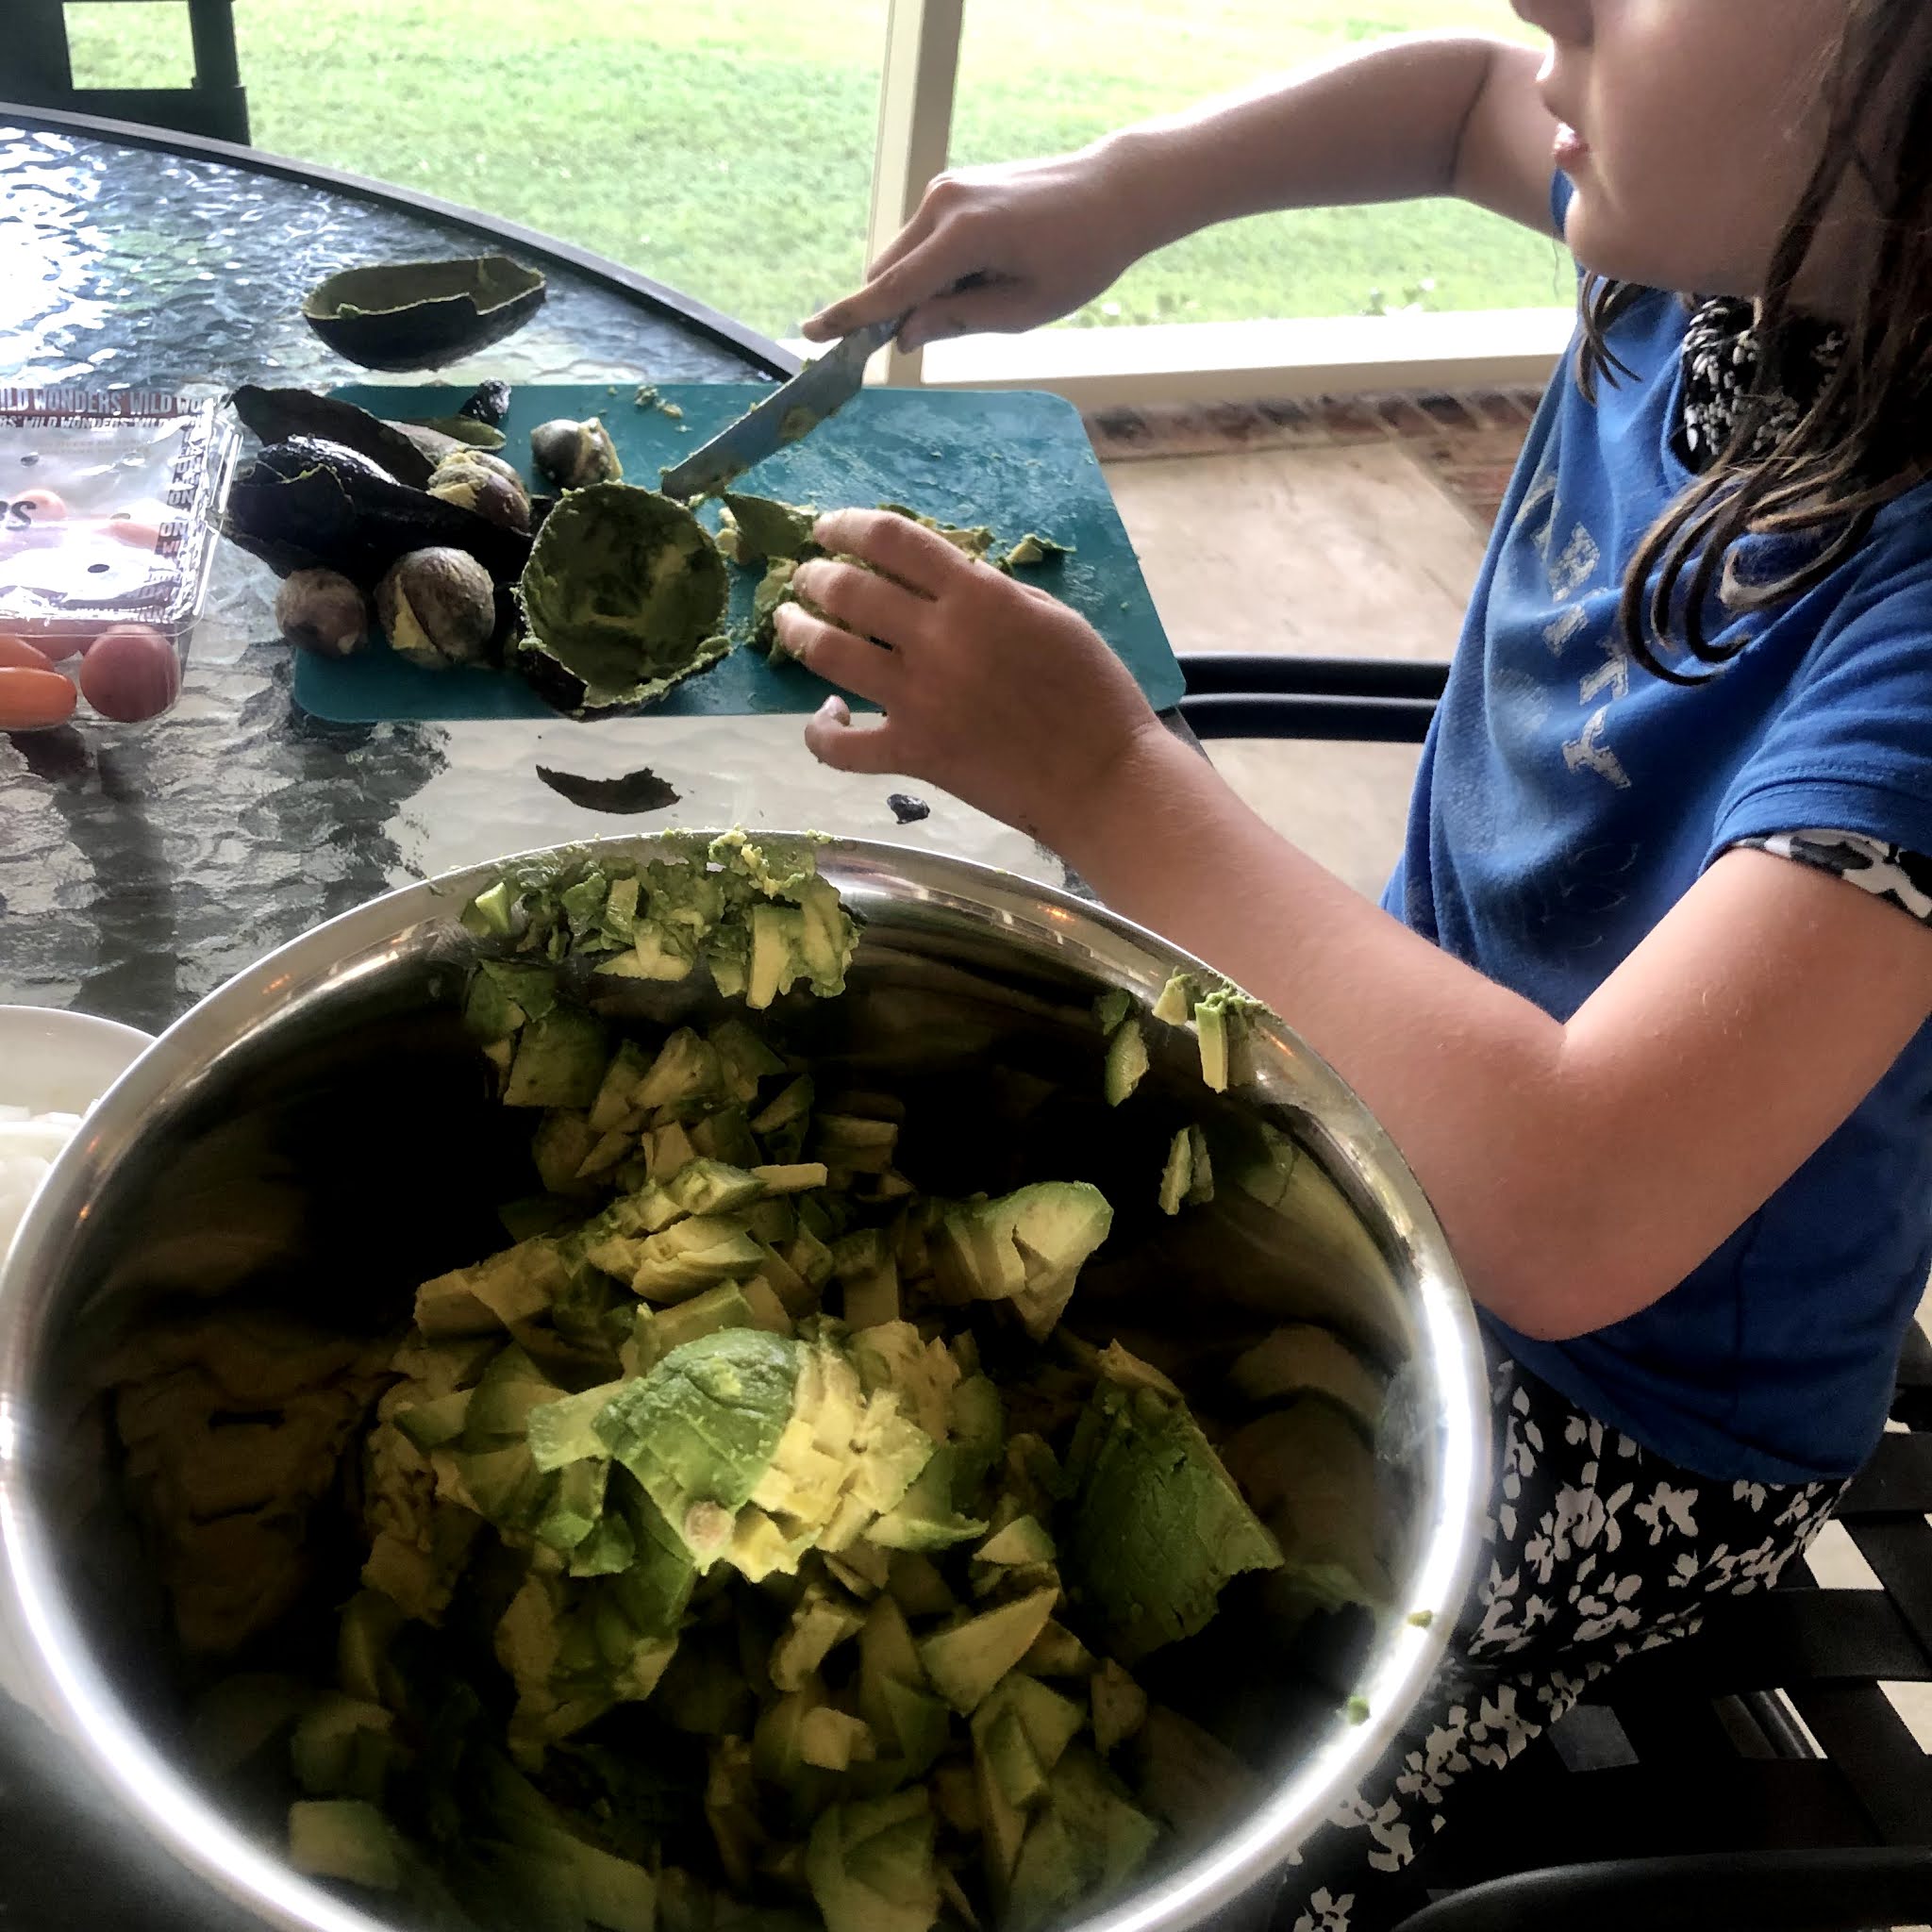
I have seen my Mom and Dad made guacamole for like forever. So I wanted to learn how to make it. Usually we always have a taco Tuesday so I have had a lot of practice making guacamole. It is really simple, so Mimi let me be a guest on her blog so now I can share my recipe with you. 


Mean Green Guacamole


MEAN GREEN GUACAMOLE

(All measurements are approximate. I use one avocado per person.) 


6 avocados

1/4 cup diced onion

1/2 cup diced tomatoes

1/8 teaspoon salt

1/8 teaspoon cumin

a squeeze of lime juice

cilantro, optional (but I don't use it because Daddy and Daddy-O don't like it)


First, cut avocados in half and scoop out of shells. Then cut them into cubes. Put in medium mixing bowl.


Second, add diced tomatoes and onions. 


Third, sprinkle spices over avocado mix. And add the lime juice.


Last, get a spoon and stir until is well blended. As you stir, the avocado will mash up some. My daddy doesn’t like it smooth, so I leave it chunky.


Serve immediately with chips, so the avocado doesn’t get brown. 


~~~~~~~~~~~~~~~~~~~~


While Little Sister was cooking, Baby Girl was out taking photographs. 

This sunset photo was my favorite.


Photo by Baby Girl, age 7


Wednesday, December 16, 2020

Party For Two, Anyone?

Toasted Maple Pecans

Just because you're not having a Christmas party this year doesn't mean you can't have party food. We decided yesterday that it would be fun to have just appetizer type foods for our supper. Then when I picked up my grocery order, there were several items out of stock. I checked out what I had here in the fridge and make a new plan. And it turned out just fine. 

And in another change of plans, Jessica and baby arrived right at dinner time—a day earlier than expected. She decided the smart thing to do was come the day before the predicted bad weather. So it turned out to almost be a party. A party for three. Right after she put the baby to bed, we used Christmas plates and helped ourselves to party foods. And settled in to watch some wonderful Christmas concerts on PBS.


Using what I already had here, I made the very quick and very delicious Baked Sausage Dip that we've made before. And in an effort to balance that heavy recipe with some healthy options, I added carrot and celery sticks and hummus and fresh fruit. It was a perfect combination. 


The other snack food I added to the tray was a little bowl of maple-flavored toasted pecans. I've toasted pecans for years but adding the maple syrup was new to me. It was so easy and it only made a little bowl full. Of course, you could easily make a huge batch but one cup of nuts was all we needed this time. These are not glazed and sugary like pecans sometimes are prepared. But there is enough maple syrup to give them a little extra umph!

TOASTED MAPLE PECANS

1 cup pecan halves

2 tablespoons maple syrup

Salt

Pepper, optional


Preheat oven to 375º. Line a sheet pan (I used a quarter sheet pan) with parchment paper. 

Pour maple syrup over nuts in a small bowl and stir to coat. Spread in a single layer on a sheet pan and sprinkle with salt and pepper if using.


Toast nuts for 10 minutes then stir. Toast for another 2 minutes and taste them. Toast for another 2 minutes if needed. (Mine took the whole 14 minutes.) Let them cool before serving. Store in an airtight container.


Toasting pecans is a judgement call—they need to come out of the oven just before they are crisp because they will crisp up as they cool. 


Having a party for two or three at home is simple. I arranged everything on a tray and just that one step made it look special. A local restauranteur years ago said, "I could sell peanut butter and jelly sandwiches at a premium price if I presented them well." He was speaking at a ladies club and told that group that half of success in the fine dining business was in the presentation. Yes. His food was also delicious, but the other half of his success was in creating the proper ambience and serving the food well. I heard many speakers in that club over the years. He is the only speaker I remember 30 years later.

I am taking a blog break for a few weeks. We, like many of you, are observing Christmas in new ways. Our celebration will be pared down to suit the times. We may discover that there are part of this scaling back that we like. And at the same time we will miss some of our traditions. But Christmas will come in its own fashion this year. And it will be one for the books. I imagine we will be talking about this particular Christmas for years. Be sure to make some good memories, too.

Merry Christmas & Happy New Year to you all!


Tuesday, August 29, 2017

Time For Tea


We went to the most lovely bridal tea party over the weekend. Such a wonderful day for the two families to get to know each other. And it was surely a day of making memories.


The nieces from the bride's family got to meet the nieces from the groom's family. Between the bride and groom, there are seven nieces, ages 3-16. And they were instant BFFs. (That's "best friends forever" if you don't have younger folks around to keep you up to date on such things.) All of them will be in the wedding party. They are so excited. The grownups were happy to meet each other, too.


There were many questions ahead of time from our little ones. They learned that you dress up to go to a tea party. ("But I want to wear my cow shirt!" The cow shirt had to wait for another time.) And they knew that tea party manners meant sitting still in your chair. And they were instructed on what to do if they didn't like a certain food on their plate.

We had tried to explain to our little girls that a tea party meant small sized foods. And they were relieved to learn that they were not required to drink tea. They had their own little tea pot of lemonade on the table. But they did have real china cups and saucers. Not a styrofoam cup with a lid and a straw in sight! And the smallest girls rose to the occasion and were perfect little ladies.


At bedtime that night, Baby Girl told us, "That was the best tea party I've ever been to in my whole life." She's three. And just as she was being tucked into bed she added proudly, "And I didn't break anything."


I dug back through older posts here on the blog and found a recipe that we used for a bridal shower here at our house several years ago. I love this recipe because it can be made ahead and popped into the freezer for baking later. Make them small and fill them with thinly sliced ham and they would be perfect for a tea party at your house!

SWEET POTATO BISCUITS

4 cups all-purpose flour
2 tablespoons baking powder
2 teaspoons salt
1 cup butter
1 cup cooked mashed sweet potato* 
¾ to 1 cup buttermilk

1.  Combine first 3 ingredients.  Cut in butter with a pastry blender or two forks until crumbly.
2.  Stir together mashed sweet potato and ¾ cup buttermilk; add to dry ingredients, stirring just until moistened.  (Add remaining ¼ cup buttermilk, if necessary.)
3.  Turn dough out onto a lightly floured surface, and knead 3 to 4 times.  Pat to a ½-inch thickness.  Cut dough with a biscuit cutter and place biscuits on a lightly greased baking sheet.
4.  Bake at 425º for 12 to 15 minutes or until golden.

Yield:  3-inch cutter makes about 14 biscuits
            2-inch cutter makes about 36 biscuits (this time I got about 48 biscuits)

* 1 (15-oz.) can sweet potatoes, drained and mashed, may be substituted.

Note:  To freeze, place unbaked biscuits on a baking sheet in the freezer.  Once frozen, place biscuits in a zip-top plastic freezer bag, and freeze until ready to use.  Before serving, bake frozen biscuits on a lightly greased baking sheet at 425° for 15 to 16 minutes.


Tuesday, December 29, 2015

The Nuts And Bolts Of It


Friend Missy (who is now a Mimi herself) shared her Mimi's recipe for Nuts & Bolts with me weeks ago. There are so many versions of Chex party mix online—some make smaller amounts, some cook faster, and most have more seasonings. But I wanted to try this family favorite, just like Missy has made it for years.

Mommy mixed it up for me one day while she was here at the farm wrapping gifts and we were out running those last errands. This isn't a hard recipe, but it takes hours in the oven. I did get one text from Mommy when she poured the butter mixture over the cereals, asking if she should make more of the butter mix. She thought maybe the cereal wasn't coated enough. I trusted Missy's recipe to be perfect just like she wrote it. It was. The butter mix and cereal amounts are just right.

This makes an enormous amount. Perfect at the holiday season because we've had plenty to eat, we've given several jars as gifts, and there is enough to get us through all the bowl games on TV this coming weekend. I used jars for giving, just because I had them. Those fun tins you can get just before Christmas would work, too. Plastic bags are fine, but might not keep the mix fresh as long as storage in glass—not a problem, though, if you are eating it up pretty quickly.


Here is the old family recipe, complete with Missy's notes. She also told me that she adds more Worcestershire and Tabasco because they like it spicy. We stuck to the original recipe this time and have loved it that way. I did follow her suggestions for less pretzels and using pecan halves.

NUTS & BOLTS (Missy's Mimi's recipe)

1 box Wheat Chex
1 box Rice Chex
1 box Cheerios (large)
1 (16-oz) bag pretzel sticks (I think 8 oz. is plenty)
1-1/2 lb mixed nuts (I use 1 lb mixed nuts and 1/2 lb pecan halves)
1-1/4 lb. butter (5 sticks)
3 tablespoons Tabasco
4 tablespoons Worcestershire

Preheat oven to 200 degrees. Mix first five ingredients together in a VERY large bowl. Bring butter, Tabasco, Worcestershire sauce to a boil. Pour over the dry ingredients and stir gently to coat everything.

Pour into two large roasting pans (I use the disposable ones) and put on middle racks in ovens if you have a double oven, or put both in one oven and alternate positions a few times while cooking. Cook for 4-1/2 to 5 hours, stirring gently every 45 minutes.

Let cool and seal in airtight containers. (Each batch makes twelve 8-oz bags.) If sealed well, this Chex mix stays crunchy for a long time.


Christmas has come and gone. But our little people are still with us for several more days. That means there is not much time to write at the moment. I am still in baby chasing/meal cooking/toy picking up/story reading/un-decorating mode. I'll catch up with you in 2016!


Monday, December 21, 2015

Last Minute Recipe


I'm sitting here this morning, enjoying the fire—our last morning cool enough to have one—and another Christmas movie, while I'm working on menus for this week and the grocery list. One chick is back home in the nest already. More arrive today, and the last ones tomorrow.

We are planning to have appetizers on Christmas Eve after we get home from church. And I wanted to make the hot chicken dip we enjoyed a couple of years ago. I went to the recipe index here on the blog to find the recipe. And it WASN'T THERE! I have never posted this easy recipe. I'm fixing that right now.

My cousin Lynn shared this recipe with me and told me that whole family loves it. It was a hit with our folks, too. It's one of those stir-it-up-and-leave-it kind of recipes. I'm putting it here, without a photo (because I won't make it until Christmas Eve.) Now I'll be able to find it easily next time.

CHICKEN DIP

2 (8-oz) blocks of cream cheese
2 (12.5-oz) cans chicken, drained (mine were 10-oz)
1 cup Ranch dressing
1/2 medium bottle Texas Pete, or to taste

Mix all ingredients together in a crockpot. Serve with Scoops or Fritos.

The gentleman who gave Lynn the recipe told her that he melts the cream cheese in the crockpot, then adds the other ingredients.


Keep this recipe in mind in you need a quick easy recipe for your holiday feasting. Thanks, Lynn!


Sunday, October 4, 2015

Rain, Rain, Go Away

Baked Sausage Dip

What a weekend! It has rained non-stop for days now. As of this morning, we've had over 10 inches of rain in four days. (And it's still raining.) As bad as that has been, the midlands and low country parts of our state have had serious flooding. I keep seeing photos from family and friends of water standing in their houses, of tadpoles caught swimming through the house, of backyards deep under water.


While this weather is wreaking havoc on farm work, our house-on-a-hill has not been affected. When Daddy-O rode out in the truck this morning to check the creek and the river, he made a photo of the creek that runs through our pasture. Check last summer's photo against this morning's photo—that's the same spot in the creek. We've had a lot of water, but I think it's almost over.

We were happy to stay indoors all weekend and watch football on television. Now, I had thought about snacks for TV viewing. I didn't have a huge plan, but I bought goat cheese for a Rosemary Goat Cheese Ball that is served with crackers and fig preserves. And it's delicious.

But this weekend, we had a young man in the house. A young man who cooks. I learned that "boy food" snacks are different than my snack ideas. He made a sausage dip that was delicious. Good enough that it could have been my supper. Jessica says every time he makes this, it's a hit with his guests.


It's early in the football season, so tuck this recipe away for future reference. It's a keeper.

BAKED SAUSAGE DIP

1 lb. spicy (or hot) breakfast sausage
8-oz. block of cream cheese, softened
10-oz. can original Rotel tomatoes, drained

Brown sausage and drain. Mix together with softened cream cheese and tomatoes. Put in a 1-1/2 quart baking dish. Bake at 325 degrees for 20-30 minutes, or until hot and bubbly. Let stand a few minutes before serving. (So you don't burn your guests!)

Serve with sturdy crackers.


We enjoyed our weekend visitors and look forward to the next visit. Hopefully, on a sunny weekend!

Monday, February 16, 2015

Say Cheese

Quick Gruyere Puffs

Okay. So when the doctor's office has magazines full of recipes like this on laying around, are they drumming up more business? I went for lab work a few days ago and saw this recipe. I just couldn't resist. At least the blood work was done before I made these!


I wanted something a little special for our Valentine celebration. We don't go out that night. A dinner at home suits us and it's a little less crazy. We started with these cheese puffs.

I have made hundreds and hundreds of plain puffs that I stuff with chicken salad for baby and wedding showers. So this technique was not so unusual for me. This recipe was pretty easy. Just one saucepan and a baking sheet. So the clean up was quick. It doesn't make nearly as many puffs as my other recipe, so there was only the single pan to bake. It was the perfect amount--just one pan full of delicious cheese puffs.

If you have never made puff shells, just trust the recipe. Do what it says. The dough looks a little like Play-Doh when it's ready to spoon onto the baking pan. It should look like that. It's easy enough to make for guests. (Read my reheating notes at the bottom.)


MINI GRUYERE PUFFS

1/2 cup water
1/4 cup butter
1/2 teaspoon dried basil, crushed
1/4 teaspoon garlic salt
Dash of cayenne pepper
1/2 cup all-purpose flour (I used King Arthur unbleached all-purpose)
2 eggs
1/2 cup shredded Gruyere or Swiss cheese (2 ounces)
2 tablespoons grated Parmesan cheese
extra grated Gruyere cheese (optional)

  • Preheat over to 450 degrees. Line a baking sheet with parchment paper (or grease it.) Set aside. 
  • In a small saucepan, combine water, butter, basil, garlic salt, and cayenne pepper. Bring to boiling over medium heat, stirring to melt butter.
  • Add flour, all at once. stirring vigorously. Cook and stir until dough forms a ball that doesn't separate. Remove from heat. Cool for 5 minutes.
  • Add eggs, one at a time, to dough in saucepan, beating with a spoon after each addition until smooth.
  • Stir in shredded Gruyere cheese. Drop dough by rounded teaspoons, about 2-inches apart, on prepared baking sheet. Sprinkle with Parmesan.
  • Bake for 10 minutes. Reduce heat to 375 degrees and bake for 10-12 minutes more, until puffed and golden brown. 
  • Turn off oven. Let puffs stand in oven for 3 minutes. If desired, sprinkle with extra Gruyere cheese. (This extra cheese did not melt for me, even though I sprinkle the minute they came out of the oven.) Serve hot. 

Makes 20 puffs


These were just perfect! Now, if you have never had cheese puffs, understand that the center is supposed to be empty. It's a very light appetizer.  This recipe is almost as good as the cheese puffs I enjoyed at Bistro Niko in Atlanta. And we got to enjoy these by our very own fire. A nice start to our Valentine dinner.

The restaurant puffs were smaller. About half the size of these. This recipe said it made 20 and that is what I got, so they are the size intended.  I'm not sure I would call these "mini." But whatever the size, they are delicious.

The morning after our Valentine celebration, I heated some of the leftover puffs for breakfast. I popped them into the toaster oven, tray removed, and pushed the "toast" button. Just a couple of minutes in the little oven and they were as delicious as the freshly baked ones. Knowing that they can be reheated nicely would make them more usable for serving to guests.

Reheating in the microwave would have left them soft, but with the toaster oven I got a hot, crispy puff. I think you probably could put the entire batch of puffs on a baking sheet and back into a hot oven for just a very few minutes if you wanted to make them ahead for a party.

I plan to freeze the last two, just to see if freezing and reheating will give me a good puff. I'll let you know how it goes. Fingers crossed that works because these would be fabulous to have on hand in your freezer.

Friday, December 19, 2014

Last-Minute Recipe: Toasted Pecans


Less than a week to go to Christmas. Like most of you, I've been busy here with Christmas things, non-Christmas things and life in general. Some of the plans I made have gone by the wayside. Some were replaced by something easier/faster. Others were scratched off completely.

Here is a super quick recipe that might fill the bill for your last minute needs. It is such a typical Southern nibble to have on hand. My grandmother made these often when I was little. She had several pecan trees in her back yard, so there were always pecans in her kitchen. When I was little, I didn't love these, but I do remember the grown-ups were always excited to find that Grandmother had taken a pan of these out of the oven. Now that I'm grown, I know why they were excited. These are wonderful. 

When Jessica was home at Thanksgiving, she made these to take back to the city. She was using these as an add-on for a little gift for friends. So fast. So easy. So delicious. If you are gifting them, pack them  as soon as they have cooled, or you will find everyone at your house will be sneaking a taste and soon there won't be enough to give away! I'm making some today to have for Christmas.

TOASTED PECANS

pecan halves
butter
salt

Put pecan halves on a baking sheet in a single layer. Add a few pats of butter. Place in a 350 degree oven. Bake about 15 minutes, stirring a couple of times.
The time is only approximate, so watch closely! (Do not walk away from the kitchen to do something else!)

Use your nose to help you know when they are done, because you can begin to smell the nuts when they are nearly ready. Taste the nuts, allowing for the nuts to crisp a little more as they cool. Watch closely. Nuts can burn easily.

Salt nuts to taste.  


A 1-lb bag of pecans fills a large baking sheet. For this many, use 5-6 good-size pats of butter.


Thursday, December 19, 2013

Need One More Gift?


Yes, I am sticking to my plan and doing "doing less." (But, it's Christmas—I have to do something!) In fact, I'm taking a break right now to rest for a few minutes this morning. Posting a short blog entry doesn't require much energy, though. I thought you might like to have this easy, easy recipe if you need just one more thing to give, to take to a party, to have for your family to nibble on.

We had enjoyed a pumpkin dip at a couple of baby showers in recent years. I found this recipe on SouthernPlate.com around Thanksgiving and I saved it for Christmas.  The ingredients are things I usually have on hand--except for the cookies. It took five minutes to mix together and put into containers. One recipe filled four half-pint jars. I added a little treat bag with bought gingerbread man cookies.

And this really does taste like pumpkin pie. So if you know your folks won't go near a pumpkin pie, find something else for them!

PUMPKIN PIE DIP

8-oz. cream cheese, softened
2 cups powdered sugar
15-oz. can pumpkin
1-1/2 teaspoon ground cinnamon
1/2 teaspoon ground ginger

Mix cream cheese and powdered sugar until creamy. (I used my hand mixer.) Add pumpkin, cinnamon and ginger and beat until well blended. Cover and refrigerate until ready to serve.

Serve with ginger cookies, graham cracker sticks, or apple slices.


Jessica arrives tomorrow. We will see the rest of the family on Saturday. Yeah!