Showing posts with label ice cream. Show all posts

Tuesday, July 19, 2022

Mimi Camp Has Come And Gone


Mimi Camp this year started as soon as we got home from the lake. And unlike all the other years it started without a plan because we had been busy with the family at the lake and with the lake renovations before that. But because we had skipped two Covid years we were determined to do something. This is just a peek at a few of the things we did. And we had two recipes worth sharing. 


I crawled into bed the first night home from the lake after tucking the girls into their beds and I laid there wondering what on earth we could do in the morning. And what was I going to put in ''the box." I was hoping they wouldn't remember that we usually start our camp day by opening the official Mimi Camp box to see the clues for the day's activity. (They remembered.) I couldn't even find the actual box but thankfully had an empty box with a lid that hadn't made it to the trash dump yet. 


Early that first morning I filled it with an assortment of fruits and vegetables from the fridge. Some were wilted and about to be tossed anyway. But they were a great for creating food art. They added herbs from the garden. The girls worked all afternoon making food paintings. We talked about different ways to see ordinary things.


I can't even begin to put the rest of the week in order, but there was fishing at the pond behind the house. And a picnic. On a blanket. On the ground. 


According to Baby Girl that's the definition of a real picnic. It has to be on a blanket on the ground. We came home with no fish but it was all great fun.


Another morning they found my gallon jar of buttons in the box along with an old flannel shirt that Daddy-O sacrificed to the cause. We cut off the sleeves and cut off the cuff button and learned to sew that button back on. I wanted them to be able to button it back up. Button sewing turned out to be the sleeper hit of the week. They kept sewing buttons. Both girls agreed the hardest part was tying the knot in the thread.


I thought we would have fun going through an old cookbook of mine that has a chapter of recipes for each decade from the 1930s to the 1970s. The plan was to find a recipe from each decade. We started off with a bang and made ice cream from the 1930s the first night. This is the 1930s recipe. 

PEPPERMINT ICE CREAM

2/3 cup sweetened condensed milk
1/2 cup water
1/2 teaspoon peppermint extract
3 drops red food coloring (I was out of red, so we used green)
1 cup whipping cream

Combine the condensed milk, water, extract and food coloring. Whip cream until thick and custard like and fold into the peppermint mixture. Pour mixture into a 3-cup refrigerator tray. Freeze until partially frozen. Break mixture into chunks into a chilled mixer bowl. Beat until smooth. Return to cold refrigerator tray. Freeze until firm. Makes 3 cups.


Since our ice cream had to be green, Baby Girl said, "Isn't it supposed to have chocolate chips in it?" So we added those. And Little Sister asked, "Why can't we use your little churn?"  I explained about refrigerator freezer desserts from way back. (My mother made a great frozen lemon dessert in a metal ice cube tray.) But then thought she might be on to something. So we skipped the "beat the cream" part and mixed it all together and poured into my countertop churn. 1930s meets 2022. Worked like a charm.


When the girls got up another morning, they found a five pound bag of flour in the box. And each girl separately made a loaf of no-knead bread. The only thing I did was move the heavy Dutch oven in and out of the hot oven. If Mimi Camp had badges, both of them would have earned the bread baking badge.


The next night Little Sister made caprese skewers for a late afternoon snack on our patio and we added some bread wedges to our tray.


And Daddy-O used the very last of the bread for French toast on Saturday morning. We didn't want to waste a crumb of their delicious bread.


Our "foods from the decades" exploration had one more success when they made brownie pudding from the 1940s. After that, they looked at the 1950s recipes and decided to abandon this project when they saw shrimp in jello. EVERYTHING was in jello in the fifties! 

BROWNIE PUDDING

1 cup all-purpose flour

3/4 cup granulated sugar

2 tablespoons unsweetened cocoa

2 teaspoons baking powder

1/2 teaspoon salt

1/2 cup milk

2 tablespoons cooking oil

1 teaspoon vanilla

3/4 cups packed brown sugar

1/4 cup unsweetened cocoa powder

1-3/4 cup hot water


Stir together flour, sugar, 2 tbsp cocoa, baking powder and salt. Mix in milk, oil and vanilla. Pour into greases 8x8-inch baking pan. Combine brown sugar, 1/4 cup cocoa and hot water; pour over batter. Bake at 350ยบ for about 40 minutes. Serves 6 to 8. 

The chocolate sauce layer on the bottom gets thicker as it cools. We liked ours warm, not hot.


So much more happened. But this hits the highlights. If I'm a smart Mimi I'll start collecting ideas for another camp right now. Baby Girl informed me that she planned to come to Mim Camp until she finished high school. Maybe college. "By then I'll have learned all that Mimi knows." 


Monday, June 7, 2021

All Things Peaches

Peach Cobbler


Driving down to the lake yesterday I passed the peach stand. If I could have stopped to make a photo I would have. It's a shed right on the highway beside a long driveway that leads to the house of the peach farmer. Baskets and bags of peaches line the shelves. And it's all on the honor system. There's a bucket for you to drop your money in when you get your peaches. Daddy-O picked up a couple of bags for us last week while we had enough family here to help eat our favorite desserts.

We had quite a week with Little Lady and her family at the farm. It was her first time visiting since she started walking, so she was able to explore every inch of everywhere. We spent the rest of last week after they headed home undoing our temporary baby proofing. Every available surface held something that had been set up out of reach.


We had time for a couple of days to catch our breath, then we moved to another porch. (Morning coffee on the porch is the best.) The other family arrived yesterday for their farm vacation. Those city children love nothing better that staying where there is plenty of room to roam and ramble. So we moved to the lake cottage for a while. I have my coffee beside me this morning while I write to you. Daddy-O is always ready to pour me a refill.

But before we get into gear with this next family (we are plenty close enough for lots of visiting) I want to share the recipes I made last week. Our peach season here lasts quite a long time as different varieties come in, so these will likely make another appearance on our table. Whether that table is at the farm or at the lake.


This is the recipe we've all used for years. Follow the directions exactly—especially the "no stir" part. And be sure to use a 2-qt. baking dish. Don't grab that 9x13 dish you use for everything else!

PEACH COBBLER

3-4 cups of sliced fresh peaches
1 ½ cups sugar, divided
¾ cup plain flour
2 tsp. baking powder
Pinch of salt
¾ cup milk
1 stick butter

Put 1 cup sugar on peaches.  Set aside.  Melt butter and pour into a 2-qt. baking dish.  Mix remaining sugar, flour, baking powder, salt and milk. 
Pour batter into melted butter.  DO NOT STIR.
Spoon peaches over top of batter.  DO NOT STIR.
Bake at 350 degrees for 1 hour, or until golden brown.


And then there was peach ice cream. There is a long story about the ice cream making last week that ended with me now owning a new countertop ice cream machine. And realizing we need to replace our ancient freezer.

Peach Ice Cream

But all you need to know is that this is the easiest ice cream recipe ever. Todd first made a fabulous vanilla ice cream. His recipe involved a lot of steps, used a vanilla bean and cream cheese. It was perfection. I will happily eat his anytime he makes it. But you know me, I mostly do easy. This recipe is ready to pour into the ice cream maker in minutes.


This ice cream tastes like the kind my mother and daddy used to make, but it's been tweaked to make a smaller amount since the countertop machines (the kind where the container is stored in the freezer) make 1-1/2 to 2 quarts. And it does not use raw eggs like Mother's old recipe. In current day cooking "rules" raw eggs are a no-no.

PEACH ICE CREAM (no eggs)

1 (14-oz) sweetened condensed milk (like Eagle Brand)
1 (12-oz) can evaporated milk
1-1/4 cups whole milk (I have also used low-fat but it's not as creamy)
about 1 cup of cut up ripe peaches (I used 2 large peaches) 
2 tablespoons sugar
a good squeeze of fresh lemon juice (about a tablespoon)
1-1/2 teaspoons vanilla
pinch of salt

Use a whisk to mix the 3 milks together thoroughly and chill for 30 minutes. (I just put my cans of milk in the refrigerator ahead of time.) Mash up peaches with fork until there are no big pieces left. Stir in sugar, lemon juice, vanilla and salt. Mix peaches with milk mixture. Pour into ice cream maker and freeze according to appliance directions. Freeze until done, about 20-25 minutes.

At this point, it's very soft. You can place the ice cream container (removed from maker) into the freezer for about 15 minutes to firm it up a bit. Or, transfer to a plastic container and freeze it.


These early variety peaches never got very soft, so I ended up using my handheld immersion blender on the peach/sugar mixture. Mashing with a fork wasn't happening.

Don't like peach ice cream? Use this recipe and change the fruit. (We love the strawberry version.) Or, double the amount of vanilla if you want to make vanilla ice cream. Cookies & Cream also works. Just add your crumbled Oreos after the vanilla ice cream mixture is about half frozen. These ice cream makers have an open top so you can do that while it's running. 

Google "no cook ice cream" for other flavors. Although I haven't tried increasing the amounts to make a big churn of ice cream, I don't know why that wouldn't work.

When Mommy and J-Daddy are in residence at the farm, he shows off his cooking skills with gourmet meals each night. (I hear that he loves my big kitchen.) And we get to enjoy many of his creations. That's a major treat. Looking forward to seeing what he makes this time. 

Maybe it will involve blueberries. I picked these right before we headed to the lake. The first bowl full from our dwarf blueberry bushes. Little Sister and Baby Girl are in charge of keeping them picked now.

And now....back to my coffee. "Daddy-O! Would you bring me a little more, please?"


Thursday, April 29, 2021

Homemade Strawberry Ice Cream

Stewart Farms

Not everyone is as lucky as we are. When strawberries are in season, we just head down the road to a neighbor's farm and buy some. It's a U-pick farm, but for those of us not looking for a farm experience they usually have some gallons ready picked. So I can grab a bucket and head home. Where we live, it's miles for us to go do anything. Unless you're talking about strawberries. (Or blueberries—another neighbor grows those.) With this first bucket, I made strawberry shortcake. And then my favorite—strawberry ice cream. 

I'm just going to repost the blog from 2016 with this super easy recipe. It's written for a    1-1/2 quart ice cream maker. Adjust amounts if you want more. Goodness, how that baby has grown! 

This time I only had a small can (5-oz) of evaporated milk in the pantry. I made up the difference with heavy cream. I couldn't tell any difference. I also had an issue with my little countertop ice cream maker. Might have something to do with the fact that it's over 20 years old. Whatever the problem was, the ice cream didn't freeze. So I poured the mixture into an oblong container (just like the one pictured) and popped it into the freezer. I stirred it several times as it was freezing. If you don't stir, you will have a solid frozen hard block. Stirring mixes some air into it, just like the dasher of a churn does. That makes it the ice cream texture you're after. Although homemade still freezes harder than commercial ice cream. We've been making our strawberry ice cream last as long as possible, dishing up small servings. It's delicious. So hard to make myself not scoop up that second bowl.

Now, let's time travel back to May of 2016...

~~~~~~~~~~~~~~~~~~~~~~~

STRAWBERRY ICE CREAM

Strawberry Ice Cream (no eggs)

I had an ulterior motive when I brought strawberries to Georgia. I knew they would have to use them quickly and I would be here to taste all the recipes. 

 
Mommy made ice cream yesterday with part of her berries. If you have one of those 1-1/2 quart ice cream makers (the kind where you freeze the container before using--no ice required) in your kitchen, strawberry season is a good time to pull it out. Those tend to be forgotten appliances, but they really do work and making homemade ice cream is easy enough for a weeknight dessert. 


Everyone enjoyed the ice cream but maybe Baby Girl loved it most. She didn't waste a drop. I like her style. And when she was done, she said, "Mimi, it's tasty!" I totally agree. 

 
This ice cream tastes just like the kind my mother made--but it doesn't call for raw eggs. In this day and time, that's safer. 

STRAWBERRY ICE CREAM (no eggs)

1 (14-oz) sweetened condensed milk, such as Eagle Brand
1 (12-oz) can evaporated milk
1-1/4 cups fresh milk
about 1 cup cut up strawberries 
2 tablespoons sugar
a good squeeze fresh lemon juice (about 1 tbsp)
pinch of salt
1-1/2 teaspoons vanilla

Sprinkle sugar over cut up berries. Stir and add in lemon juice and salt. Let stand while mixing milks. Mash slightly. 

Using a whisk, blend the 3 milks together thoroughly and chill for 30 minutes. (I like to chill the canned milks first.)

Mix strawberries and milk mixture. Pour into ice cream maker and freeze according to appliance directions. Freeze until done, about 20-25 minutes. 


While it might change the texture a little, you can use low-fat or fat-free milk for any or all of the milks called for. Just remember, lower fat content means it won't be as creamy. But it will still be "tasty" as Baby Girl says. 


Tuesday, July 28, 2020

Cool ~ Creamy ~ Lemony


This lemon ice cream might be the best recipe I've ever posted. (Did I, by any chance, also say this about the Jordan Marsh blueberry muffins?) And it is possibly the easiest. Four ingredients whisked together, poured into a pan and popped in the freezer. It's a perfect mix of tart and sweet. It only makes three cups but it's very rich, so tiny servings are appropriate. 

A friend just called to ask a question as she was stirring this up. I had shared the recipe with her before I got it posted to the blog. She also said her husband asked what she was making and when she read him the ingredients he said, "That doesn't sound good to me." One of my son-in-laws—the one who doesn't like citrus— would agree. (UPDATE: Turns out my friend's husband loved this!) 

I forget that there are people in the world who do not like lemon. So when I say "best" what I really mean is "the best" to me.  And it also might mean what's "best" to me on that particular day. No judgement if you don't agree. Differences are what make us more interesting.

I'll quit telling you about this ice cream now...other than to say "go make some!"

NO-CHURN LEMON ICE CREAM

1 tablespoon lemon zest
1/4 cup fresh lemon juice (about 2 lemons) 
1 cup sugar
1/8 teaspoon fine sea salt
1 cup whole milk
1 cup heavy cream

Whisk together lemon zest, lemon juice, sugar and salt in a large bowl. In a measuring cup whisk together milk and heavy cream. Slowly pour into lemon/sugar mixture, whisking constantly. Continue whisking until sugar is completely dissolved, about 2 minutes.

Pour into 8-inch square metal pan. Cover tightly with foil and freeze for 2-3 hours until frozen around the edges and soft in the middle. Take out of freezer and stir well. Cover with foil and freeze again for about an hour. Scoop into chilled bowls to serve.


This recipe came from Dori Sanders, an 85-year-old African-American Southern author who lives not so very far from where I live. Her first novel, Clover, was a best seller in 1990. Such a good story. It would still be a good read decades later. (It's on my bookshelf. Might be time for a re-read.) She is also a food writer and peach farmer. Her own life is quite a story, too. I haven't read her cookbook where you'll find this ice cream recipe. But I just added it to my online shopping cart.


Monday, June 22, 2020

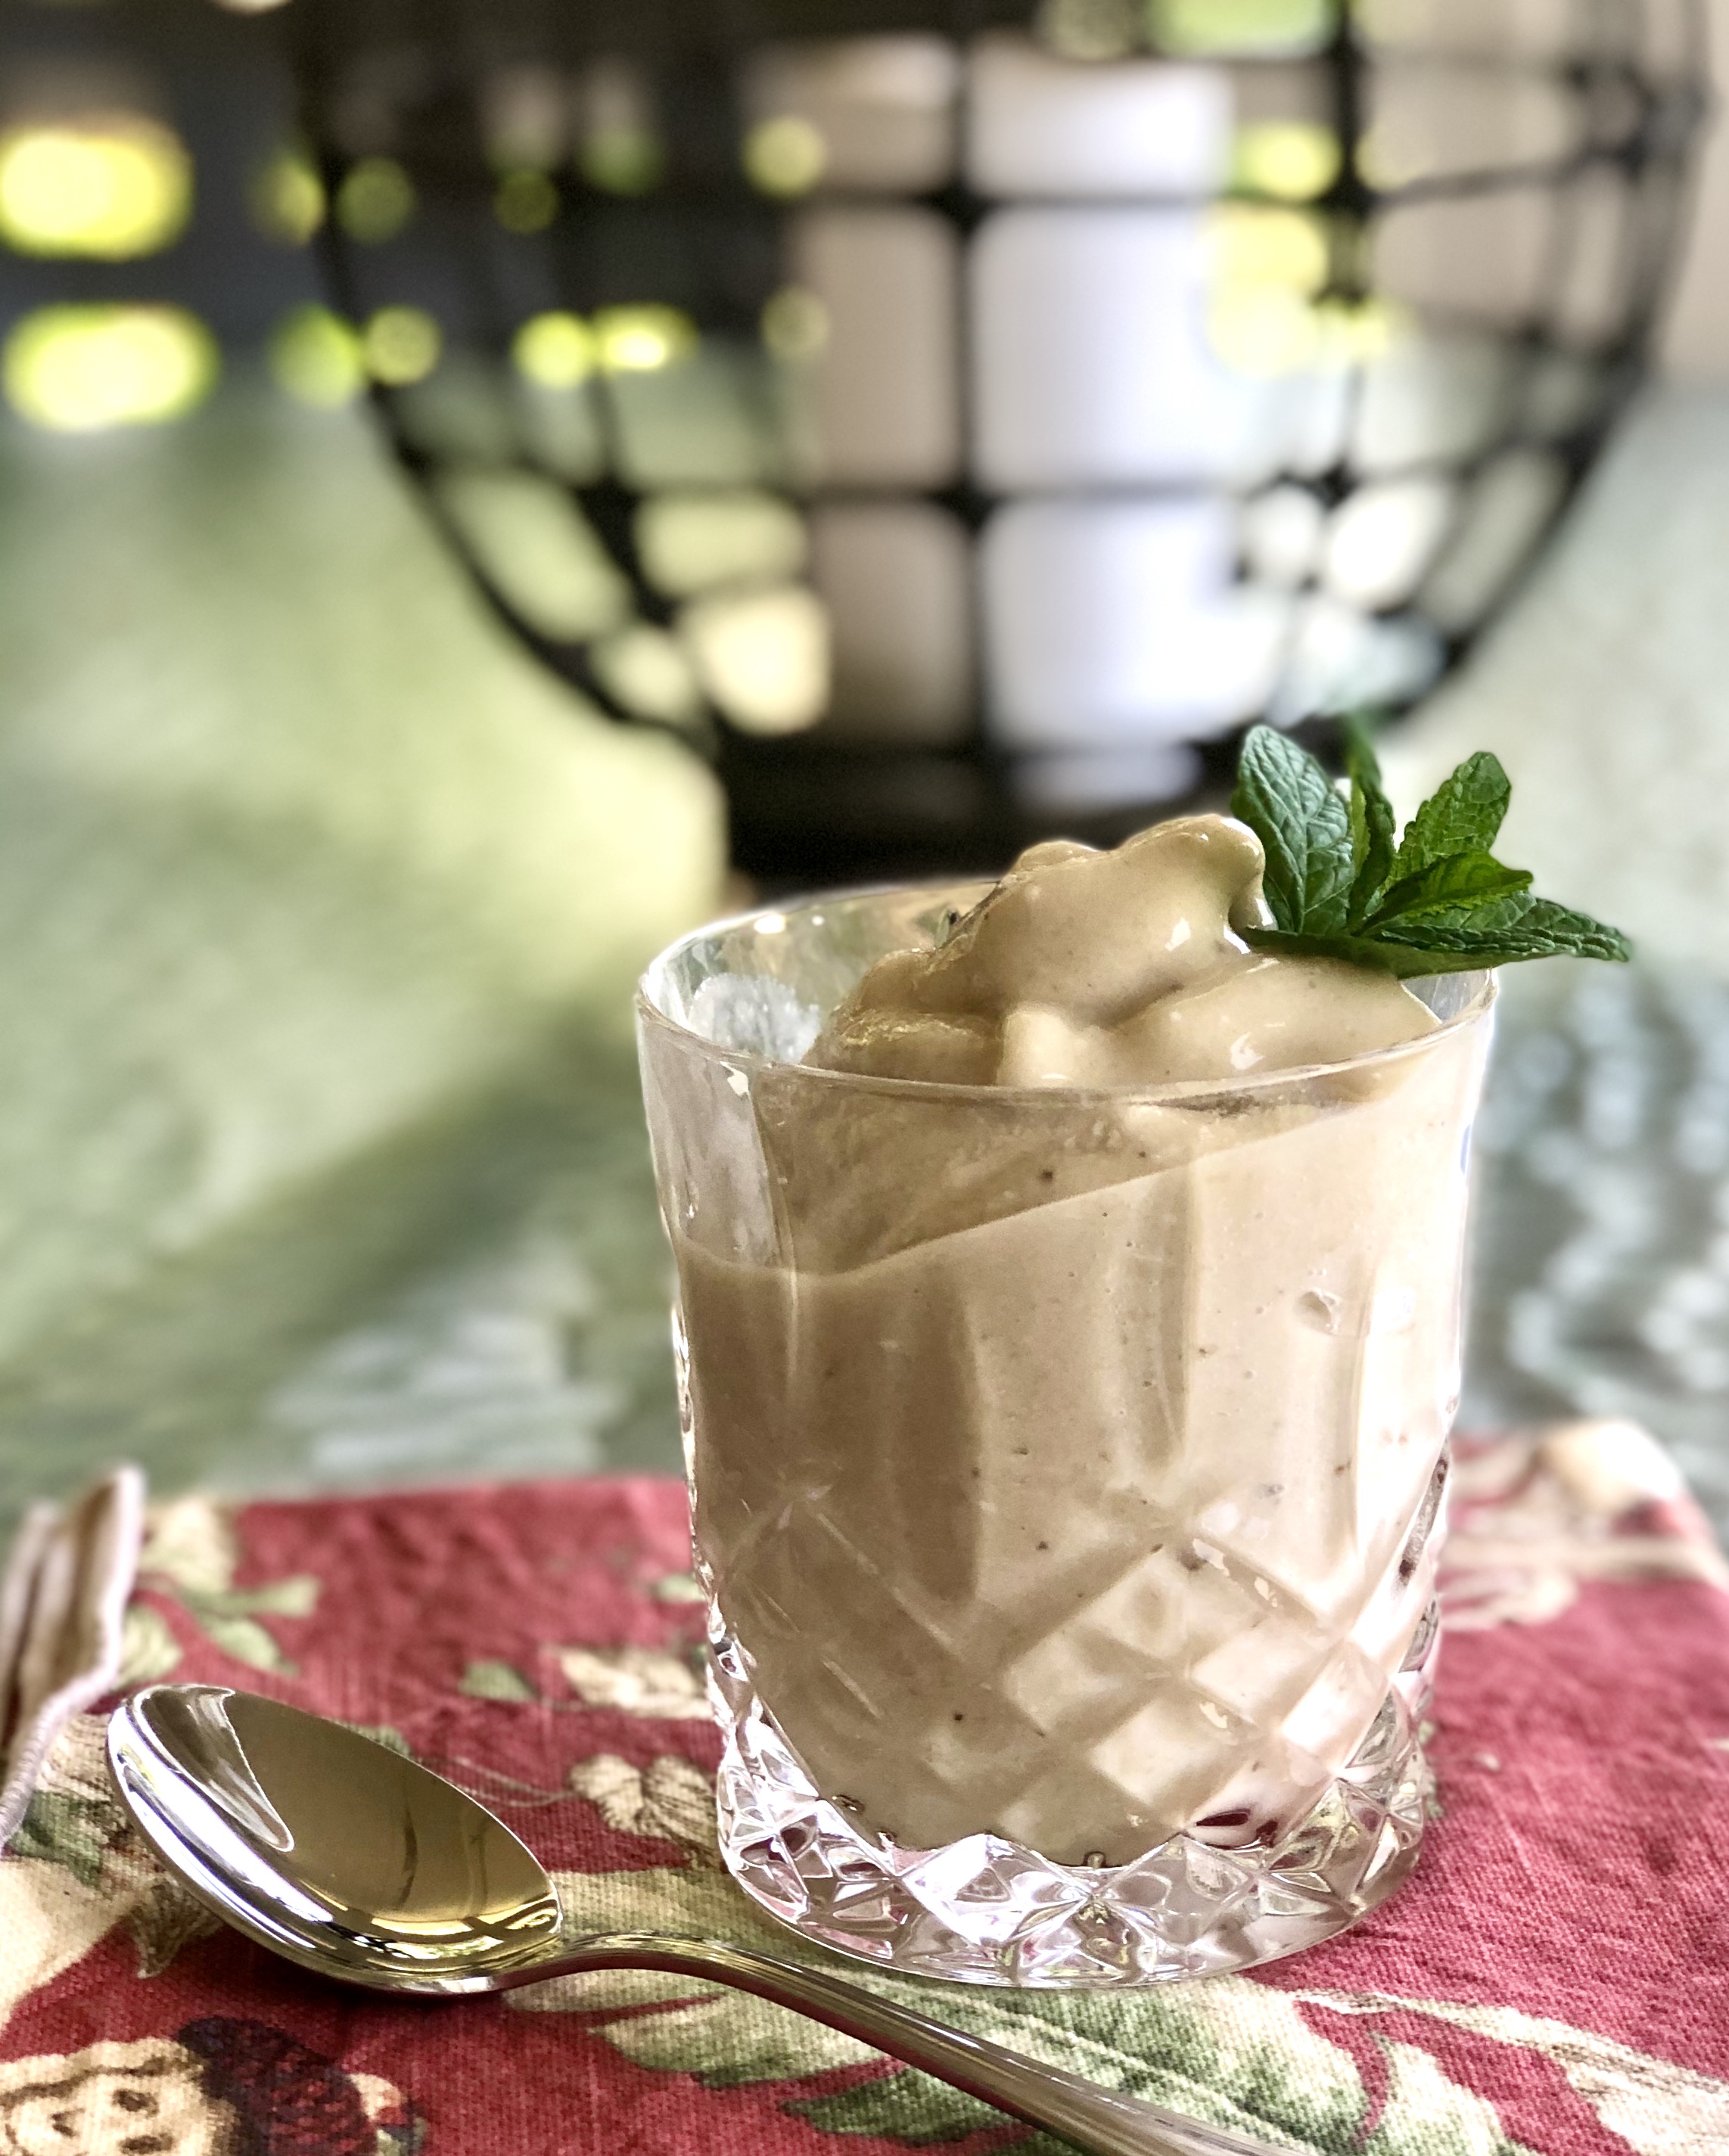
Banana "Nice" Cream

BANANA "NICE" CREAM

I've been making something similar to this since long before I was married. But I just discovered that this stuff has an actual name—"nice" cream. It's nothing but frozen bananas and something to make it blend. Somewhere deep in an old recipe box is the recipe to make this frozen dessert using frozen bananas and apple juice.

Right now as we've focused on making even healthier food choices, I saw a version that used fat-free Greek yogurt, your choice of fat-free milk, and frozen bananas. Yesterday for a Father's Day treat I whipped up another batch. What a terrific way to use up those last three overripe bananas! (Why is it always three?) I also baked banana bread again this week from the ripe bananas on the kitchen counter. But I had a small container of banana slices in the freezer, too. Making this healthy dessert instead of more banana bread (which we love) was a winning choice.

One change I've noticed in my "still in quarantine" cooking is that I am using fewer true recipes. I'm just cooking. Understand that I have many, many years of experience in the kitchen, but with some basic understanding of cooking all of you can do this, too. I've been watching Jamie Oliver and Al Roker (among others) on Instagram as they show what they are doing in the kitchen. No recipes. They have cooked foods simple enough that you can watch them and then repeat in your kitchen. And it frees you to substitute and make changes to suit your family. This year I've looked more for food ideas than recipes.

When I'm doing this kind of cooking I sometimes ask myself, "What's the worst thing that can happen?" When I was giving Little Sister a FaceTime omelet lesson, I told her that the worst thing that could happen was that she would end up with scrambled eggs instead of an omelet. With this faux banana ice cream, the worst is that you might have a banana milk shake instead of a soft-serve frozen dessert. Sounds pretty yummy either way.

This is not really a recipe, but here's roughly what I did... 

BANANA "NICE" CREAM
       ...makes 2-3 servings

3 overripe bananas, sliced
juice of 1 lime
1 spoonful of fat-free Greek Yogurt
unsweetened vanilla almond milk

Slice the bananas and toss in the lime juice. Freeze. To make these easier to blend, freeze in a single layer then place in a freezer container or freezer bag. This keeps them in separate slices. Not a frozen clump.

To make the frozen dessert, put a big spoonful of yogurt in the blender (I use a Vitamix,) toss in the frozen banana slices and pour in some almond milk. You will need enough milk to let the bananas blend. As more as you need it. Start blender on a slow speed and increase slowly. Stop and push bananas down in the blender as needed to continue blending. Process until it reaches a soft serve consistency.


Wednesday, January 17, 2018

Snow Day Soup Day


What a difference a day makes! When I drove home from Atlanta yesterday, it was 50 degrees with the sun shining as I zipped up the highway. But the meteorologists said snow was coming. Most of the time when they say the word "snow," it is accompanied by words like "slight possibility" and "slim chance" and "if all the conditions are right." We don't get snow very often.

But this morning, those conditions were right and beautiful snow fell for hours. I imagine most of it will be gone tomorrow. By the weekend, it warms up and we'll only need to put on a sweater to go outside. So you can understand why snow is a cause for celebration for most of us. It lasts just long enough for a few pretty pictures. There might also be a little sledding and maybe a snowman if you have kids. And then it's gone.


Yes, they do clear the major roads, but here in the country, we just wait for it to melt. The cows, on the other hand, do not wait. Daddy-O headed out on the orange tractor this morning as the snow was beginning to accumulate and fed them. They were happy to see him this morning. Looks like we ended up with about 2 inches. That's a significant snow for us. Who knows how long before we will see another one.


When he got back in from chores, Daddy-O asked several times, "Is it time to make snow ice cream yet?" Not all snows will work for ice cream, but this one was perfect. So before lunch was ready, he brought in a huge bowl of clean snow and I stirred up the ice cream, the same way my mother did it when we were little.


There really are no hard and fast measurements here, but this is a good starting point. Today, we even made a second bowl using condensed milk and vanilla. (Skip the sugar here.) Yes, we had a snow ice cream tasting. But both of us like this old-fashioned version best. 

SNOW ICE CREAM

1 large can chilled* evaporated milk
about 1/3-1/2 cup sugar (or to taste)
about 1 tablespoon vanilla
my largest mixing bowl full of CLEAN snow

When snow is predicted, put the can of milk in the refrigerator so you'll be ready. Stir the sugar into the milk until the sugar dissolves completely. Take your time and make sure you don't feel any sugar granules. Stir in vanilla. Taste and adjust to suit you. Then spoon the snow into the milk mixture and stir. Keep adding snow until it "looks like ice cream." It will be soft, so eat it immediately. 

*The milk is chilled so it doesn't melt the snow.


Now while I was stirring up a bowl of snow and milk, I also had a pot of soup going right behind me. For once, we had our dessert (before it melted) before we had our lunch. An upside-down-day as the little granddaughters might say!

The soup is written for an Instant Pot, but you could easily do it in a slow cooker or on the stovetop, too. (You might need a little more water for stovetop cooking, since some liquid will evaporate.) It was a quick and easy soup. In the Instant Pot, using frozen corn and frozen chicken breasts, it took 45 minutes from beginning to end, Not exactly an "instant' but still a very quick way to make lunch. And once the ingredients were in the pot and the lid was closed, I didn't have to look at it, stir it or touch it in any fashion until it was done. THAT'S what makes the Instant Pot useful.


CHICKEN TACO SOUP (Instant Pot) 
        ...recipe from SlapDashMom.com (check her site for other good recipes)

1 small onion, chopped
1 (15-oz) can black beans, drained
1 (15-oz) can light red kidney beans, drained
1 (8-oz) can tomato sauce
10-oz bag frozen corn
2 (10-oz) cans Rotel tomatoes (I used Mild)
1 packet taco seasoning (I used mild, low-sodium)
1 teaspoon cumin
1 teaspoon chili powder
2 boneless, skinless chicken breasts (fresh or frozen)
1/2 cup water

Place all ingredients into pot. Put lid on, close and set vent to "seal." Use manual button and set to 8 minutes. Let   "natural release" for 10 minutes. Then release remaining pressure. Remove chicken and shred with two forks. Add shredded chicken back into soup. Serve. 

[If you are doing Weight Watchers, this soup is ZERO points 
on the new Freestyle plan,according to SlapDashMom.]


Last week I bought a bag of individually wrapped chicken breasts on sale and had popped them in the freezer. I used two of those small breasts for this soup. And I put them into the pot FROZEN. No other changes to the recipe. I'm sure it took longer to come to pressure, but that's the only difference. The cooking time remains teh same. From closing the lid to serving the soup took about 45 minutes. It took 25 minutes to come to pressure. Another time I'll try it with fresh chicken and see how much faster that time it.

Okay, I'm going back to watch this last round of snow falling this afternoon. It could be years before we see it again.


Thursday, May 5, 2016

Strawberry Ice Cream

Strawberry Ice Cream (no eggs)

I had an ulterior motive when I brought strawberries to Georgia. I knew they would have to use them quickly and I would be here to taste all the recipes. 

 
Mommy made ice cream yesterday with part of her berries. If you have one of those 1-1/2 quart ice cream makers (the kind where you freeze the container before using--no ice required) in your kitchen, strawberry season is a good time to pull it out. Those tend to be forgotten appliances, but they really do work and making homemade ice cream is easy enough for a weeknight dessert. 


Everyone enjoyed the ice cream but maybe Baby Girl loved it most. She didn't waste a drop. I like her style. And when she was done, she said, "Mimi, it's tasty!" I totally agree. 

 
This ice cream tastes just like the kind my mother made--but it doesn't call for raw eggs. In this day and time, that's safer. 

STRAWBERRY ICE CREAM (no eggs)

1 (14-oz) sweetened condensed milk, such as Eagle Brand
1 (12-oz) can evaporated milk
1-1/4 cups fresh milk
about 1 cup cut up strawberries 
2 tablespoons sugar
a good squeeze fresh lemon juice (about 1 tbsp)
pinch of salt
1-1/2 teaspoons vanilla

Sprinkle sugar over cut up berries. Stir and add in lemon juice and salt. Let stand while mixing milks. Mash slightly. 

Using a whisk, blend the 3 milks together thoroughly and chill for 30 minutes. (I like to chill the canned milks first.)

Mix strawberries and milk mixture. Pour into ice cream maker and freeze according to appliance directions. Freeze until done, about 20-25 minutes. 


While it might change the texture a little, you can use low-fat or fat-free milk for any or all of the milks called for. Just remember, lower fat content means it won't be as creamy. But it will still be "tasty" as Baby Girl says. 


Thursday, July 30, 2015

We All Scream For Ice Cream

Homemade Peach Ice Cream

Ice cream. One of my favorite treats. I was sad to discover last year that one of my favorite store bought ice creams is no longer "ice cream." The flavor I liked now says "frozen dairy dessert." I don't even want to know what that means. (Same brand's vanilla still is labeled "ice cream.") Sometimes it's better to make your own.


I grew up in an ice cream making family. And our much loved old recipe was made with raw eggs. Not a concern back then, but I am hesitant to use them now. I have substituted Egg Beaters, which is pasteurized, but still raw in a sense. But I found a new recipe! No eggs. I do know that you can make a cooked custard base and then chill it, but that is work. And it doesn't taste like our old recipe.


My plan was to use the online recipe as a starting place but change it to be more like our family recipe. It was a happy accident when I misread the recipe and used a large can of evaporated milk instead of the small one. It was perfect! It tastes like the ice cream I grew up with.

I love my little 1-1/2 quart ice cream maker. I have room in my freezer to keep the inner container ready, so it's easy to pull it out, pour in the ingredients and flip the switch. No crushed ice. No ice cream salt. Not much mess. In about 20-30 minutes, it's ready—if you like it soft-serve style. If you want to scoop it up, put it in the freezer after it's done.

HOMEMADE PEACH ICE CREAM

1 (14-oz) sweetened condensed milk (like Eagle Brand)
1 (12-oz) can evaporated milk
1-1/4 cups milk (I only had 1%)
about 1 cup of cut up ripe peaches (I used 2 large peaches)
2 tablespoons sugar
a good squeeze of fresh lemon juice (about a tablespoon)
pinch of salt
1-1/2 teaspoons vanilla

Use a whisk to mix the 3 milks together thoroughly and chill for 30 minutes. (I just put my cans of milk in the refrigerator ahead of time.)

Mash up peaches with fork until there are no big pieces left. Stir in sugar, lemon juice and salt. Mix peaches with milk mixture.

Pour into ice cream maker and freeze according to appliance directions.
Freeze until done, about 20-25 minutes.


At this point, it's very soft. You can place the ice cream container (removed from maker) into the freezer for about 15 minutes to firm it up a bit. Or, transfer to a plastic container and freeze it.

We enjoyed some of it straight from the maker in it's soft serve version. The next night after it was frozen, we scooped up. It's good both ways.

Don't like peach ice cream? I'm sure you can use this recipe and change the fruit. Or, double the amount of vanilla if you want to make vanilla ice cream. Google "no cook ice cream" for other flavors.


Monday, June 16, 2014

Pie And Ice Cream


Daddy (who is already in another state after a couple of nights here) asked for blueberry pie for dessert yesterday. Of all the pies we've made_peach cobbler, apple pie, chocolate chip pecan pie, peanut butter pie, etc.–he wanted one that neither Mommy or I had ever made. We didn't have a tried-and-true recipe. But it was Father's Day! How could she tell him no? So it was Google to the rescue. Mommy found a recipe with 158 reviews, most of them 5-stars. She figured it would have to be good.

And it was delicious! What we didn't think about was that when you make a blueberry pie, you don't have to peel peaches or apples. This turned out to be super easy in addition to being super delicious. This has been added to our "keeper" recipe list.


The ice cream recipe is the one that my parents used for years and years. I grew up in a family that would make ice cream at the drop of a hat. Ours was usually made with fruit of some sort, but this is the base recipe that the others come from. Again, with no fruit to peel or prepare, it's quick to stir together. It turned out to be a perfect summer dessert.

BLUEBERRY PIE

5 cups fresh blueberries
1 tablespoon lemon juice
1 (15-oz) package refrigerated pie crusts
1 cup sugar
1/2 cup all-purpose flour
1/8 teaspoon salt
1/2 teaspoon cinnamon
2 tablespoons butter
1 large egg, lightly beaten
1 teaspoon sugar

  • Sprinkle berries with lemon juice; set aside.
  • Fit half of pastry in a 9-inch pie plate according to package directions.
  • Combine 1 sugar, flour, salt and cinnamon. Add to berries. Mix well.
  • Pour into pastry shell and dot with butter.
  • Unfold remaining pastry shell on a lightly floured surface; roll gently with rolling pin to remove creases.
  • Place pastry over filling; seal and crimp edges.
  • Cut slits in top of crust to allow steam to escape.
  • Brush top of pastry with beaten egg and sprinkle with 1 tsp. sugar.
  • Bake a 400 degrees for 35 minutes or until golden brown.
  • Cover edges with foil to prevent overbrowning, if necessary.
  • Serve with vanilla ice cream, if desired.


HOMEMADE ICE CREAM (for 4 or 5 quart ice cream churn)

3 (12-oz) cans evaporated milk
2-1/2 cups sugar
Egg Beaters to equal 3 eggs 
2-1/2 tablespoons vanilla
1/2 teaspoon salt
Fresh whole milk

Mix first 4 ingredients.  Stir until sugar is completely dissolved. Pour into 4 or 5-quart ice cream churn container.  Add fresh milk to the “fill” line.  Freeze according to churn directions.


You can use this vanilla recipe and one of these add-ins for other flavors.

For all of the following flavors, use 2 tablespoons vanilla instead of 2-1/2 and add the fruit to the vanilla recipe.

Strawberry, Peach, or Banana--3 to 4 cups fruit, mashed (I stir part of the sugar into the mashed berries or peaches and let it sit until the juices have released)
Peanut Butter---Substitute a 12- oz. jar of peanut butter (regular or crunchy) for fruit.  Leave out eggs.  Mix jar of peanut butter with one can of milk before adding to remaining ingredients.
Cherry---Substitute 2 jars of maraschino cherries and juice for fruit.

Years ago we made ice cream with raw eggs. There are now health concerns about that practice, so I switched to Egg Beaters, which is a pasturized egg product. If you have compromised health, use your own judgement about the Egg Beaters. You might want to look for a recipe that starts with a cooked custard or a recipe with sweetened condensed milk and no eggs. 


Wednesday, February 12, 2014

The Snow Is Following Me


I must have brought the midwestern snow back home with me. I slipped and slid last week in the snow out there as I drove around. Even took a car service to the airport so that Mommy didn't have to get out on the slick roads to get me there. When I got home to the balmy temperature of 32 (it was 7 degrees that day where Mommy lives,) I thought I was done with the real winter stuff. But NOOOooo....Mother Nature had other plans.


We are in the midst of an "historic" and "catastrophic" snow/ice event, says the weatherman. Yes, it has been snowing since yesterday (sleeting now) and it isn't supposed to stop until tomorrow. But we have not had a catastrophe. Let's hope it stays that way. 

We are as well prepared as anyone. I made the mandatory "bread and milk" run on Monday, so the kitchen is stocked. When you live on a farm, preparation is necessary. The cows still have to be fed, regardless of the weather, so Daddy-O has to be able to travel, at least to the other side of the farm. 


But after the chores were done today, we had a little snow fun—in the form of snow ice cream! I make it the same way my mother did. I didn't measure anything but I'll tell you pretty much what I did. If you taste as you go, it will be good.

SNOW ICE CREAM

1 can evaporated milk
about 1/3-1/2 cup sugar (or to taste)
about 1 tablespoon vanilla
my largest mixing bowl full of CLEAN snow

Stir the sugar into the milk until the sugar dissolves completely. Stir in vanilla. Taste and adjust to suit you. Then spoon the snow into the milk mixture and stir. Keep adding snow until it "looks like ice cream." It will be soft, so eat it immediately.

(We set the bowl of leftover snow cream out on the cold porch until we were ready for second helpings.)


Yarn: Malabrigo Sock, (leftover from these socks)
Needles:  Size 6

In between the Midwestern snow and the Southern snow, I squeezed in a couple of days over the weekend at Knit Inn 2014. I taught one class on how to fix knitting mistakes and I took two classes on knitting lace. The last class--the Sunday morning class--was learning lace by knitting these fingerless mitts. Such a fun way to teach a technique! Perfect for the last class of the weekend when everyone is so tired. I finished the first one this afternoon while watching it snow. I'm ready to start the other one tonight and hope to be done before the storm is over.

I was thinking about driving to the beach this weekend to meet up with friends who left yesterday to miss the snow. But at the rate I'm going, it would snow there!