Showing posts with label sheet pan dinner. Show all posts

Monday, October 12, 2020

Lesson From My Kitchen


When Daddy-O went out to pull up the straggly garden plants, he harvested a few vegetables instead. He discovered a handful of green beans ready to be picked. there have not been any for some time. This was their last hoorah. He also cut about 6 pods of okra. And well, those little tomatoes...I'm not sure they will ever stop! I suppose frost will get them eventually.

One thing I've pushed myself to do this strange summer is to cook without a "recipe." You don't always need a recipe, but you do need to know some basic cooking directions. Last week I wanted to do the easiest dinner possible and use up these last garden vegetables. Sheet pan dinners are as easy as they come.

 Instead of looking for a recipe, I looked for cooking times and temps for chicken tenders. I had a package that needed to be cooked pronto. I've done sheet pan veggies many times and I knew how they cooked. I searched "chicken tenders sheet pan meal." And a few actual recipes popped up. I was not interested in anything but the cooking time/temp. 

My preferred temperature for oven roasted vegetables is 425º on the convection setting. They roast quickly and get beautifully browned and crispy. I had also done them at 400º, so I knew that was an option. On a few times, I've roasted things at 450. 

I needed to know about cooking the chicken tenders on a sheet pan. So many recipes. So many temperatures and times. But I did find a recipe for chicken tenders on a sheet pan at 425º, cooked for 20 minutes.That fit perfectly with how I like my veggies. I didn't bother with recipe specifics. I only wanted the basics. Here's what I did...

SHEET PAN CHICKEN TENDER VEGGIE MEAL
  • Preheat oven to 425º. Use convection setting if you have it. Without convection, it might take a little longer.
  • Line a sheet pan with parchment paper. Put sliced/cut vegetables on pan, being careful not to crowd. Drizzle a little olive oil over all veggies and use hands to toss them, making sure all are coated. Sprinkle with house seasoning, OR salt, pepper, garlic powder, OR seasoning of your choice. 
  • Rub a little olive oil on the end of pan reserved for chicken tenders. Season tenders and line them up on one end of sheet pan. Brush with a little olive oil (I used my hands and rubbed some on) and season. 
  • Press panko crumbs on each tender and spray with olive oil spray or other cooking spray. Sprinkle a little more seasoning on top.
  • Roast for 20-25 minutes. Watch carefully near the end and check that you are not overcooking. 20 minutes was fine for this pan. 
  • Cut grape or cherry tomatoes in half. Toss with a little oil. 
  • With 10 minutes remaining, add tomatoes to the pan and sprinkle with seasoning. 

I turned Daddy-O's meager harvest into a feast for two. It was delicious! And knowing this was the last of the garden vegetables (not talking about the tomatoes) made it even sweeter.

Remember, THIS IS NOT A RECIPE. It's a starting pace. An idea. A launching pad. I had green beans and okra and little tomatoes to cook. You might have other vegetables. Next time I won't have this combo from the garden . Or you might have even a different meat. Spend a few minutes to check recipes for times and temps to make your combination work. Make sure your veggies are dry before you roast them. Wash them, of course, but pat them dry, or let them sit out a while to dry.

You are free to use any seasoning you like. The seasoning for Sausages & Veggies w/Mustard Sauce would be good to use if you want to make your own. And there are many good  bought seasoning mixes. Just pick your favorite. Or, go a little crazy and sprinkle an assortment of herbs over the pan! Another time, I might just cook the chicken tenders this way and do side dishes on the stove top. Do not get locked into this as a "recipe." 

This turned out better than I expected. The chicken tenders were browned and crispy. I did not turn them over during cooking. The vegetables were nice and crispy. I did stir them when I took the pan out to add the tomatoes. And 10 minutes was plenty of oven time for those little guys.

Please know...you can do this at a different temperature. Sometimes I roast vegetables at 400º if that works better with the rest of my meal. That will take a little longer. Watch and go by color. I did use a meat thermometer to check the chicken. That's the safest way. If you don't have one, cut a piece open to make sure it's cooked through.


Here is another panful of my most cooked recipe this summer—Grape Tomatoes & Pasta.  It was as good  this weekend as it's been every time I've made it. I've lost count of how many times I've made this during the summer. It's a delicious way to put a dent in the grape tomatoes harvest. And many of my friends have made this and loved it. I know I can buy the tomatoes and the basil in the store all year, but this has been a special recipe for us, knowing the star ingredients came from our back yard.


And here it is for the very last time with our garden tomatoes. It's a little different than usual. Using that same principle above, I used the basic recipe—which really wasn't a recipe—and changed it up to make do with what I had here.

I didn't have any fresh mozzarella. And I did have green peppers from the garden. So this time I sautéed diced peppers and onions a little before adding the tomatoes which I cut in half this time. After I added the cooked spaghetti and stirred it all together. Then I sprinkled shredded mozzarella on top and popped the pan into a 350º oven for about 10 minutes to let the cheese melt. This was so good.

Be brave in the kitchen. Out of an ingredient? See if you can find a reasonable substitute and skip a trip to the store. Or can you leave something out all together? Be brave.


Monday, September 21, 2020

Sheet Pan Sausages & Vegetables with Mustard Sauce


Are you tired of making the same ol' things for dinner? Do you desperately feel the need to make something new? But you really don't want to spend much time in the kitchen? That is how I feel much of the time. I figured this recipe was worth trying after I saw it on Instagram a couple of weeks ago. But I was NOT prepared for how good it would be. And how crazy easy it was. I did not have the exact ingredients of the original. So I used what I had on hand, following the author's cooking directions. This summer has been all about cooking with what you have in your kitchen.

The recipe I'm posting here is my version. And we loved it just like this Please take a minute and read the original. It will give you some ideas to tweak it to suit you. (Follow "thewholecook" on IG for more good ideas.)

The recipe called for fully cooked chicken sausages sliced into circles. I'm sure it meant big sausages. I had a box of fully cooked chicken sausage breakfast links in the freezer. They are so small that I added them to the pan whole—and still frozen.  I actually went back and pulled the box out of the trash after we ate to make a picture of this so I would remember what I used. This was the first time I had tried these sausages. It was another item of an online grocery order that was an experiment. A successful experiment!

For my version of this recipe, I used potatoes. I had a bag of tiny red potatoes in the pantry...so tiny that I didn't even cut them. Except for a couple of the larger ones. (I could have cut regular potatoes into small chunks.) This was delicious. So delicious that I've already made it again. I'm happy that I didn't have the exact ingredients. It could not have tasted better! The sauce was so good that Daddy-O wants to make more to put on other things. 

Mid-afternoon I washed the broccoli, trimmed the florets and left them to dry until it was time to cook. I roast a lot of vegetables. They need to be dry to get that good brown color that is the hallmark of roasting. If there is much water left on them from washing, they will steam.

Then about a half hour before we wanted to eat, I turned the oven on the preheat. While that was heating, I got out the baking sheet, lined it with parchment paper (I like the precut sheets). Then I proceeded with the recipe. Twenty to twenty-five minutes in the oven and everything on the sheet perfectly cooked. If you use different vegetables, you need to think about whether they will all cook at the same time. Or adjust accordingly.

For my gluten-free friends, this meal fits the bill made just as I did it. Here is how I made this:

SHEET PAN SAUSAGES & VEGETABLES with MUSTARD SAUCE

        adapted from The Whole Cook


1 box (10 links) fully cooked chicken maple breakfast sausages

1 or 2 broccoli crowns, cut into florets

1/2 (1.5 lb) bag of tiny red potatoes (or cut larger ones into small chunks)

Olive oil for drizzling

1/4 teaspoon salt

1/4 teaspoon black pepper

1/4 teaspoon garlic powder

1/4 teaspoon dried oregano

1/4 teaspoon dried basil


Easy Mustard Sauce


1/4 cup mayonnaise

1 tablespoon dijon mustard

1 tablespoon water

1/2 teaspoon fresh lemon juice

1/2 teaspoon minced garlic (from a jar)

Pinch of salt


Preheat oven to 425º. Line a large baking sheet with parchment paper. Mix together salt, pepper, garlic, oregano and basil in a small cup.

Spread sausages and vegetables in a single layer on baking sheet. (There is no need to measure veggies. Just make them fit the pan.) Drizzle vegetables with oil and use hands to toss to coat them. (I did not put oil on the sausages.) Sprinkle with seasoning mix. 

Put pan in oven and bake for 20-25 minutes, until everything is done. (I didn't stir or turn anything.) While sheet pan is in the oven, stir together the mustard sauce ingredients. 

Divide sausages and vegetables in individual bowls and drizzle mustard sauce over all and serve.


This recipe probably should feed three people—if one of them is not Daddy-O. But there were two of us here and the only thing left from what you see in the pan was a little bit of broccoli. I did not have any kind of side dish with this and maybe I should have. For us, it was truly a one pan meal.

Remember, you do not want to overcrowd the vegetables in the pan or they will not properly roast. Maybe I could have squeezed a little more on the pan, but not much. I'm adding the chicken breakfast links to my next online grocery order. I might even get two boxes this time. 

My friend Jane asked me ages ago why I use minced garlic from a jar so much. I told her it was because it was easy. Now I can give her another reason. I made this mustard sauce two days after I made tzatziki sauce with fresh minced garlic. The taste of the raw garlic was a bit much...as in the taste lingered in my mouth all day. 

Jane is right. It's not hard to mince fresh garlic. And for cooking, it does give you more flavor. But when it's stirred into something that doesn't need cooking, the jarred kind takes the edge off of it. No tasting garlic for hours. Everything has it's best use. 


Wednesday, June 3, 2020

Cooking "Freestyle"

With that is happening in the world, it feels a little out of sync to write about cooking at the moment. Sam Sifton, NY Times food writer, says "...And yet it is not. It is one thing you can do that can make someone else’s life a little better, if only for a few minutes." He is correct. Cook your food. You need to keep people fed. Share your food. It says you care. Choose good food. Keep your family healthy. We do what we can. 

Sheet Pan Supper
chicken tenders, roasted green beans, roasted potatoes & carrots

You know...you don't HAVE to have a recipe. A recipe leads to thinking "I can't make that. I don't have all the ingredients." I've been cooking for a very long time. Over half a century. (Sounds awful when I say it that way) and I'm okay with "just cooking." But if you are a newer cook, you might depend on recipes to tell you every step. You only need some of the basic parts of a recipe, then you can cook with what you have on hand. You can cook freestyle. Let me help you a little.

We were at the lake for the weekend and I made an easy dinner in the oven. I figured out the temps and times so that I could put everything in the oven at one time. My first thought was to cook it all on one sheet pan. But after looking at the ingredients, I realized it wasn't going to fit. My pan at the lake is a little smaller than the one at home. So I checked to see if I could put two pans in the oven at the same time. Yay! A 9x13 pan and my cookie sheet fit side by side on one rack. 

The potatoes cook at 425º for 35 minutes.  (The time and temp are from the Lipton Onion Soup recipe on the box, but I used salt & pepper, garlic powder and dry minced onion to season.) That is also the temperature I use most often to roast vegetables, like the beans. I found a recipe online that said chicken tenders can cook in the oven at 425º for 25 minutes. That's all I needed to know.

The potatoes got a head start in one pan, then the chicken and beans joined them. Then I watched. And I checked them. This is the part newer cooks don't want to hear—"It's done when it's done."  

Trust yourself to see that it's done. Stick a fork in the potatoes to see if they are tender. Did you cut your potatoes bigger than I did? Then yours might take longer. Are your chicken tenders on the small side? They may be done a little sooner.   It's done when it's done. If something gets done faster, take it out of the oven sooner. You could take the beans or the chicken off the pan if one is done before the other and put the pan back to finish cooking. You are the boss of your kitchen.

I am writing this down for future reference. It's nice to have the times figured out. And it was delicious.

SHEET PAN CHICKEN TENDERS DINNER

potatoes and carrots, peeled and cut into chunks
1-2 tablespoons of olive oil
seasonings of your choice (I used S&P, garlic powder, dry minced onion)

1-lb. package of chicken tenders
a good handful of fresh green beans, trimmed
a drizzle of olive oil for the beans

Seasoning mix for the chicken: (I didn't use all of this for 1 lb. of tenders)
1 teaspoon smoked paprika
1 teaspoon garlic powder
1 teaspoon oregano 
1/2 teaspoon salt
ground black pepper, to taste

Preheat oven to 425º. For easy clean up, line pans with foil. 
Toss potatoes and carrots with oil and season them. Spread them in a single layer in a 9x13-inch pan. Put in oven and set timer for 35 minutes.

While the potatoes are cooking, spray chicken tenders with cooking spray (to make the rub stick) and sprinkle seasoning mix over both sides. Spray lined baking sheet with cooking spray and place tenders at one end of the pan. Toss the green beans with a bit of oil, season and spread them on the other end of the baking sheet. 

When the potatoes have cooked for 10 minutes, slide the baking sheet in the oven and continue cooking for the remaining time.


For the record, I have also roasted vegetables at 375º and at 400º. It depends on what else is cooking in the oven. And for my oven fries, I use 450º. Changing the temperature will change the time. 

If you are on Facebook or Instagram, check out Jamie Oliver and watch him cook. Always healthy. Usually simple family dishes. No recipes with exact measurements. Just watch him put together a simple dish. It helps get your cooking juices flowing.


Sunday, March 4, 2018

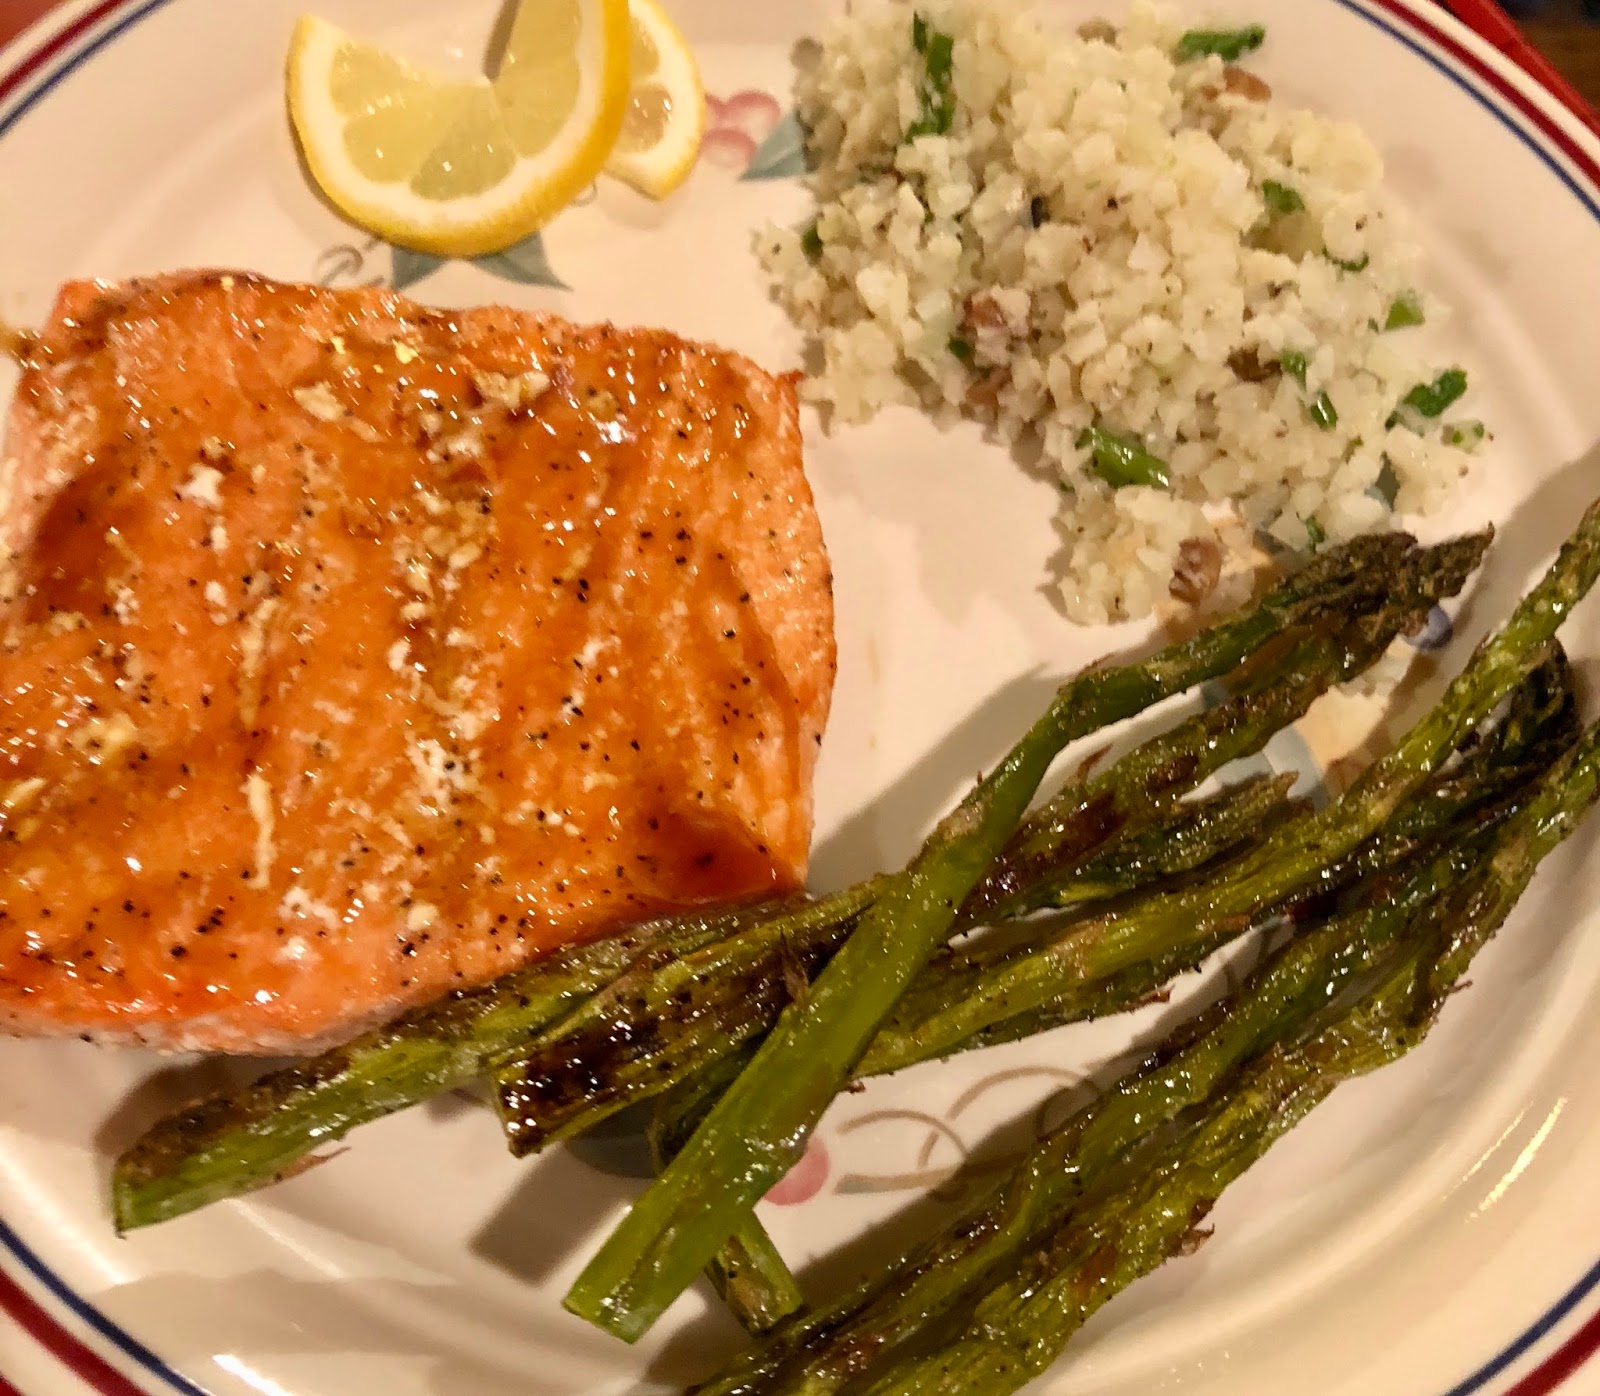
Sheet Pan Teriyaki Salmon with Asparagus


I have been staying the course for the last few weeks. Working diligently on the knitting that has a deadline. I am inches away from the finish. If there had not been the need to "knit backwards" a couple of times, I would be really near the end. But unknitting is part of the process. No "it's close enough" this time. I want this to be done correctly because this is a special project. So I take out stitches when I need to and reknit them.

Now, even though I've knitted lots every day, I cannot sit still for too long at a time because it's bad for my back, bad for my hands, and bad for my concentration. So during these knitting weeks, I've taken frequent breaks. To do laundry. To clean house. To declutter. Clearing away the cobwebs in the corners has the added benefit of clearing away cobwebs in my head.

For the last couple of years, I've been up and down the highway many times, never staying home for many weeks in a row. But I've only been gone a couple of days since Christmas. And it's March already! Because I've spent several weeks in a row here at home, I've noticed things that I've conveniently ignored up until now.

These last few weeks I've cleared bookshelves. Emptied drawers. Dusted corners. Cleaned closets. Thrown away. Given away. And I hate to admit it but I finally put away the last Christmas decorations. The house feels like it can breathe again. I imagine I could go through the same shelves and drawers and cabinets and do it all over again and find more things to eliminate. But this is a good start.

Of course I've cooked. We have to eat. But I've looked for quick, easy meals. I didn't want to spend lots of time cleaning up after supper either. One pot meals. Sheet pan dinners. Instant pot cooking. It's all good.

Last week I borrowed an idea from daughter Jessica. I followed her directions but used what I had on hand here to cook salmon in the oven. (Check out her blog for many good healthy recipes. Lots of Whole30 things, too.)

SHEET PAN TERIYAKI SALMON with ASPARAGUS

2 salmon filets (I used frozen filets, thawed overnight in fridge)
1/2 bunch fresh asparagus, washed & trimmed
olive oil
*house seasoning (or use a mix of salt, pepper, garlic powder)
bottled teriyaki sauce

Preheat oven to 425º.

Line a baking sheet with parchment paper for easy clean up. Place asparagus on baking sheet. (For best results, be sure your asparagus is dry before you roast it.) Drizzle a little olive oil over vegetables. Toss to coat. Sprinkle with house seasoning. Arrange in single layer on one end of pan. Roast for 10 minutes.

Take pan from oven, turn asparagus over. Put salmon filets on other end of pan. Drizzle olive oil over filets. Sprinkle with house seasoning. Put pan back in oven and continue roasting for another 15 minutes, or until salmon is done. Brush salmon with teriyaki sauce when it comes out of the oven. (Next time I think I'll brush some on a few minutes before it's done.)


Bam! Supper is served. To finish out the plate, I zapped a bag of frozen Green Giant cauliflower risotto medley. Five minutes in the microwave and a minute to rest and it was ready. Y'all...a one cup serving of this risotto has 20 calories. A cup of white rice has 206 calories. Brown rice has 216. And we thought the riced cauliflower was good. Good enough that I'll be sure to keep some on hand.

~~~~~~

I always keep a jar of house seasoning on the shelf. Sometimes I make a big batch. Most times I make it in this smaller proportion.

 *House Seasoning:  
1/4 cup salt 
1 tbsp. black pepper
1 tbsp. garlic powder

Mix well. Store in an air-tight container, such as an empty spice bottle or small jar. 


Saturday, April 2, 2016

Saturday Sheet Pan Dinner

 
Southern Living has been part of down South family life for a long time. (They just published their 50th anniversary edition of the magazine.) When we cleared out this house several years ago before our big remodel, we found several hard bound "Southern Living Annual Recipes" from the 1970s that had belonged to my mother-in-law. So it is not a surprise that both of my daughters check out the recipes each month in the latest magazine.


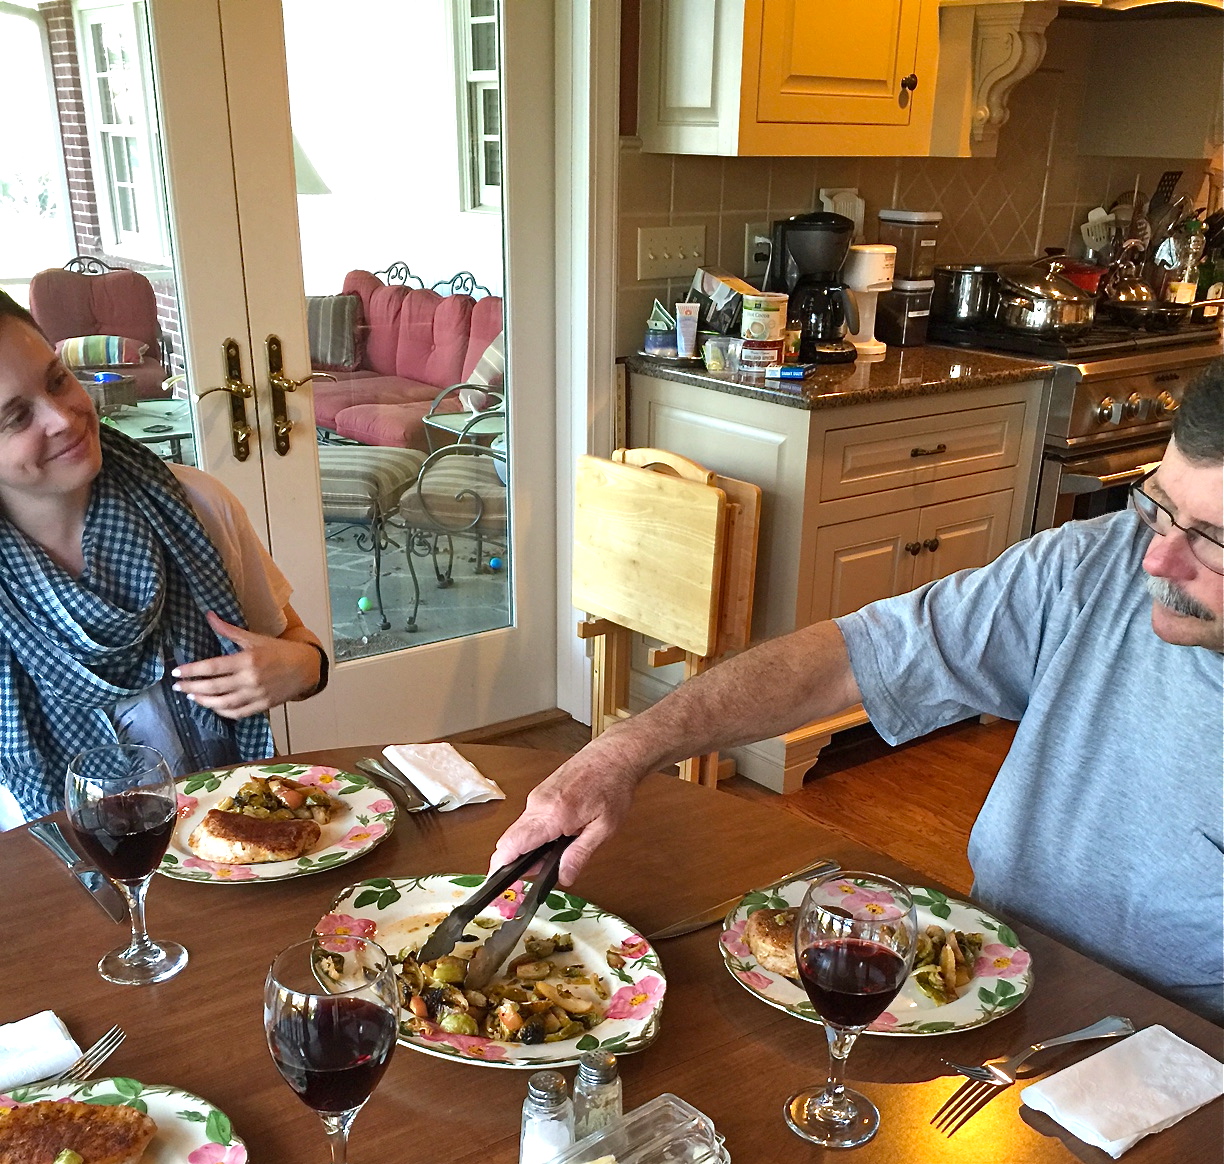
Jessica was home for the weekend and volunteered to cook our dinner on Saturday evening. Of course, I said, "Yes!" I was busy packing for a few days away at a knitting retreat. I was happy to turn the kitchen over to her. She told me that she had carried the January edition of Southern Living in her work tote bag for months now, waiting to try one of the sheet pan dinners featured in that copy. After mother/daughter manicures this morning, we stopped at the local grocery store and found all she needed for supper.


She used boneless pork chops—that's what our store had—and adjusted the cooking time a little. And we only needed three chops. Otherwise, there was no change to the recipe. This was so delicious. The flavors might be reminiscent of winter. After all, this was a January recipe. But we thoroughly enjoyed them in April.


Don't let the long list of ingredients scare you off. It's mostly the rub for the pork chops. You could measure those ahead (minus the fresh rosemary) and make it easier at cooking time.
 
PORK CHOPS WITH ROASTED BRUSSELS SPROUTS AND APPLES

1 teaspoon paprika
1 teaspoon chili powder
1 teaspoon garlic salt
1/8 teaspoon ground red pepper
1/8 teaspoon ground cinnamon  
3 tablespoons light brown sugar, divided
2 teaspoons finely chopped fresh rosemary, divided
1 teaspoon kosher salt, divided
1/2 teaspoon freshly ground black pepper, divided
4 (1-inch-thick) bone-in, center-cut pork chops
3 tablespoons, plus 2 tsp. olive oil, divided
3 tablespoons apple cider vinegar
1 Gala apple (8 to 9 oz.), cut into 1/2-inch wedges
1 pound fresh Brussels sprouts, trimmed and cut in half (quarters if they are really large)
Vegetable cooking spray

Preheat oven to 425°. Stir together first 5 ingredients, 1 Tbsp. brown sugar, 1 tsp. rosemary, 1/2 tsp. salt, and 1/4 tsp. black pepper in a small bowl. Rub each pork chop with 1/2 tsp. olive oil; rub both sides of each pork chop with brown sugar mixture (about 2 tsp. on each chop).

Whisk together apple cider vinegar and remaining 2 Tbsp. brown sugar, 1 tsp. rosemary, 1/2 tsp. salt, and 1/4 tsp. black pepper in a small bowl; slowly whisk in remaining 3 Tbsp. olive oil until blended. Place apples, Brussels sprouts, and 1/4 cup vinegar mixture in a large bowl, and toss to coat.

Place pork chops in center of a lightly greased (with cooking spray) heavy-duty aluminum foil-lined sheet pan; place apple mixture around pork chops.

Bake at 425° for 12 minutes; turn pork chops over, and bake 10 to 14 minutes more or until a meat thermometer inserted in thickest portion registers 145°(medium rare) - 160°(medium.) Transfer pork chops to a serving platter, and cover with foil to keep warm. Stir apple mixture in sheet pan, and spread into an even layer.

Increase oven temperature to broil, and broil apple mixture 3 to 4 minutes or until browned and slightly charred. Transfer apple mixture to a medium bowl. Toss together apple mixture and remaining vinegar mixture. Season with kosher salt, and serve with pork chops.


Thank you, Jessica, for a delicious meal!