Monday, December 16, 2019

Easy Hot Fudge Sauce

Hot Fudge Sauce

Need a dessert in a hurry during this busy season? You can certainly dash to the store or bakery and purchase something. And sometimes that is the very best option. Or....you can make hot fudge sauce to spoon over bought ice cream. Sort of a compromise. A little bit homemade if that makes you feel better. That's exactly what I did for our book club supper last week. 

This recipe came from Bon Appétit magazine many long years ago. And it has never failed me. It's been quite some time since a made it. But if you have the ingredients on hand—mostly staples—it can be ready in a jiffy.


Four ingredients if you don't count the water. And about ten minutes to prepare. It's a recipe worth having during this busy holiday season. It's also good in the summer time when it's hot out and everyone wants ice cream.


A few minutes of stirring and the mixture goes from lumpy and bubbly to silky smooth. You can store the sauce in the refrigerator until you're ready to use it. If it's for treats at your own house, you can reheat a small amount in the microwave for a single serve portion.


I can never remember how many squares of chocolate make one ounce. I know. I know. I could do the math. Or, since it's a 4-oz box, I could break the chocolate bar into four even pieces and use three of them. But it's also written on the package. If you can find it. It's kind of like "Where's Waldo?" There is so much written on the back of the box, it took me forever to see it. 

If you serve it too hot, it melts over the ice cream.

Since I had not made it in a couple of years, I needed a taster to make sure it was good enough to serve to my friends. Daddy-O was happy to volunteer. And then volunteer again to lick the spoon.

HOT FUDGE SAUCE

6 tablespoons (3/4 stick) unsalted butter
½ cup water
3 oz. unsweetened chocolate
1 cup sugar
2 tablespoon light corn syrup (such as Karo)

Melt butter with water in a small saucepan over medium heat; then bring to a boil, stirring constantly.  Add chocolate and let melt, stirring occasionally.  (Do not be concerned if mixture lumps at this point.)
Add sugar and corn syrup and let boil gently for 5 minutes.  
Serve warm. Or hot. You can decide if you like hot sauce that melts the cold ice cream a little. Or, warm sauce that gets chewy on the ice cream. I like it all.


If you want a Christmas dessert, spoon the sauce over vanilla ice cream, then sprinkle with crushed peppermint candies, and tuck a sprig of mint into the side. Sometimes I add a tiny red and white striped candy cane instead of the crushed candy. And if you're really want it to be festive, look for the Peppermint Stick ice cream at Publix. It's a seasonal flavor and one of my favorite Christmas treats. I bought two cartons as soon as I saw it around Thanksgiving. 

My always willing taste tester.

There are busy days ahead. Blog posts for the next few weeks might be sparse. So just in case we don't meet here on the blog (you are likely as busy as I am) until after Christmas, let me take a minute now to send you my holiday wishes. I wish that...
                         that you enjoy the season,
                         that you get most of the things on your list checked off
                         that you will not worry about what doesn't get done, 
                         that you take time to look at the Christmas stars one night,
                         that you can spend time with people you care about,
             and during this holiday season that can be both joyful and difficult, 
                                                 my wish is 
                         that you will remember to be kind to yourself.


Thursday, December 12, 2019

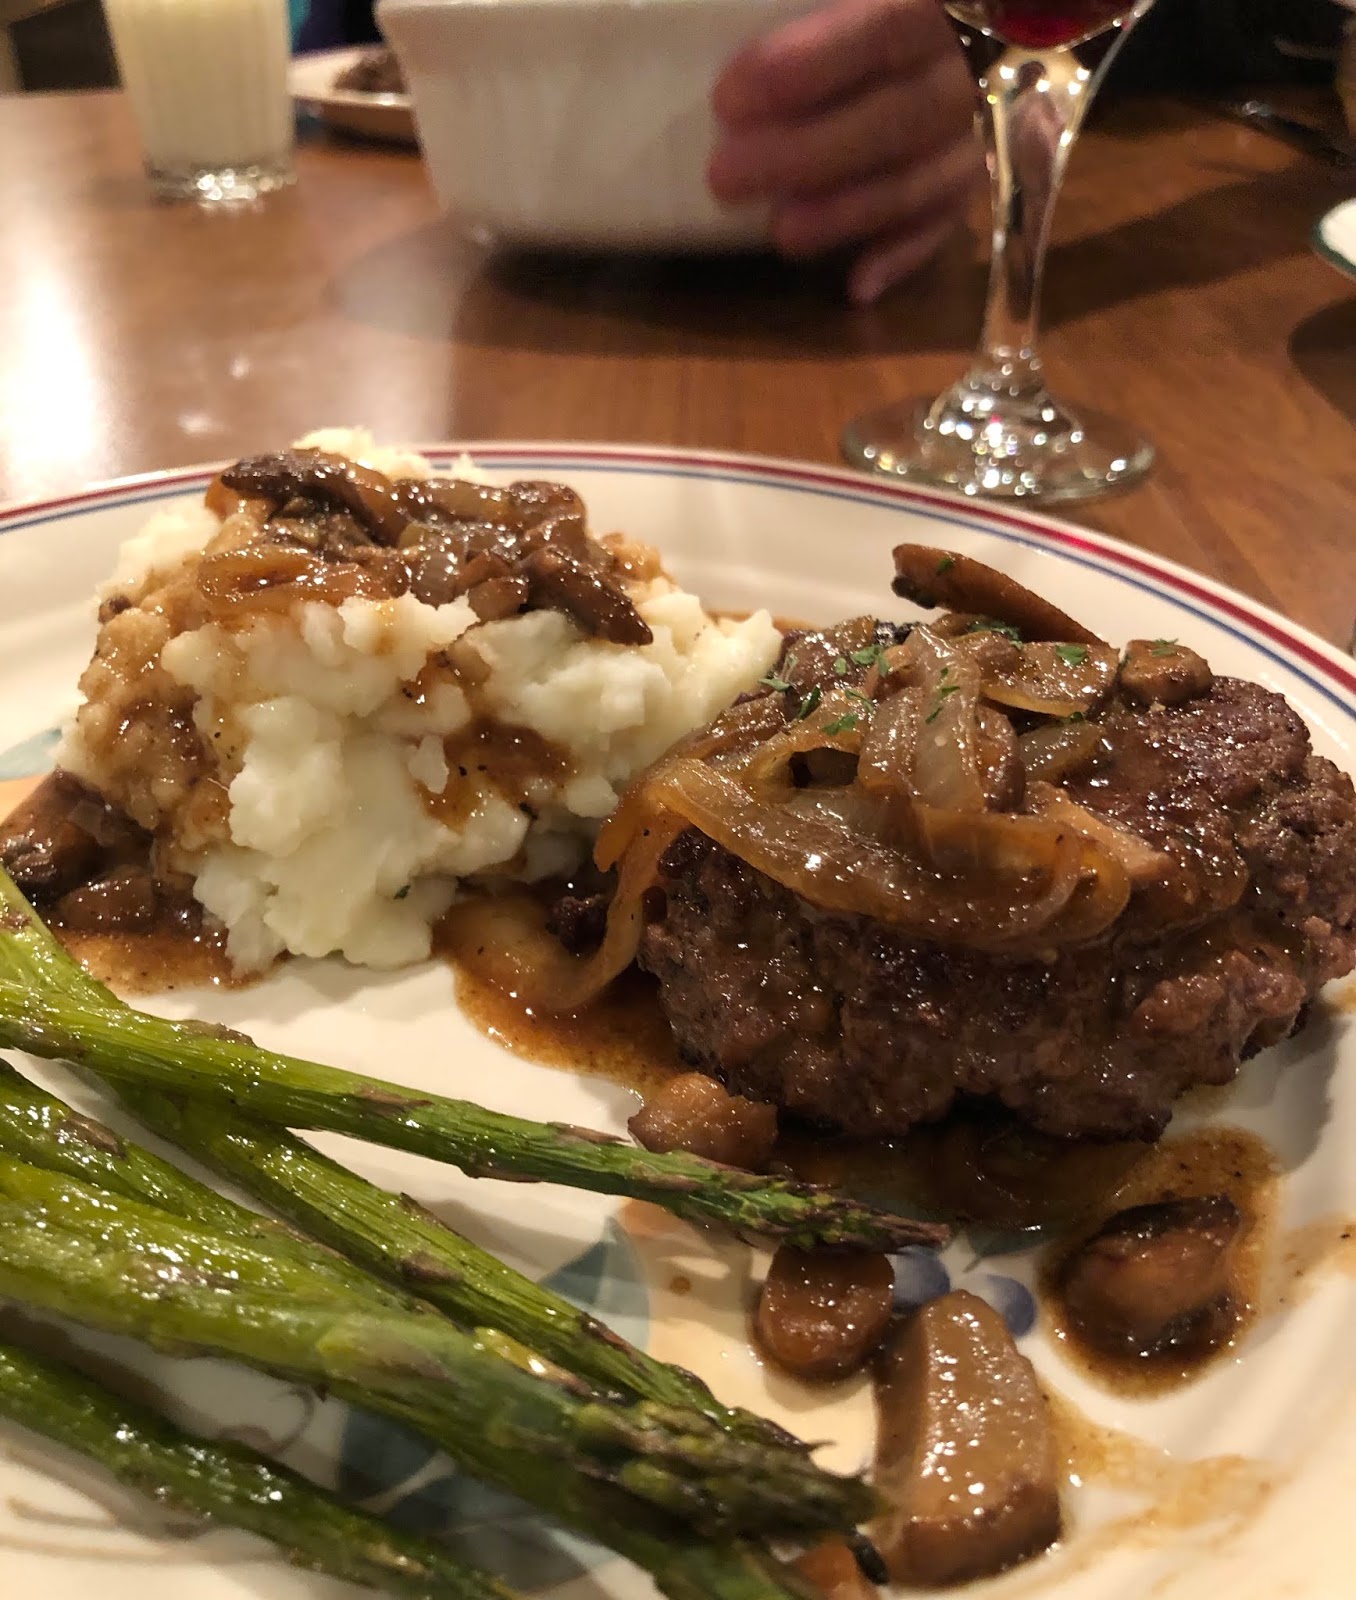
Hamburger Steak with Onion & Mushroom Gravy

Hamburger Steak with Onion & Mushroom Gravy

I had planned to wait and publish this blog post in a week or so when I know I won't have time to write. But the recipe is too good to keep under wraps. So here you go. Enjoy it now!

You would have to have known Mommy as a newlywed to fully appreciate this meal. When she married, she was accomplished in so many things. But cooking was not one of them. She made a lot of cheese quesadillas, Kraft macaroni & cheese and hot dogs in those days. But 14 years later, after many phone calls to mom, watching FoodTV, reading food blogs and simply having to put meals on the table day after day for years, she is an excellent cook, as comfortable in the kitchen as she is singing before an audience.

I had heard about this recipe for quite some time and was happy when she offered to make it for our dinner while everyone was here over Thanksgiving week. Her daughters all love this. J-Daddy loves it. And now we see why. The seasoning is perfect—even with our tweaks.


This is a long list of ingredients. But it's not a difficult recipe. When I make something like this, I usually set out all the ingredients and measure all the spices before I start cooking. Slice your onion and mushrooms. Then it's just a matter of adding them into the pan as you go. 

Don't let the long recipe scare you. It's well worth a little extra effort. It's one of the best dishes we've tasted in a while. Better than many restaurant meals we've had. Mommy spooned the gravy over her homemade mashed potatoes this time. She said she's also served it with noodles and rice, depending on what's in her pantry. It's all good.


HAMBURGER STEAK with ONION & MUSHROOM GRAVY

1-1/2 lb. ground beef (80/20 is best)
2 tablespoon olive oil
salt
pepper

For the gravy:
2 tablespoons butter
1 large yellow onion, thinly sliced
1/2 teaspoon salt
1/2 teaspoon black pepper
1/2 teaspoon onion powder
1/2 teaspoon garlic powder
1/2 teaspoon dried thyme
1/2 teaspoon Montreal steak seasoning
1-1/2 cups baby bella mushrooms, thinly sliced
1 teaspoon cornstarch
1 cup low-sodium beef broth
2 tablespoons low-sodium soy sauce
2 teaspoons yellow mustard
2 teaspoons apple cider vinegar
chopped fresh parsley (optional)

Handling lightly, form ground beef into 4 patties. Don't overwork the beef.

Heat a large skillet over medium-high heat and add olive oil. Salt and pepper burgers.
Cook burgers about 3 minutes or more, until one side is deep brown. Turn burgers over and cook until desired doneness. Remove from pan and set aside.

Reduce heat to medium. In the same skillet you cooked the burgers in, melt the butter. Add onions about 4 minutes. Stir occasionally, scraping up the browned bits in bottom of pan. Sprinkle with salt, pepper, onion powder, garlic powder, thyme and cajun seasoning.

When onions are very tender, add mushrooms and stir to combine. Cook about 2 minutes more. Add cornstarch and stir to combine. Reduce heat to simmer and add beef broth, soy sauce, mustard and vinegar. Continue cooking, stirring until sauce thickens, 4 or 5 minutes more. 

Return burger patties to pan and spoon gravy over them. Top with parsley and serve


I normally buy extra-lean ground beef, but Mommy said much of the flavor comes from the beef drippings so she uses the 80/20 mix here. If you are feeding 5, just make the burgers a little smaller.


If you are into clean eating, doing Whole30, or need gluten free, check the original source of this recipe, Defined Dish. Mommy makes the original version, but I don't normally stock arrowroot powder, ghee or coconut aminos in my pantry. We reworked it to use ingredients that I had here. She said the taste was a little different with our substitutions but equally good. 


Monday, December 9, 2019

There's Still Time To Make These

Little Sister's teacher gift.

The Christmas crunch is fully upon us. We drove down last week to watch the little girls perform in their school variety show. So much fun to see them, dressed in poodle skirts, sing and dance with three friends to Rocking Around The Christmas Tree! They were so good that they were the opening act. Makes a grandmother proud.

Because Baby Girl told me she lost her little knitting tool, I took them new ones when we visited. Little Sister got one this time, too. She had never used one. But after the show and after dinner at their house, they were not going to let us leave until we knitted something. It was getting late and we still had a drive to Jessica's house ahead of us. But I gave them a super quick lesson. 

I'm an experienced grandmother who has been down this craft road before. I had a plan and came prepared. The Wonder Knitter only makes a knitted tube. (Knitters call that "I-cord.") I had the brilliant idea that they could make little wreaths for Christmas. I made a bag for each child that contained a skein of yarn already set up on the Wonder Knitter. When I handed them the bags, we were ready to go. I showed them how to make the stitches and in a very few minutes, Little Sister had made two green wreaths. I did the finishing since we were short on time. Before we left, Baby Girl had finished one, too, for her kindergarten teacher.

When you finish knitting (6 inches, more or less—we had several sizes of wreaths), you'll have a long yarn tail on each end. Tie them together, making several knots so it isn't going to come undone. Clip the ends and tie a red ribbon bow over the join. Voilà! A perfect teacher gift. The girls each took one to their homeroom teachers the next morning and other teachers asked, "Will you make me one, too?"

Wonder Knitter: How to start, how to knit, and how to finish 

This happy project took a not-so-happy turn just hours after we got back to the farm. I had a tearful FaceTime session with Little Sister, who tried to make another teacher gift by herself. When she took the knitting off the spool, something went wrong and she ended up unraveling her precious work. Baby Girl explained, "It just kept shrinking, Mimi!" We'd only had time for a 30-second explanation of how to end the knitting. And that wasn't enough.

I told them both that it takes time to learn anything new and that there are always some boo-boos along the way until you master a new skill. You start over and try again. And again. I will see them again next week and we can have a better lesson than the very quick session on the busy night of the variety show. But in the meantime, this video will help. It might explain it better than I did, anyway.


I found the Wonder Knitter at Hobby Lobby. They cost about $9. If you have a 40% off coupon, the cost is closer to $5.  Those coupons are available most weeks online or on their app. If you are shopping at Hobby Lobby, they also sell small skeins of yarn in many colors. I think they are priced around  $1.00. (I should have looked closer at the label before I threw them away.) Then I bought a spool of red grosgrain ribbon to finish the wreaths. I like grosgrain because both sides are the same. Makes it easier to tie the bows. (Grosgrain ribbon has a ribbed finish as opposed to satin ribbon that is shiny on one side and dull on the other.)

This is a terrific project for kids. Our two little ones are ages 5 and 9. The youngest needs a little help getting started and maybe ending it. But the knitting part is well within her ability. And I'll be honest—when I was showing them how to make the stitches, I didn't want to hand the knitting spool back to them. The process is very relaxing. I have only done the very simplest projects, but I saw on Google that you can make beaded jewelry, too. I am not ready for that yet.

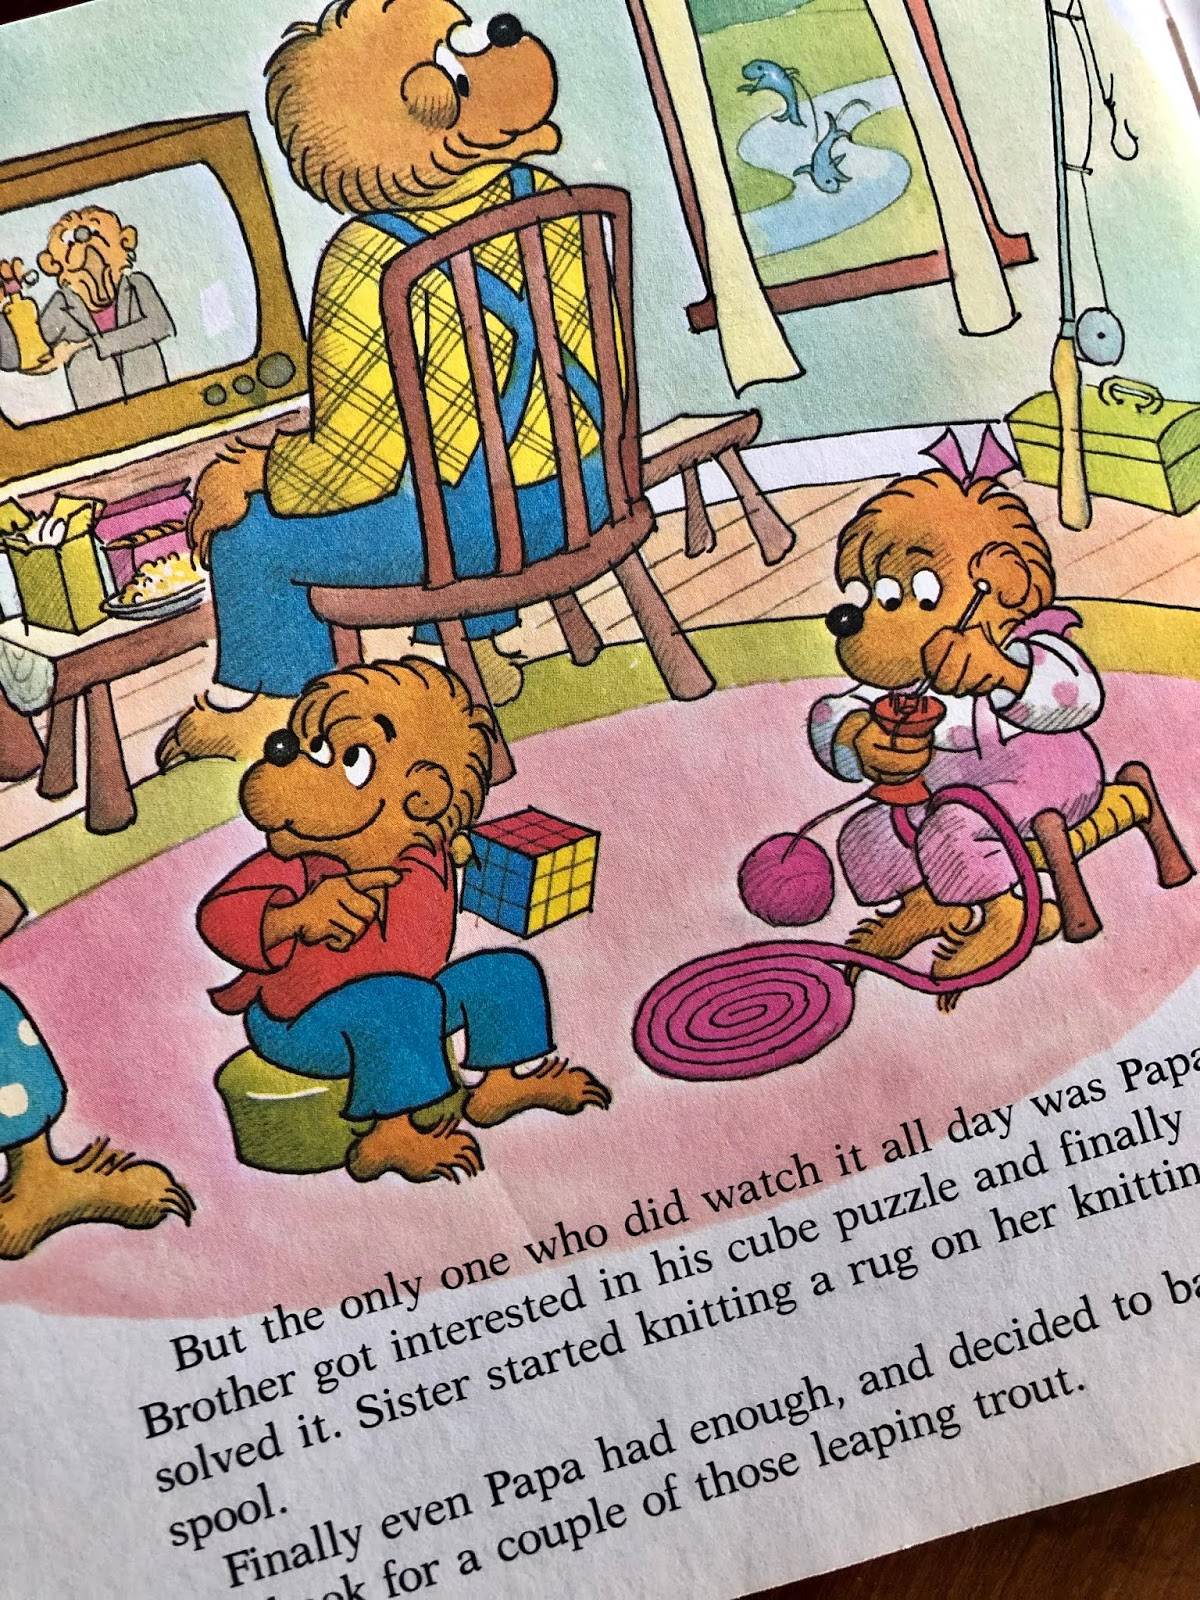
From the book, Too Much TV, by Stan & Jan Berenstain.

If you have never heard of spool knitting, know that it has been around for a very long time. I had one as a child and knitted a rug for my dollhouse like Sister Bear is doing here. (Wind the knitted tube in to a coil and stitch it together on the back.) I used a wooden spool with four nails in the top. (Link shows how to make one.) Not fancy but it worked. The Wonder Knitter, however, is much more user friendly. If you are an Amazon shopper the Wonder Knitter can be ordered from there, too.

You may think this is too much during this busy time. Or, you may be the opposite and need something to keep the kids occupied during the holidays. But it's a great craft when the time is right. Baby Girl used hers back in the spring and made bracelets and necklaces for herself and her dolls. Just a knitted tubes, long and short, tied together. She was thrilled with her "designs." It's a great way to help little ones become makers.


Tuesday, December 3, 2019

Get Sauced!

Homemade Cranberry Sauce

We had a wonderful week with grandchildren (and daughter & son-in-law) here for Thanksgiving. The little girls are a perfect age to visit. Young enough to love bedtime stories and hugs, but old enough to do their own baths and brush their own teeth. 

For the last two years we did not have our extended family Thanksgiving dinner, like we had done each year since I was a young child. Things can't stay the same forever. But this year a lovely young couple in our family invited everyone to their house for the big dinner. They wanted to revive the Thanksgiving tradition. They live in a historic home, built in the 1700s and moved to its current location in the 1800s. It was perfect for nearly 50 of us to gather. The weather cooperated so tables were also set up on the large porches. 


They knew about how many people to expect. But the huge number of dishes we all brought caught them by surprise. There were casserole dishes, bowls and platters on every available surface. The desserts had to be moved to another room. We've never exactly had a food plan. The hosts provide the turkey, dressing and gravy. Some of us make the same things each year (I always make macaroni & cheese and bake bread and rolls) so the essentials are covered, and our more adventurous cooks bring something different every year. And it always works out.


One of the dishes that Mommy always makes for Thanksgiving is cranberry sauce. Some people love the canned cranberry sauce—although there can be great disagreements about jellied vs whole berry. But our favorite is her homemade cranberry sauce. Here is her recipe. It's quick and easy and delicious.

CRANBERRY SAUCE

1 lb. fresh cranberries, washed
2 cups sugar
1/3 cup water
1 cinnamon stick
1/2 teaspoon ground allspice
1/4 teaspoon ground nutmeg
1 orange, zested and juiced

Combine berries, sugar and water in a medium saucepan and stir together. Bring mixture to a boil over medium heat. Reduce to a simmer and stir in cinnamon stick and ground spices. Simmer for another 5 to 7 minutes. Some of the berries will burst. Some will remain whole. Add orange juice and zest and stir. Cool before serving.


I read last week that someone spooned leftover cranberry sauce over vanilla ice cream. I might try that with the very last of the sauce that fortunately was left at our house. It would have to be good!

As fabulous as the food was, the very best part was all of us being together again. It's this day that keeps us connected as a family. Fingers crossed that our young hosts were not too overwhelmed with all of this. Because we'd love to be invited again next year.


Tuesday, November 26, 2019

Give Thanks In All Things

Honey Mustard Sauce

I want to share a quick recipe and then I'm walking away from the computer for the rest of the week. Our house is full of (grown) children and grandchildren home for the holiday. Busy days around here!

Jessica was the first to get here. (She is already back at her home—it's a revolving door here this week.) I made a simple dinner that night. Baked chicken, sweet potatoes and green beans. The baked chicken looked so plain that I thought surely I could dress it up a little bit. I did a quick search for honey mustard and found a simple recipe and then tweaked it to use the ingredients I had on hand. 

Oh my goodness. This is seriously good stuff! It was delicious drizzled over the chicken. We think it would be fantastic as a salad dressing (I'm thinking grilled chicken salad.) Make our favorite homemade chicken fingers and use the sauce for dipping. And during Thanksgiving week, you might need it to spread on those sandwiches made from leftover turkey.

HONEY MUSTARD SAUCE

1/4 cup mayonnaise
1/4 cup dijon mustard
1/4 cup honey
1 tablespoon white wine vinegar
1/8 teaspoon cayenne pepper (or to taste)

Whisk all ingredients together. Will keep for a couple of weeks stored in the refrigerator...if it lasts that long.


I have so much to be thankful for. Ages ago, I kept a gratitude journal—"write down five things each day that you are grateful for." Some days it was easy to list five. Other days I had a hard time finding five. Then I figured out that my world was made up of mostly small things. That's where I found the treasure. 

I learned I had to be aware. I had to actively look for the "grateful" things. A tree in flaming fall colors. The smell of bacon frying. The sound of a rooster crowing in the early morning. Looking at this old journal I see that "clean sheets" are listed more than one time. I began to look forward to finding my five things each day and writing them down. I loved those few minutes at the end of the day when I got still and quiet and picked up the journal. After a while I stopped writing the list, but the habit of seeking out and taking note of the little things has remained.

This morning I pulled out that old journal and have read list after list. Yes. So much to be grateful for. Maybe this is the season to start the written journal again. 


Saturday, November 23, 2019

Jingle Jangle Ginger


We had afternoon guests this week. They were just here for a couple of hours mid-afternoon. There was no need for a meal. But being born and raised in the South, it was unthinkable for me not to have something to offer when they got here. Southern hospitality and all that. So cookies and coffee it was. And that was perfect. And enough.


These ginger cookies have been favorites in our family for years. It isn't a true Christmas recipe, but to me it feels like a winter recipe. Although I would be delighted to eat them on the Fourth of July!


These cookies are made with shortening. That means they are sturdy cookies that can be packed and shipped if you need to send them. I mailed them to Italy when Jessica was doing her study abroad. Can you imagine how much they had bounced around during that international trip? And they were all in one piece when she received them. (I did put a layer of crumpled wax paper in the bottom of the container and of the top of the cookies to cushion them.)


Here are my ginger cookie tips:
  • You can mix the dry ingredients together a day or two before you make the dough. Then it doesn't feel like such a big undertaking to make these. Pulling out all the spices and measuring them takes several minutes.
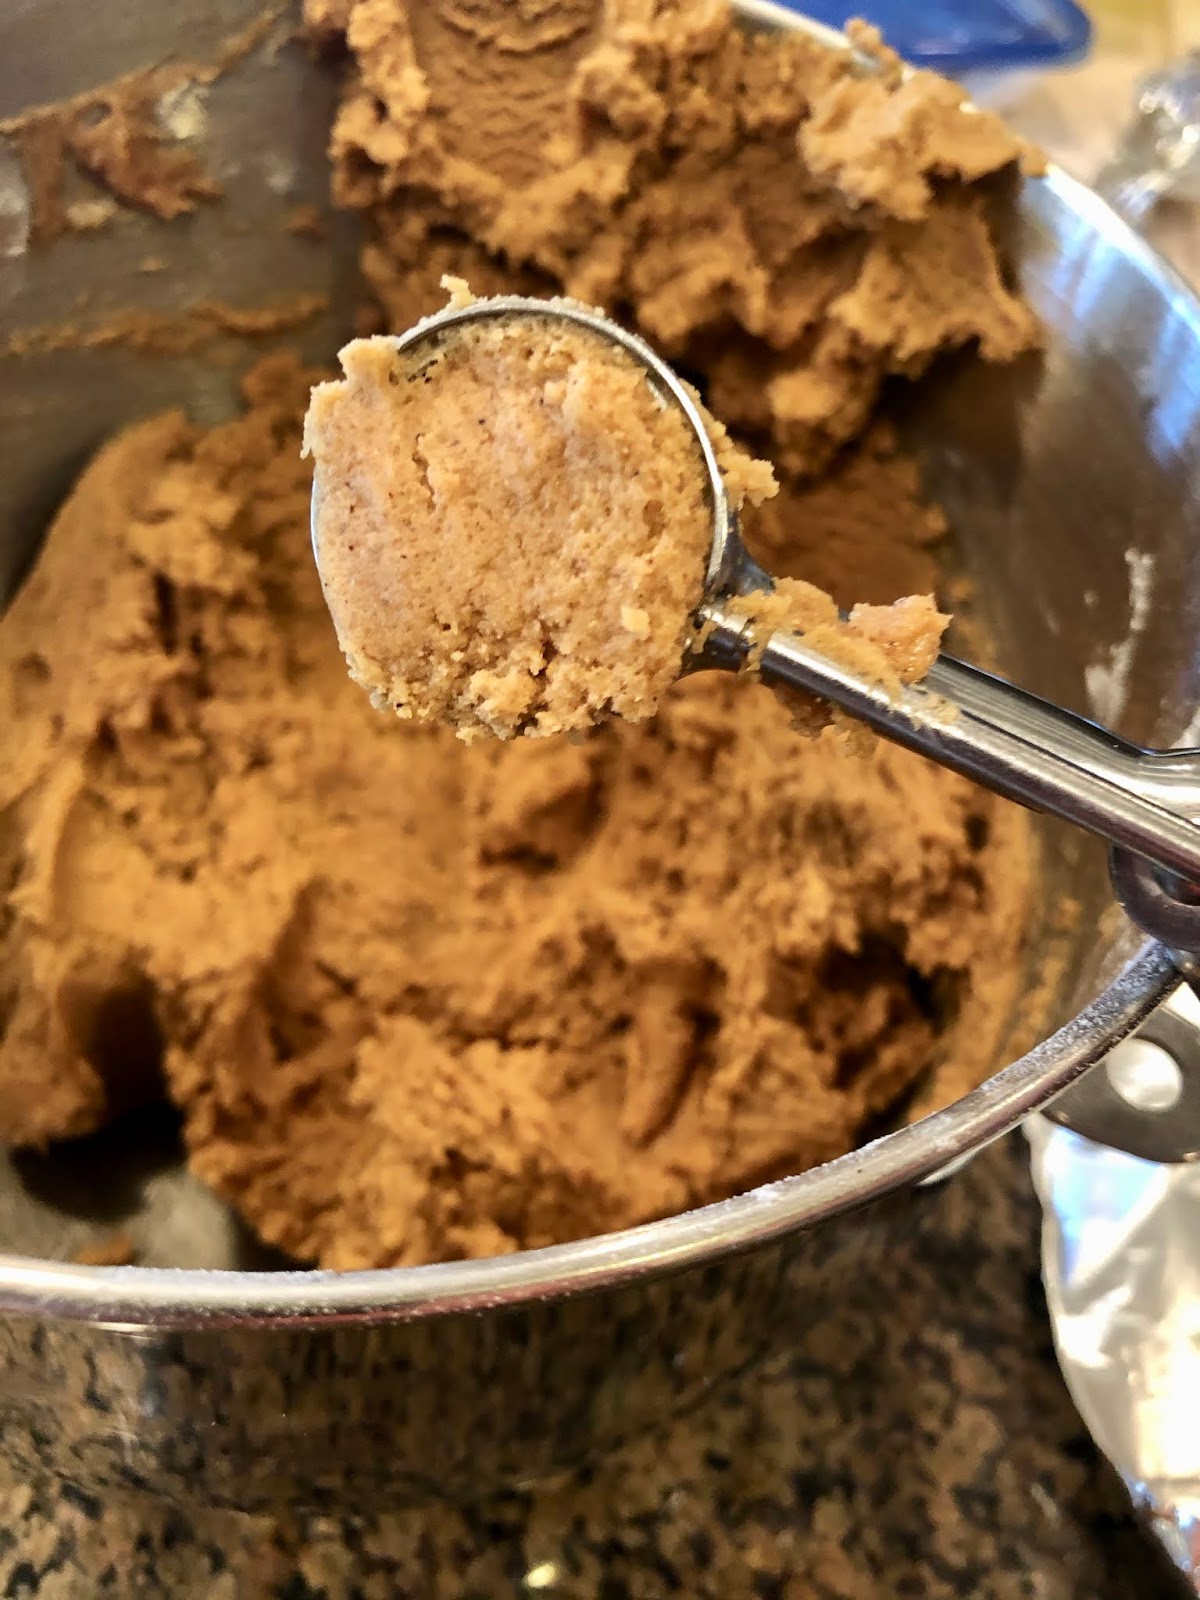
  • You don't need to refrigerate the dough before you bake them, but I have found that the dough is a little easier to scoop up after it sits for a few minutes. Just go wash the mixer bowl and spatula while it rests.
  • Use the pre-cut parchment sheets to line pans for easy clean-up. One sheet per pan will get you through the entire recipe. You don't need a new sheet of paper every time you put a pan in the oven.
  • Using a 1-inch cookie scoop makes beautiful cookies that are of uniform size. Sometimes I will use my finger to "pack" the dough into the scoop to make sure it's full. The scoop really speeds things up.

The recipe makes 120 cookies. That's 10 dozen! Plenty of cookies to enjoy. Plenty of cookies to share. Perfect with a cup of coffee or a glass of milk.


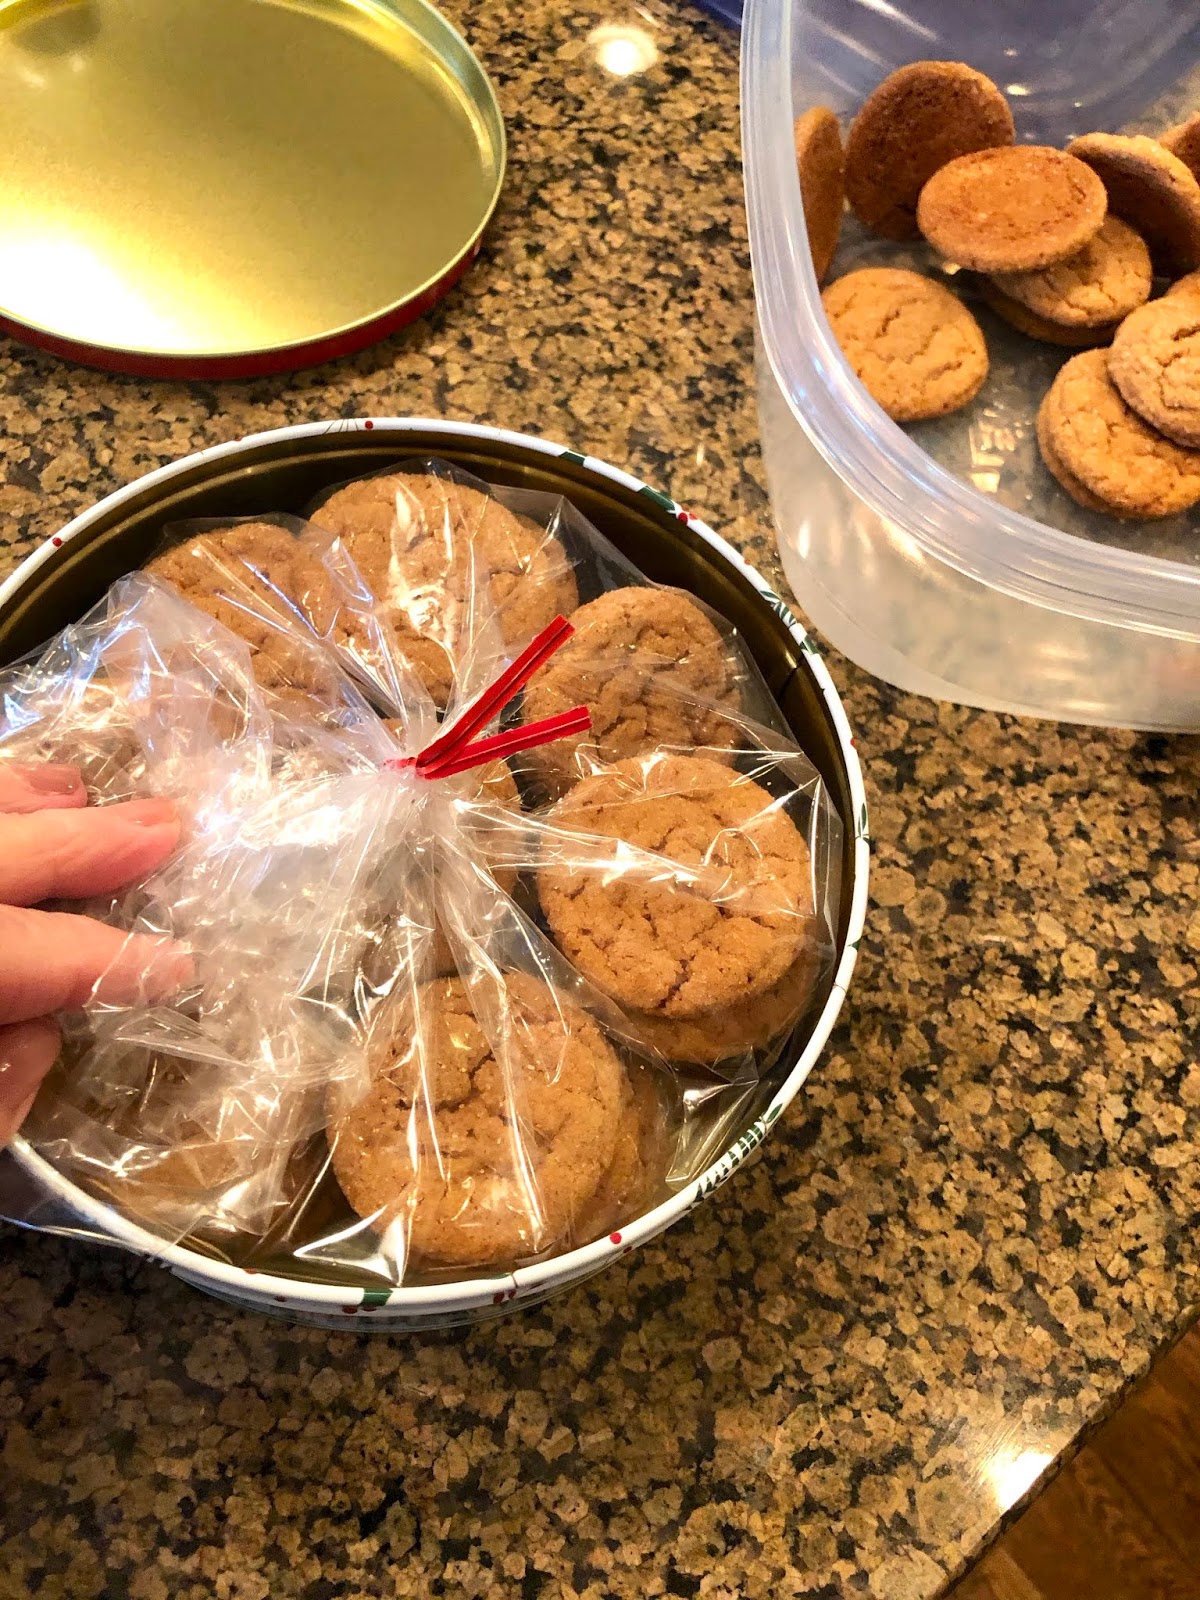
I am convinced (no actual proof) that these cookies keep better and longer when stored in a metal tin. Years ago seems like we just had tins around, left from bought treats. Now I have to seek them out and this is the time of year to buy them. Dollar stores have them right now on the Christmas aisle.  I did see some at the store that were metal with a plastic "window" in the lid. I'm sticking to my all-metal theory and I skipped those.


One day I'd like to find some that are not seasonal. But at the moment, these will have to do. I gave some away last week—BEFORE Thanksgiving—and no one seemed to mind that the tin said Merry Christmas.

GINGER COOKIES

4-1/2 cups all-purpose flour
4 teaspoon ground ginger
2 teaspoons baking soda
1-1/2 teaspoons ground cinnamon
1 teaspoon ground cloves
1/4 teaspoon salt
1-1/2 cups shortening
2 cups sugar
2 eggs
1/2 cup molasses (I used Grandma's Molasses Original)
3/4 cups sugar (for rolling)

In a medium bowl, stir together flour, ginger, baking soda, cinnamon, cloves and salt. Set aside.

In a large mixing bowl, beat shortening with an electric mixer on LOW speed for 30 seconds. Add the 2 cups sugar. Beat until combined, scraping sides of bowl occasionally.

Beat in eggs and molasses until combined. Beat in as much of the flour mixture as you can with the mixer. (My KitchenAid handled all the flour.) Stir in any remaining flour mixture by hand.

Shape dough into 1-inch balls and roll in the 3/4 cp sugar. (A 1-inch cookie scoop makes this easy.) Place 1-1/2 inches apart on an ungreased baking sheet. (In my pans that is 5 rows of cookies, 4 to a row.)

Bake at 350 degrees for 8 to 9 minutes, or until bottoms are lightly browned and tops are puffed. DO NOT OVERBAKE. (Try the first pan at 8 minutes and then decide if 9 minutes is better.)

Cook on cookie sheet for 1 minute. Transfer to wire rack and let cool. (I just put them on paper towels on the counter to cool.) 

Makes about 120 cookies


Monday, November 18, 2019

Handmade = Slow Made


Pattern: Little Tern, by Tin Can Knits
Yarn: Fiberspates Vivacious DK, colorway Crocus
Needles: size 7

It's done! Ready to wrap up this new baby who is loved before she is born. My knitting friends have oohed and ahhed and properly admired this blanket. We knitters love to see what the other knitters have made. But there are others who would look at this and wonder "Why on earth would you spend the time to do this? You know you could buy one." Yes, people really say things like this. And yes, there are beautiful blankets out there to buy. No argument there. But I wanted this baby to have a blanket made by her grandmother, just like I've made them for the other granddaughters.


As I worked and worked on this blanket for the new baby due soon after Christmas, I thought about why we make things by hand. There are certainly beautiful baby blankets for sale. But a blanket made by hand is more than a blanket. It's an expression of love. Love that you can hold in your hands. And this blanket is likely to be around much longer than I will. Many years from now maybe someone will wrap this blanket around a baby from another generation and maybe...just maybe...remember the maker.

There is something in the human spirit that calls us to make things. In this age of digital this and virtual that, "making" can seem an out-of-date concept. Years from now our every thought and every activity may be in our permanent digital footprint (scary thought) but none of those can be wrapped around a baby.


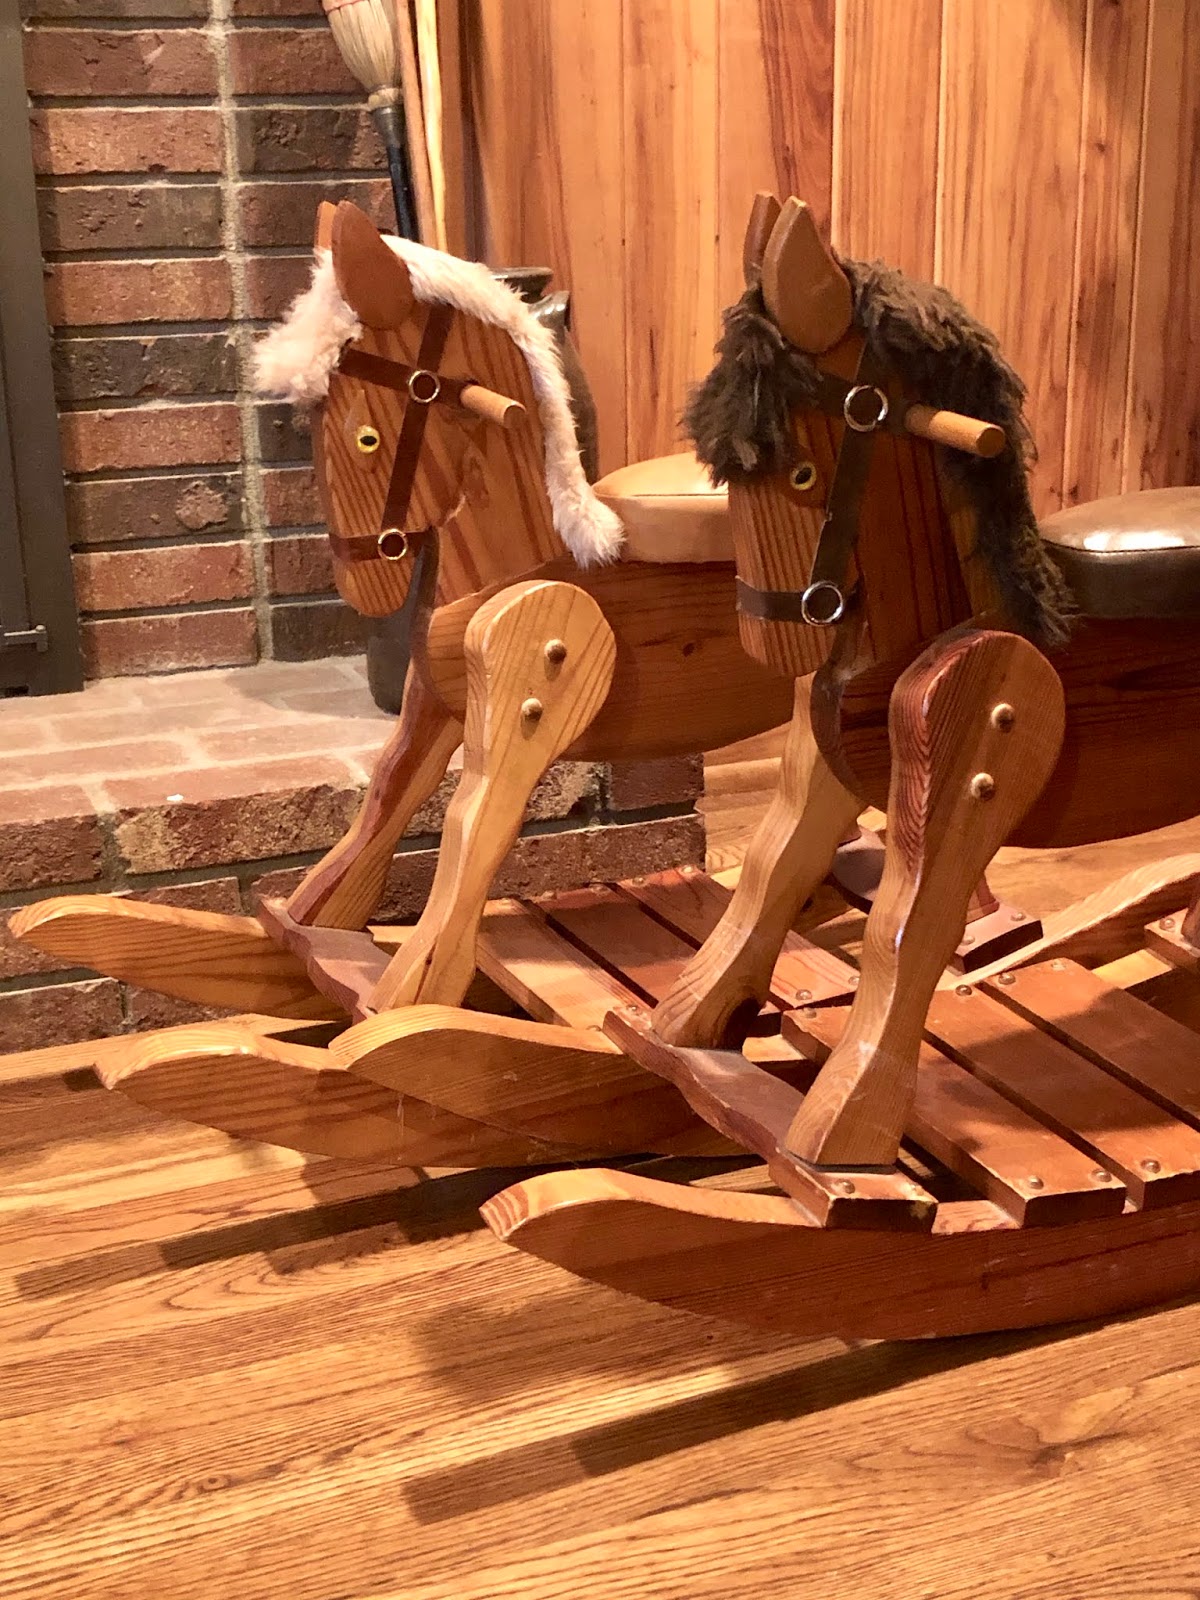
My dad was also a maker. He loved woodworking and in his retirement years, he started making toys. We treasure these toys he made for our daughters. We have two daughters—one blonde, one brunette. He made them each a rocking horse—one blonde, one brunette. Besides having building skills, he also had a sense of humor. Now it's his great-grandchildren who ride the range on these horses. These horses have rocked a million miles. 


Poppy (that was his grandfather name) died many years before they were born, but all three granddaughters know him through his toys. Handmade connections. Little bits of my dad's work are scattered around our house. Pulled down to play with when our grandchildren come to visit. There are hundreds of wooden cars out there somewhere because he made them by the dozens for us to use as birthday gifts for all the kid parties my girls attended when they were little. 

But if you are a maker, I think you would do this even if there weren't specific people to receive the work. As a friend of mine said, "Makers gotta make." Makers love to create. To do things with their hands. It's how we are wired.


To borrow a quote from this new book, Making a Life by Melanie Falick:
We make in order to slow down. To connect with others. To express ideas and emotions, feel competent, create something tangible and long-lasting.

So if you are not a maker, how do you do slow? "Making" is a built-in slow for many of us. Others embrace "slow food" or "slow living." Here's your challenge for this week...the week before Thanksgiving week when things can get a little crazy if you are cooking or hosting or traveling. Do something slow this week. It doesn't have to be a handcraft. And it certainly doesn't have to be everything we do. Keep it simple. Aim for a slow moment now and then. You might find you like it.

Turn off the TV. Lay down the phone. Listen to the quiet. Handwrite a note or card and mail it. Sip a cup of tea. Look at the stars. Pull out a jigsaw puzzle. Spend a lot of time in the car? Turn off the radio. Take two minutes and sit out on the front steps and breathe. Find your slow minutes. It's worth it.